Git and GitHub may seem like tools for developers, but did you know that you can use Git and GitHub to safely store and validate your precious PowerShell scripts? It’s true. I’ll walk you through the entire process from start to finish. And while we’re at it, we’ll see how long I last before I make a Git pun. Let’s git started.
What is Git?
Git is an open-source, distributed version control system (VCS) that tracks file changes, maintains version history, and facilitates file merger. Git was developed by Linus Torvalds, the creator of the Linux operating system, and quickly became the world’s most popular version control system because of its focus on speed, simplicity, and scalability.
What is GitHub?
GitHub is a cloud-based development platform that’s built around Git’s version control system. Acquired by Microsoft in 2018, GitHub provides cloud-hosted project repositories, extensive collaboration and documentation functionality, and an intuitive user interface for maximizing Git’s feature set. Okay, intuitive might be a bit of a stretch.
What’s the difference between Git and GitHub?
The main difference between Git and GitHub is that Git is an open-source version control system, while GitHub is a cloud service that hosts Git repositories and offers many other project management and collaboration features. While Git is free to all users, GitHub is a for-profit service that offers both free and paid plans.
Installing Git
When getting started with Git, the first thing you need to do is install it. Wild concept, I know. To spice it up a bit, here are a few different ways to install Git onto your computer.
For this guide, we’ll use Visual Studio Code (VS Code) to interact with Git. Check out our VS Code guide if you don’t already have it installed and configured for PowerShell.
How to install Git using the installer
To install Git, download the installer file from Git’s official download page. Git offers installers for macOS, Linux/Unix, and Windows. Here’s what the process looks like using the 64-bit Windows installer.
Download and run the Git installer.
If you get a User Account Control prompt, click Yes.
Run through the installation wizard. There are a lot of options here, but if you’re new to Git, most of the default options should work for your setup. The one option I would change is to set the default editor to Visual Studio Code, which is what we’ll use for this guide.
Once you work through all the available options, click Install.
Once the installation finishes, click Finish.
If I can be candid for a moment, I’ve been in the IT industry for a long time. That being said, the generic Git installer is probably the longest install wizard I’ve ever seen. I’m pretty sure it has more options than a Baskin-Robbins. If you just want to install Git as simply as possible, PDQ Connect and PDQ Deploy are much better options.
How to install Git with PDQ
Installing Git with PDQ Connect
If you’re trying to install Git on a remote device, PDQ Connect is the way to go. Here’s how to install Git for Windows with PDQ Connect.
In PDQ Connect, click Packages.
Input git into the packages search field.
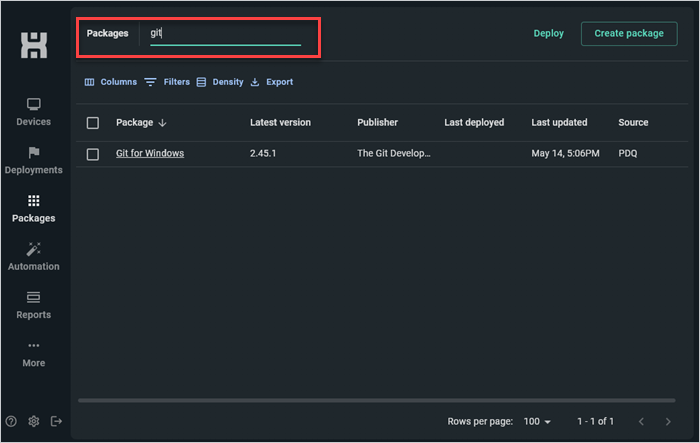
Select Git for Windows, then click Deploy.
Add the devices you want to install Git on, then click Deploy.

Installing Git with PDQ Deploy
The install process using PDQ Deploy is very similar, even if the UIs are quite different. Here’s how to install Git for Windows using PDQ Deploy.
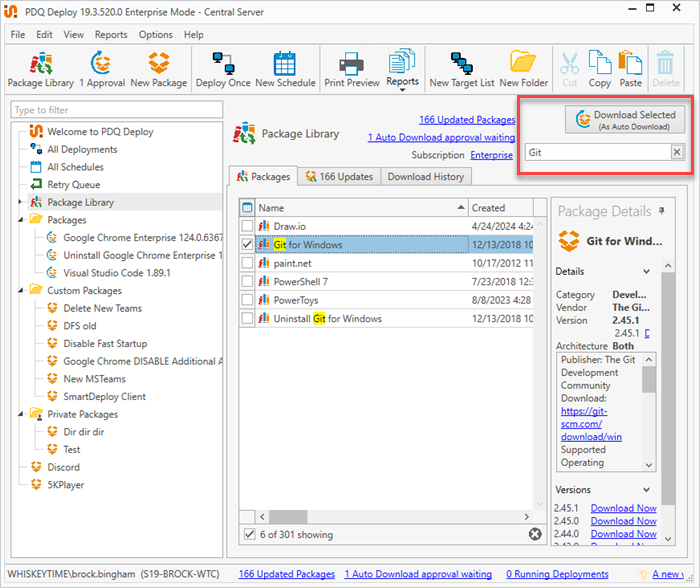
In PDQ Deploy, click Package Library.
In the search field, enter Git.
Select Git for Windows, then click Download Selected (As Auto Download).
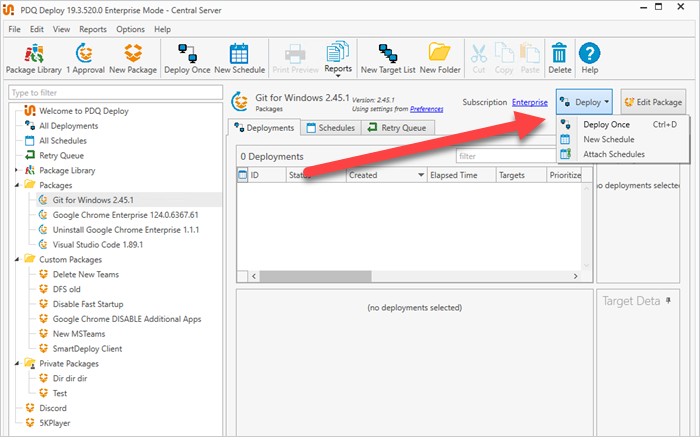
Once the package downloads to your console, select it, then click Deploy > Deploy Once.
Add the devices you want to install Git on, then click Deploy Now.


That’s all there is to it. You can install Git with PDQ Connect or PDQ Deploy faster than I can fall asleep during a meeting, which is impressive, to say the least.
If you don’t already have PDQ Connect or PDQ Deploy, you can trial either one (or both 😉) free for 14 days.
With Git and VS Code installed, we’re ready to set up our GitHub account.
Setting up a GitHub account and repository
It’s time to configure our GitHub account and repository. Since GitHub is by far the world’s most popular online Git repository hosting service, we’re going to use it for this guide. However, there are other alternatives available, such as GitLab. In fact, a hosting service isn’t required at all to utilize Git, but they offer some nice features we’ll take advantage of.
Here’s how to set up a GitHub account and repository.
Head over to the GitHub sign-up page and create an account. It’s a pretty standard process that requires an email address, password, and username, but I do enjoy the console aesthetic.
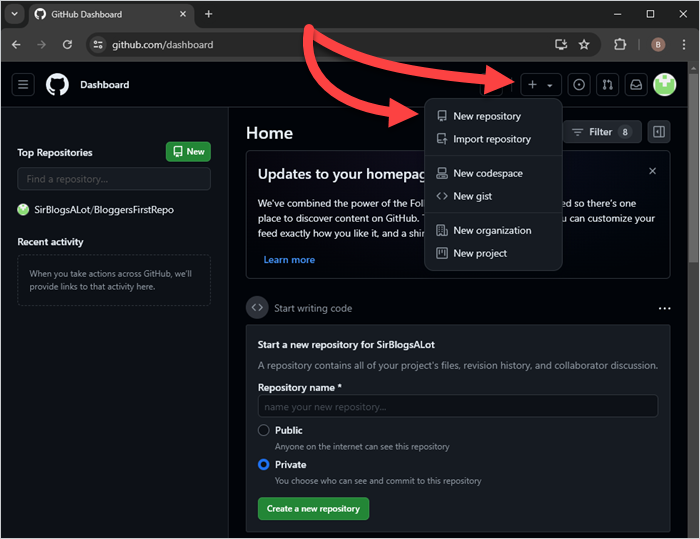
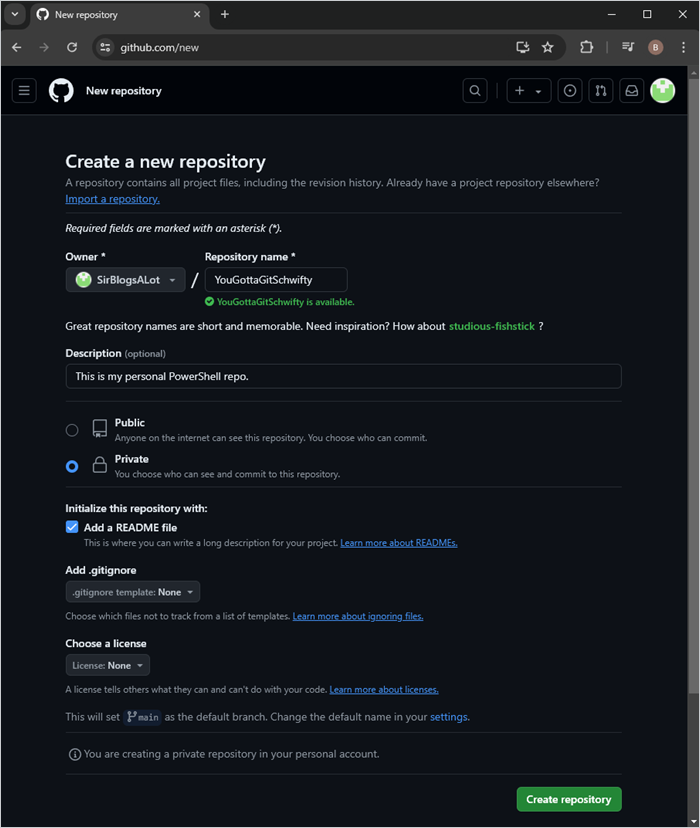
Once you log into your GitHub account, click the plus button, then click New repository.
There are several options available on the new repository page. While the only necessary item is to create a repository name, I recommend adding a description, setting the repository to private (unless you specifically want it public), and adding a README file.
When you finish, click Create repository.


Repository created? Check. Patience still intact? Double-check! Now it’s time to connect our GitHub repo to VS Code!
Connecting Visual Studio Code to your GitHub repository
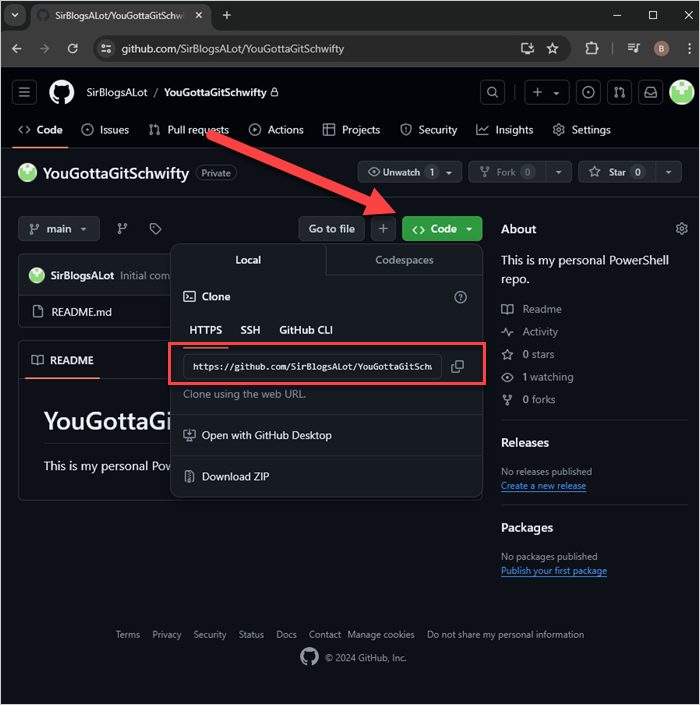
To connect your GitHub repository to VS Code, copy the repository URL by clicking on the green <>Code button and copying the URL.
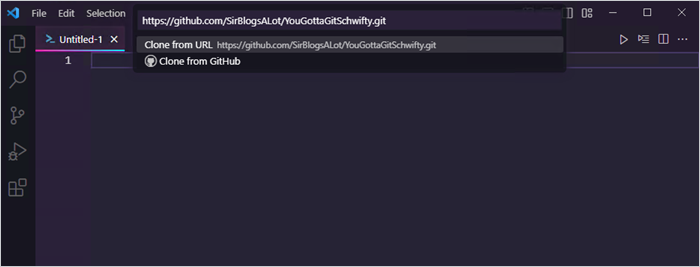
Next, create a standard folder on your computer to save your repository. I have one located on the root of the C: drive called Git for this purpose. Then, open VS Code and hit F1 or Ctrl + Shift + P to open the command palette. Enter git clone into the command palette, then hit Enter on your keyboard. Paste in the repository URL, then hit Enter again.
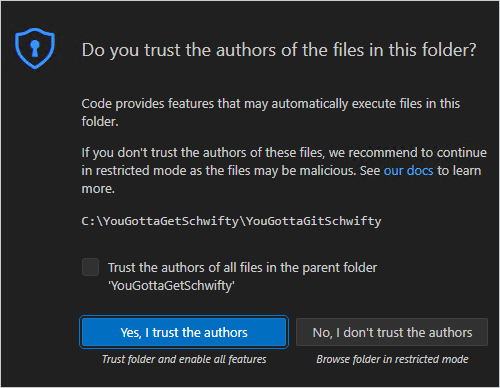
A File Explorer window should open. Navigate to the Git folder you created and select it. You may be prompted to authenticate using your GitHub credentials. Once you’ve authenticated, you’ll be prompted to open the cloned repository. Click Open. If you receive a prompt to trust the authors or not, you can either choose Yes, I trust the authors or No, I don’t trust the authors. If this is your own repository and it’s private, you can trust it. Otherwise, you may want to choose not to trust the authors, which will allow you to browse folders in a restricted mode.
Adding files to your GitHub repository with VS Code
Now that we’ve cloned our GitHub repo in Visual Studio Code, it’s time to upload or commit our scripts to GitHub. To get a head start with our existing scripts, we can simply copy them into the local repository folder using File Explorer. VS Code should reflect the files added to the repository when you’re done.

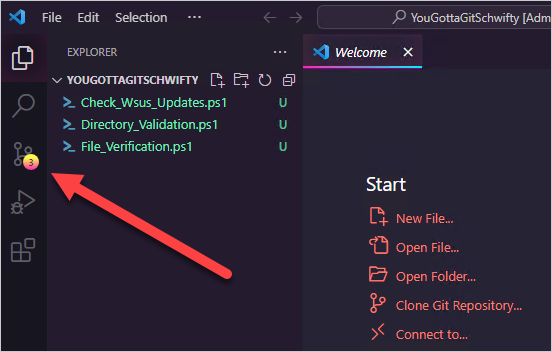
Time to commit our files to GitHub. Click on the Source Control tab in VS Code.
Hover over the Changes header, then click the plus button to stage all the files.
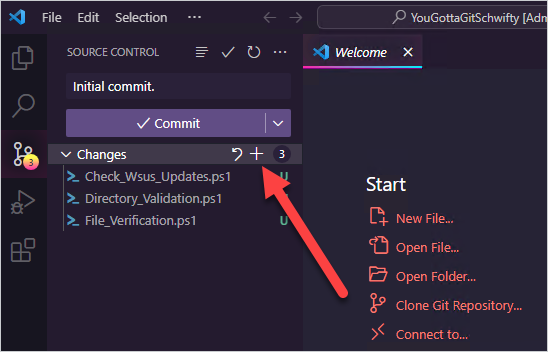
Lastly, add a comment to the message box about what you’re committing, then click Commit. Since this is our first commit, we can just add a comment that this is our initial or first commit.
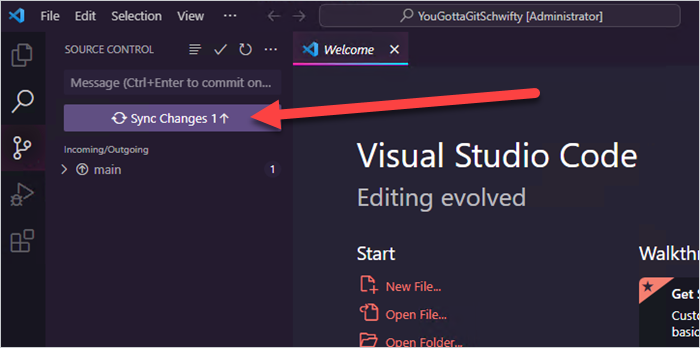
After committing the changes, click Sync Changes to upload them to your GitHub repository. If you receive a prompt saying this action will pull and push commits from and to “origin/main,” click OK.
If you get a notification that you need to configure your username and email in Git, use the following commands in the terminal.
git config --global user.name "<username>"
git config --global user.email "<email>"
Make sure to replace <username> and <email> with your username and email address.
Verifying results in GitHub
Now that we’ve committed our files, we can return to GitHub to ensure the changes are reflected there. Refresh the webpage and verify that the files were committed successfully.

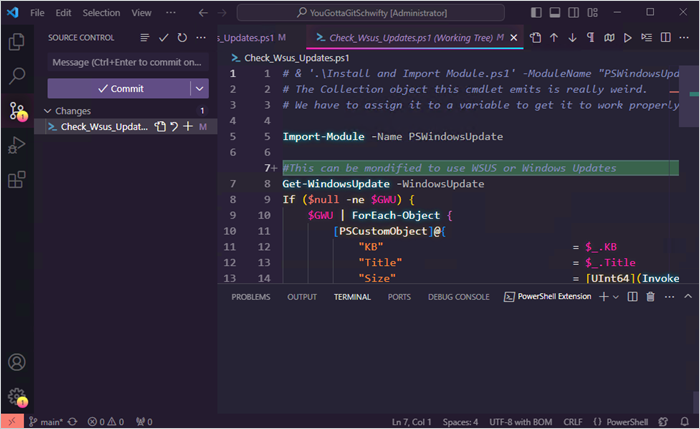
The three files I manually copied into my local repository using File Explorer have been successfully added to my GitHub repository. As you make changes to these files, the Source Control tab in VS Code will notify you that you have made changes that can be staged and committed. You can even click on the file to view the changes that have been made.
Git while the Gittin’s good
I don’t know what’s more impressive, the fact that you made it to the end of this substantial article or that I worked in a Git pun almost immediately after setting the challenge. Regardless, hopefully this article helps you get started on your journey with Git and GitHub.
Now that you’re a bit more familiar with Git and GitHub, put that knowledge to use by cloning the PDQ PowerShell Scanner repo. It’s the quickest way to drastically expand your PowerShell Scanner library in PDQ Inventory.