Is your busy schedule constantly bombarded with mundane, repetitive tasks that occupy a significant amount of your time? If you’re anything like me, you’d rather focus on worthwhile projects that promote growth and learning — or video games. Thankfully, Microsoft agrees and threw a bunch of money at the problem. Its solution? Power Automate. Let’s look at this powerful utility and see how we can leverage it to automate ourselves some more free time.
What is Power Automate?
Microsoft’s Power Automate is a tool designed to boost productivity by helping users automate repetitive workflows. With hundreds of connectors and thousands of templates, Power Automate can integrate with most, if not all, of your primary data sources and systems, including Office 365 and Azure. Power Automate simplifies automation with no to low code required, so users spend less time dealing with tedious tasks and more time on projects worthy of their talents.
What’s the difference between Power Automate and Power Automate Desktop?
Power Automate, formally known as Microsoft Flow, is Microsoft’s cloud automation platform. Here are some capabilities that set Power Automate apart from Power Automate Desktop.
Integrate with Microsoft and third-party online services using connectors and APIs
Share and collaborate on flows with coworkers
Utilize the AI Builder functionality
Access Power Automate via a dedicated web console
In 2020, Microsoft acquired Softomotive and its robotic process automation software, WinAutomation. Power Automate Desktop is the evolution of this acquisition. Some of the key features of Power Automate Desktop that set it apart from Power Automate include the following:
Local installation
Ability to record actions and integrate them into automation flows
Effective automation of local and legacy application processes
Browser automations
Microsoft didn’t clear up any confusion when it gave these systems almost identical names. While they serve similar purposes and can even integrate with one another (with the proper licensing), they function quite differently. The primary distinction is that Power Automate Desktop is designed to automate local desktop processes, while Power Automate is designed to automate web flows and connect cloud services. But Microsoft, if you’re reading this, do us a favor and append the word Cloud to Power Automate to make the distinction a little easier.
Is Power Automate free?
Power Automate Desktop is free. In 2021, Microsoft announced that Power Automate Desktop would be free for all Windows 10 and Windows 11 users. Interested users can download a copy of Power Automate Desktop from Microsoft.
Power Automate, the web-based application, is not free. However, it is included with an Office 365 subscription with limited functionality. To extend Power Automate’s functionality, you’ll need to sign up for a subscription plan starting at $15 a month per user. Higher-tier subscription plans unlock additional functionality. Keep in mind that access to premium connectors will also have you reaching for your credit card. You may want to contact a certified Microsoft licensing cryptologist to fully understand your Power Automate licensing options.
I should add that Power Automate Desktop is only free-ish. Power Automate Desktop also includes many premium features that users can take advantage of for an additional cost. You didn’t think it would be 100% free, right? If there’s one thing that Microsoft is good at, it’s making money.
Automating tasks with Power Automate and Power Automate Desktop
Now, it’s time to dive in and get our feet wet with some basic automations. We’ll look at examples from both Power Automate and Power Automate Desktop because their workflows are quite different from one another. Keep in mind that you may or may not have access to certain features we use in these examples. I’m using the standard free version of Power Automate Desktop and the Power Automate feature set included with an Office 365 license.
Automatically create a task in Asana when an email is flagged in Outlook 365
Project management tools, like Asana, can turn chaos into order. However, they can also create more work for you if you’re constantly creating, assigning, and managing tasks. Let’s automate some of these pain points away. In this example, we’ll create a flow that automatically creates a task in Asana anytime an email lands in our inbox with a specific subject line.
Log into your Power Automate account.
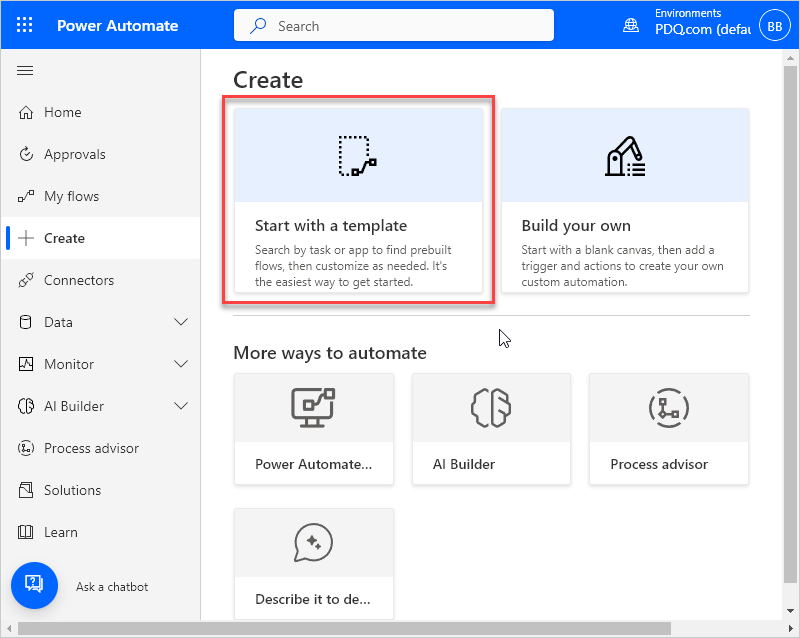
Since a template for this flow already exists, we’ll use it. Click on the Create button.
Click Start with a template.
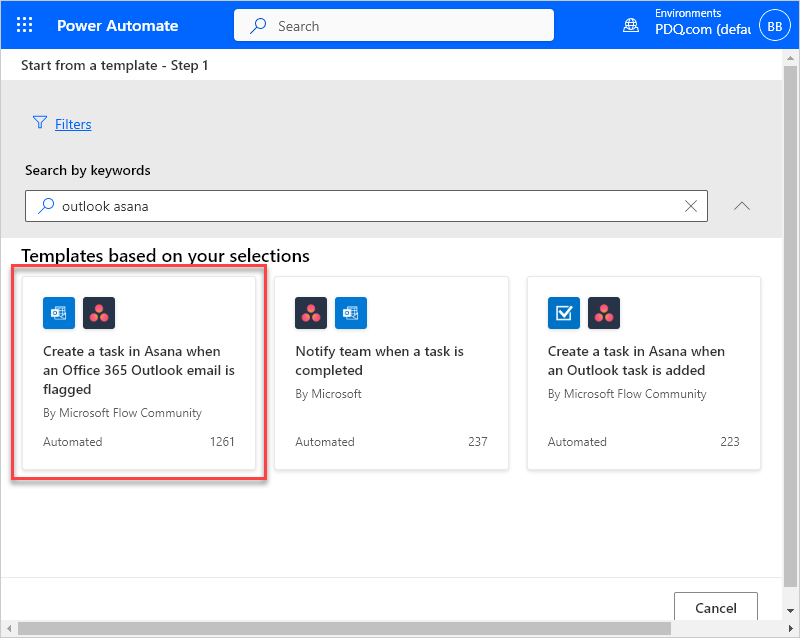
In the Search by keywords search box, enter outlook asana.
Click the Create a task in Asana when an Office 365 Outlook email is flagged button.
Connect your Asana and Office 365 Outlook accounts, then click next.
Select the mail folder where Power Automate should detect qualified emails to trigger the flow.
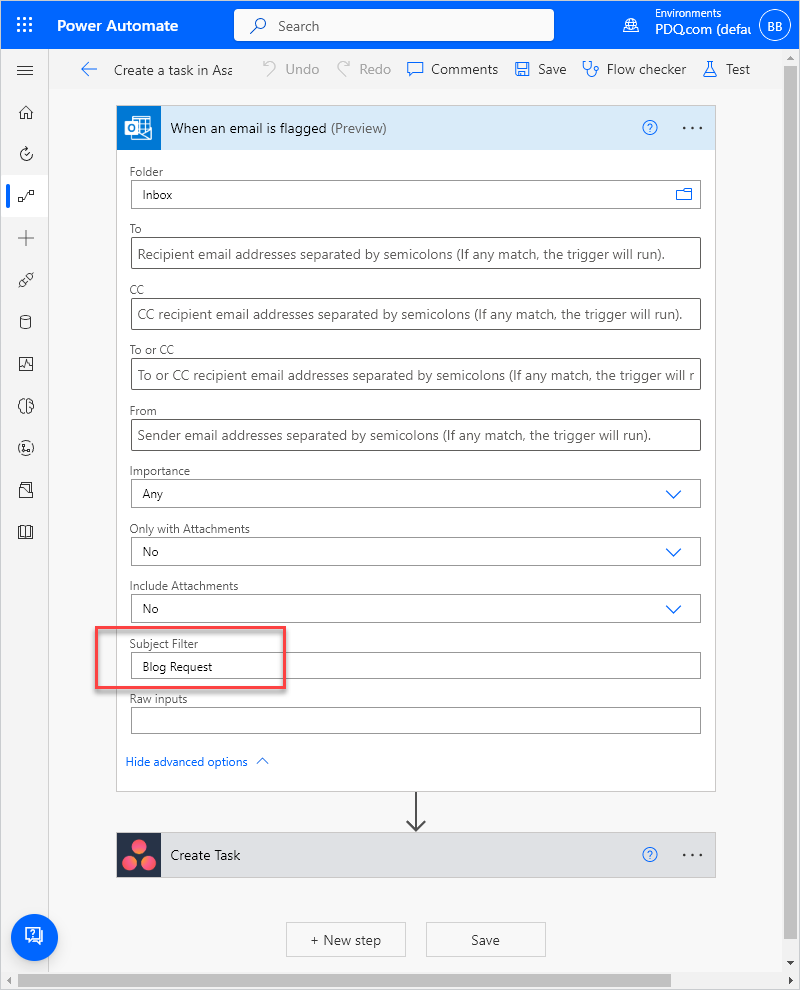
Click the Show advanced options drop-down menu.
Enter a subject to act as the filter for the trigger in the Subject Filter field. I’ve used Blog Request for my example.
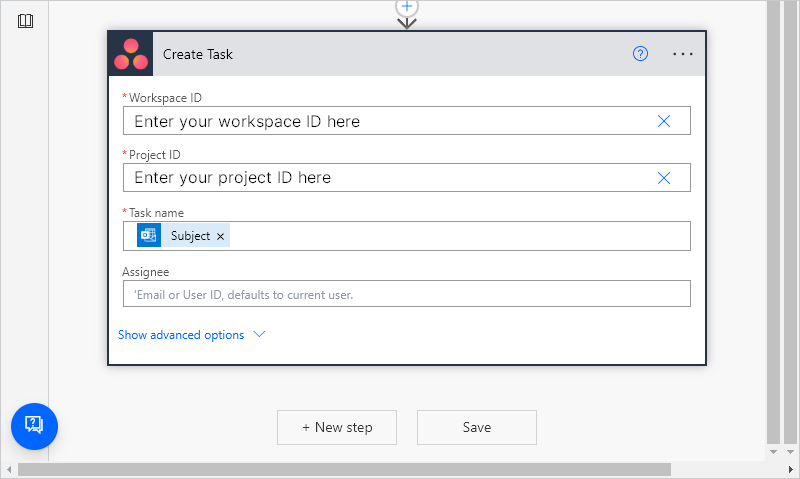
Click on the Asana Create Task action.
Enter your Workspace ID and Project ID into their respective fields. You can get your workspace ID by clicking on your profile picture in the Asana web app, then clicking About My Organization. Copy the ID number from the URL. To get your project ID, click on the board where you want the task to autocreate, then copy the project ID number from the URL.
Configure any other settings, then click Save to finish creating your flow.
Use the Test button at the top of the flow creator page to ensure your new flow works correctly.
Deleting empty files automatically with Power Automate Desktop
If you’re anything like me, you end up with many empty files. Sometimes, I create them and then never use them. Other times, I’m left with empty remnant files after uninstalling an application. Whatever the cause, Power Automate Desktop can help us clean up our empty files. We’ll use another template to create this flow.
Launch Power Automate Desktop.
Click on Examples.
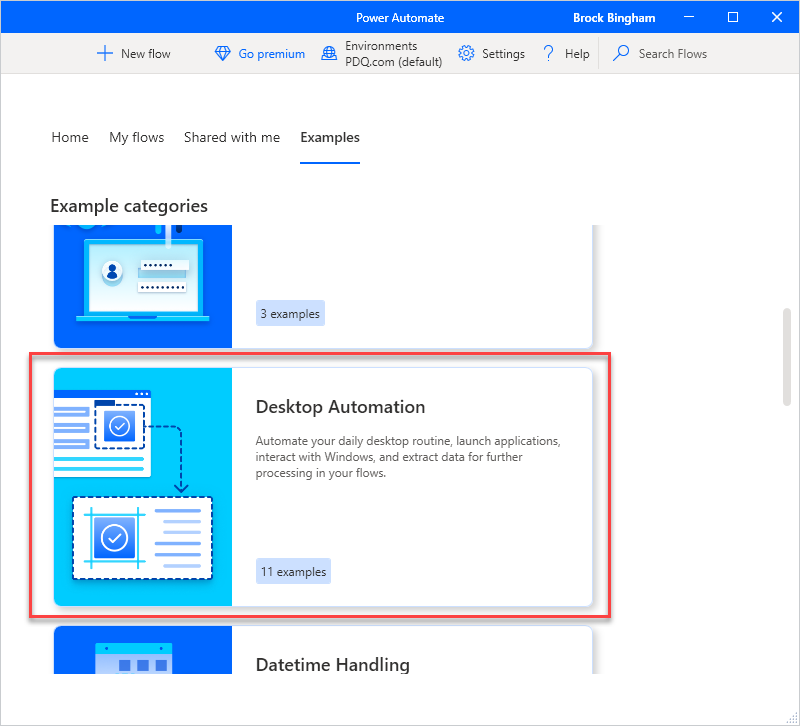
Scroll down if necessary, then click Desktop Automation.
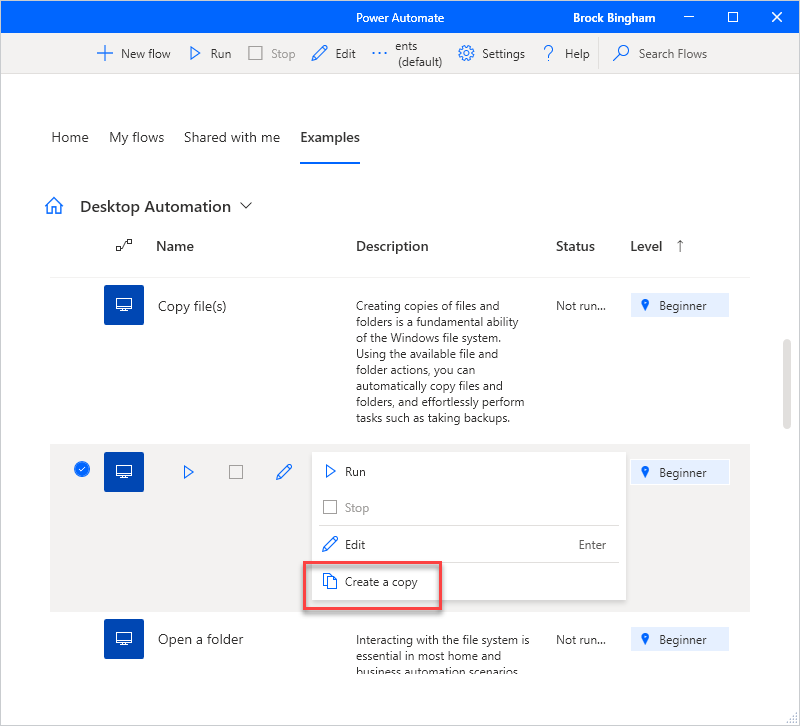
Click the three vertical dot menu button next to the Find and delete empty files flow, then click Create a copy.
Name the flow, then click Save.
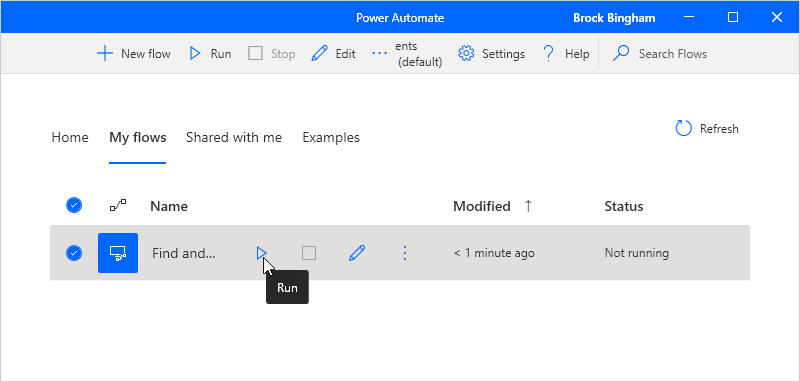
Click the Run button to start the flow.
Select the folder you want to delete empty files from, then click OK.
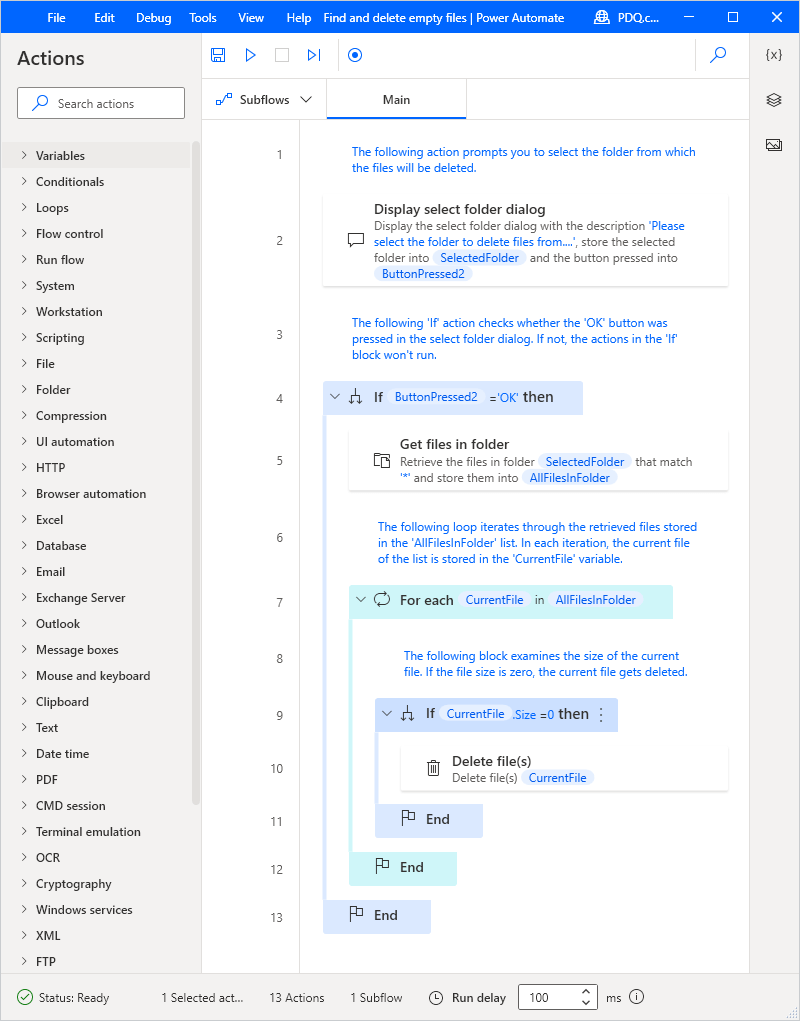
The flow proceeds to delete any files with a file size of zero.
Power Automate Desktop will notify you when the task is finished.
If you ever want to see how a task works, or if you want to edit a flow, select it, then click the Edit button. Here’s what this flow’s process looks like:
Automate more, work less
Automation is only going to get more powerful as time goes on. As these applications mature and more systems and connectors are added, there won’t be many processes that can’t be fully automated.
Check out our webcast that highlighted the power of Power Automate. You can also follow Tara as she teaches us how to manage report distribution with Power Automate.
If you’re looking for other ways to automate your life, check out PDQ Deploy and Inventory. With Deploy and Inventory, you can automate all your patch and inventory management needs. If you manage a large fleet of remote devices, check out PDQ Connect, which can easily keep track of and patch your remote fleet.


