In a perfect world, all devices would be easy for sysadmins to access and even easier to manage. Also, restarting a computer would fix all of its problems, not just 95% of them.
But we don't live in that world. Instead, we live in a world where many of our networks consist of domain and non-domain computers, making device management complex. Thankfully, PDQ Inventory can easily collect and centralize information from both domain and non-domain joined devices. Here's how.
Managing credentials in PDQ Inventory
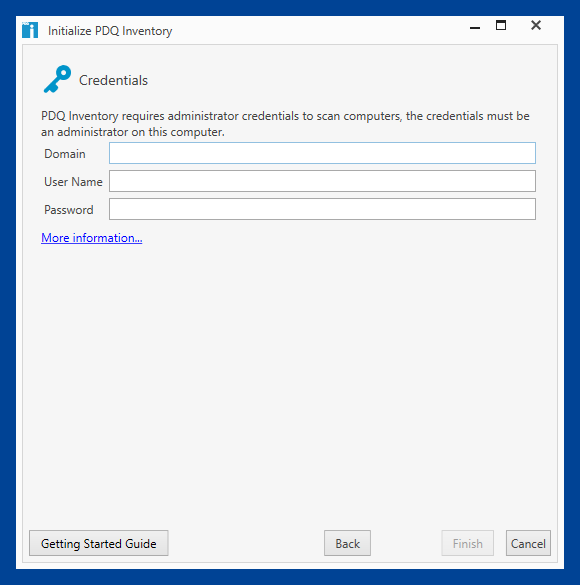
When you first install PDQ Inventory, you're prompted to provide an initial set of credentials. We recommend using a domain admin account, but what's important is to use an account with administrative access to the devices and resources you manage.
In PDQ Inventory, you can view and manage credentials by clicking Options > Credentials.
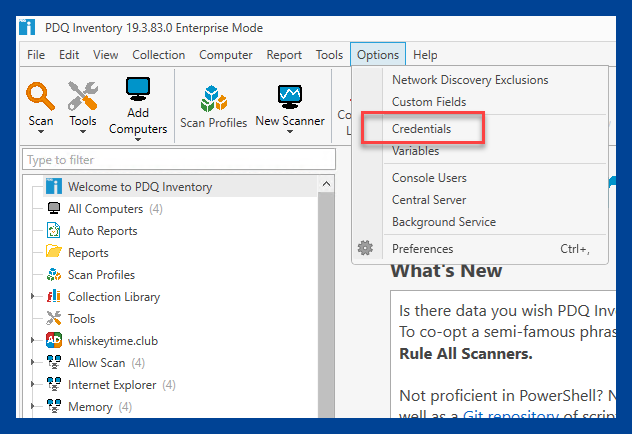
In the credentials menu, you'll find that the default scan user is set to the user credentials you provided when you first installed PDQ Inventory. You'll also find options to add or edit credentials, add LAPS, and change the default credentials used by PDQ Inventory.
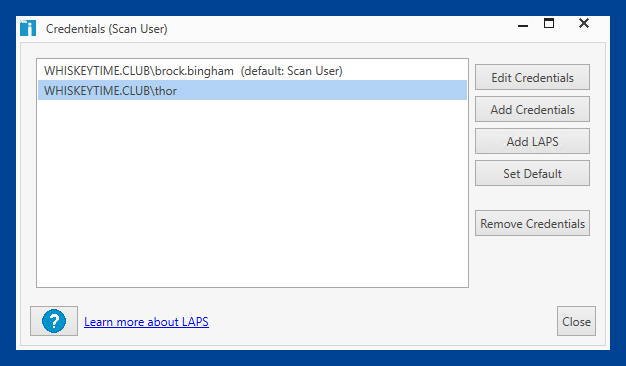
You can also add credentials for non-domain joined devices in this menu. Here's how:
1. Click Add Credentials.
2. Clear out the Domain field.
3. Enter the credentials for a local administrator account on non-domain joined computers.
4. Optionally, you may add a description to help identify what the credentials are used for.
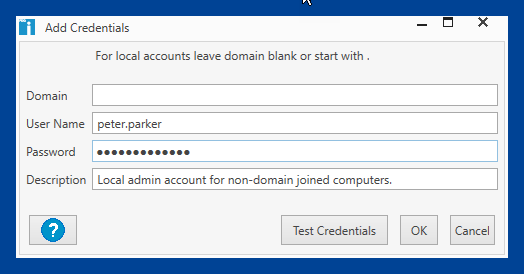
You can use the Test Credentials button to verify that the credentials work against a target computer.

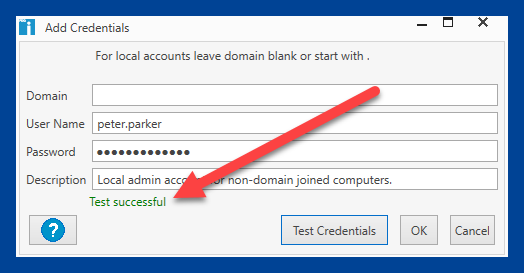
The credentials menu in PDQ Inventory makes it easy to add, edit, and remove credentials you utilize to manage your devices.
Importing workgroup computers into PDQ Inventory
With your local admin credentials added, you can now import some non-domain computers into PDQ Inventory. If you click on Add Computers in PDQ Inventory, you'll have two options to import non-domain computers: Network Discovery and By Name.
Network Discovery scans a subnet or a range of IP addresses looking for devices that can be imported into PDQ Inventory.
By Name, my preferred method, allows you to simply enter the name of the computer you wish to add to PDQ Inventory. Here's how it works:
1. Click Add Computers > By Name.
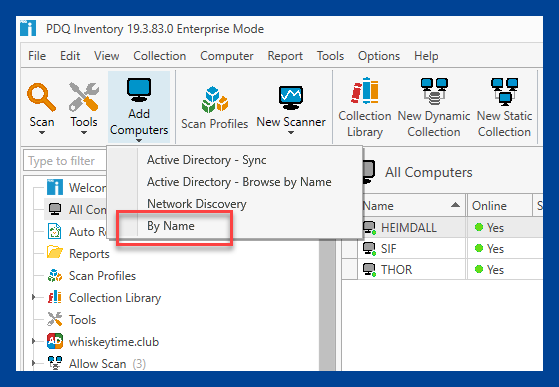
2. Enter the name of the non-domain joined computer.
3. Change the Scan User to the local admin credentials of the device you're importing.
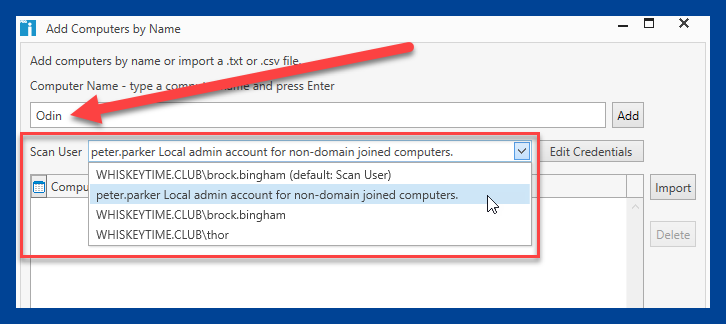
4. Click Add, then click OK.
After clicking OK, PDQ Inventory will add and then scan the computer using the credentials selected in step 3 above.
Changing scan credentials for a specific device
You can easily change the scan user credentials per device in PDQ Inventory, allowing you to customize Inventory to meet the demands of your network environment.
To change the scan user credentials for a specific device, simply right-click on a computer in Inventory, then click Select Scan User.
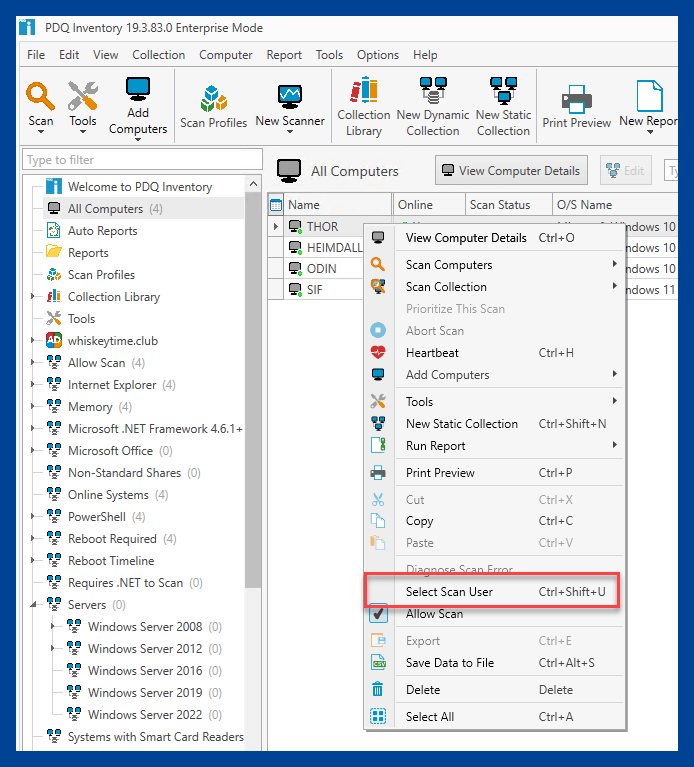
You can then select any credentials you have added to your list of credentials or click the Edit Credentials button to go to the main credentials menu.

Once you've selected the credentials, the device will remember your selection and continue to scan the device using those credentials for all future scans.
Managing a mixed domain environment doesn't have to be hard
Not all non-domain devices utilize the same credentials, nor should they. Each non-domain computer may have its own individual administrative credentials, leaving sysadmins struggling to juggle a multitude of unique credentials. PDQ Inventory relieves this burden by making it easy to add and manage domain and non-domain credentials.
If you've yet to experience the magic of PDQ Inventory, with its dynamic collections, auto reports, and detailed information gathering, what are you waiting for? Take it for a test drive today with our 14-day free trial of PDQ Inventory. Or, if you'd rather sit back and relax while one of our experts gets behind the wheel, schedule a product demo. Better yet, if you're like me, do both! Why choose just one when you don't have to?


