So, you’re ready to make the switch to Central Server mode in PDQ Inventory and indulge in all the sweet, sweet goodness it provides? You are? Awesome!
But, what about all that awesome custom data in your local database? You know, that data that you painstakingly input by hand for each and every computer in your database? How are you going to get all that fancy data into the database housed on the server?!
Good news! It’s fairly straightforward to grab and export this info using a PDQ Inventory report. I’ve broken it down for you into 3 easy parts. (If you would rather use PowerShell, see Part 2 of this blog.)
Part 1: Identify Custom Fields to export
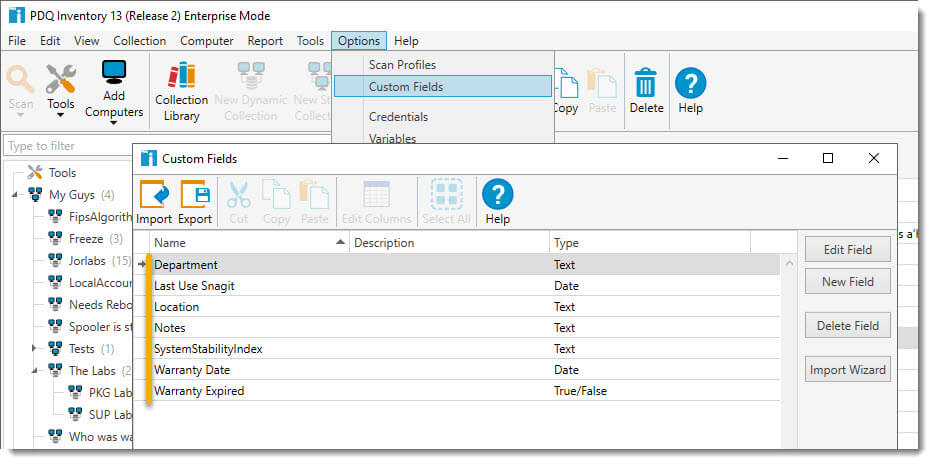
You will need to identify you have the correct Custom Fields that you wish to export.
While the console is in Local mode (prior to switching to Client mode), select
Options > Custom Fieldsto identify you are viewing the Custom Fields you want to export.Take a screenshot so you will have the list of the Custom Fields names in front of you.
Part 2: Create a Report of Custom Fields
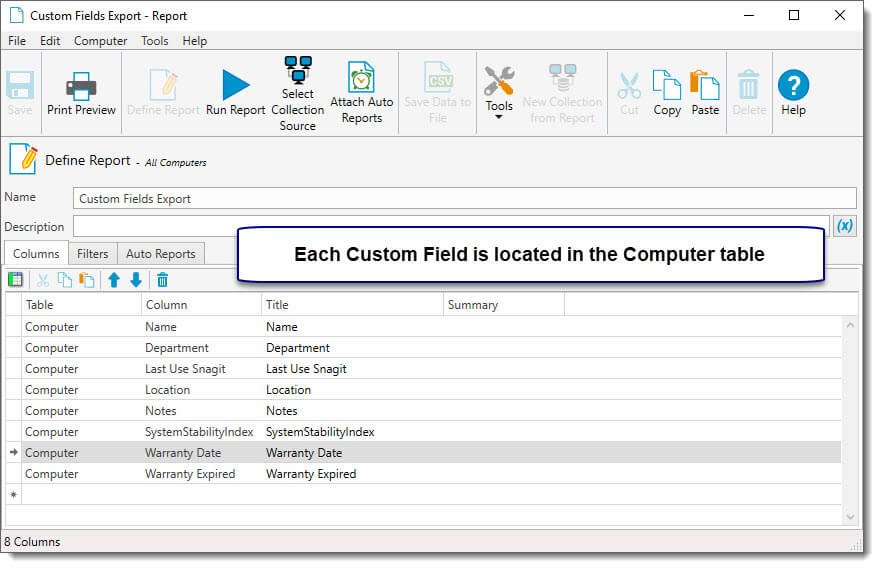
You’ll need to add the Custom Fields individually as columns to be able to see them in the report.
While still running in Local mode, select New Report
> Basic Report.
2. Give it a name like ‘Corgis Rule’ or something you’ll remember.
3. Leave the first row, as is. This will ensure the data entered for each Custom Field will display per computer.
4. On the second row under Table, select Computer.
5. Under Column, select one of your Custom Field Names (this is where your screenshot will come in handy). Adjust the Title, if needed.
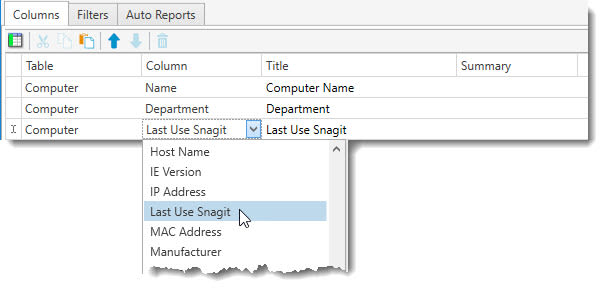
6. Rinse and repeat for each Custom Field.
7. Click Save.
Part 3: Run the Report of Custom Fields
With all of the columns defined, you’ll simply need to run the report and save it to file. You can export to your selected file type, however, a .csv file is required to use the Custom Fields Import Wizard.
Click Run Report.
Save the data as a .csv file by clicking Save Data to File.
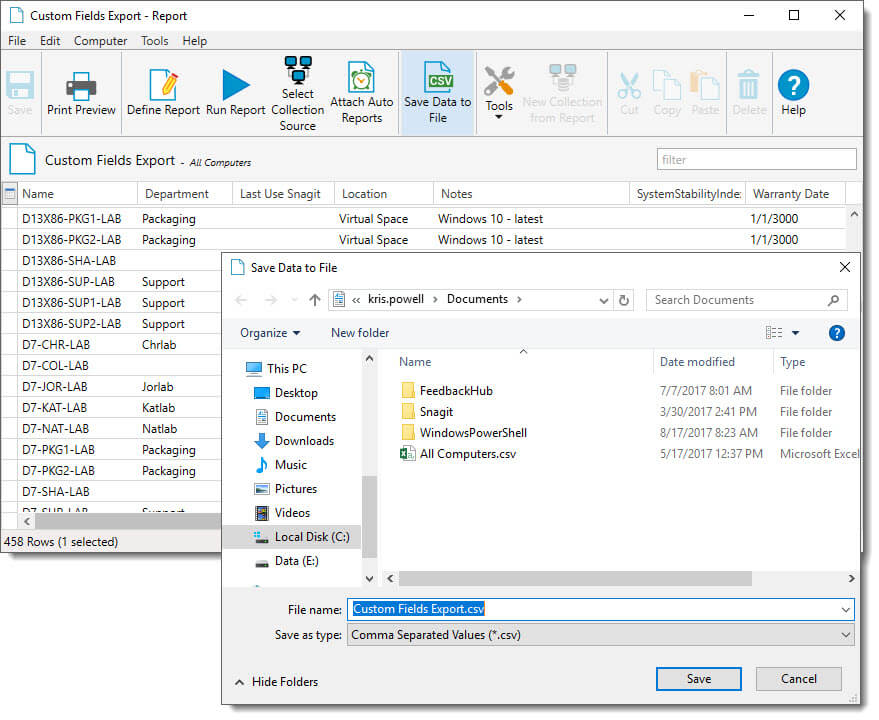
3. Your Custom Fields are now safely tucked away for future use.
4. To import these Custom Fields into another PDQ Inventory console, please refer to this wonderful guide.
Wrapping up
This blog’s main intent is to help you get your Custom Fields data exported in preparation for a migration to Central Server. However, you can also use the export as a backup for your custom data, or even a simple way to sync up different PDQ Inventory databases.
Whatever the case may be, I hope that it helps you out.
See Part Two when we showcase how to export Custom Field data via PowerShell.
Loading...

