When you’re overseeing several client environments simultaneously, speed is of the essence. Efficient processes and workflows can make your MSP more profitable while delighting clients. Meanwhile, inefficient processes and workflows could spell certain doom (and endless tears).
That’s why PDQ Connect aims to make managing tenants simple, secure, and pretty damn quick. We’ll share some common methods MSPs use to manage tenants in PDQ Connect.
How to use groups to manage tenants
Not all clients need the same actions, so you need to keep their fleets separate and neatly organized if you want sustainable workflows. While there are several ways to do this, we recommend using groups in PDQ Connect.
For this process, we’ll use static groups (unchanging groups that you can adjust manually) to maintain separate lists of each client’s devices. Then, we’ll leverage those static groups to create dynamic groups that update automatically when devices meet the set criteria. We’ll keep all these groups neatly organized in designated client folders so they’re easy to find.
Create a folder for each client
1. Expand the drop-down menu next to Create group.
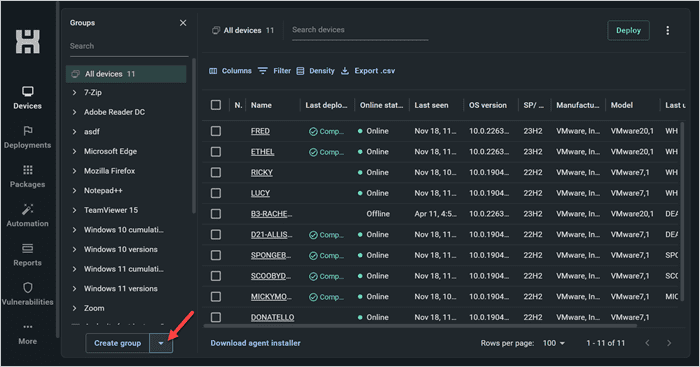
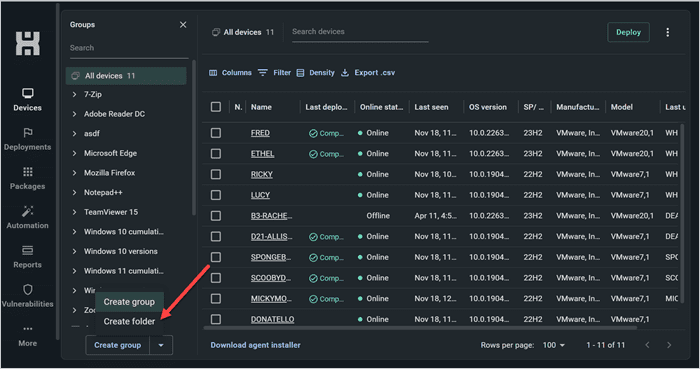
2. Click Create folder.
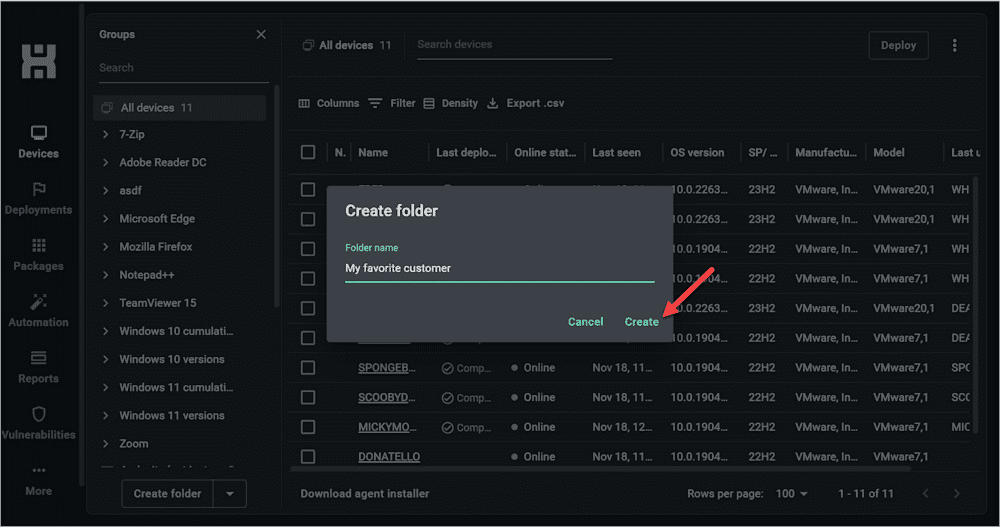
3. Input your name of choice, then click Create.
4. Repeat this process for each client.
Create a primary static group for each client
1. Click Create group.
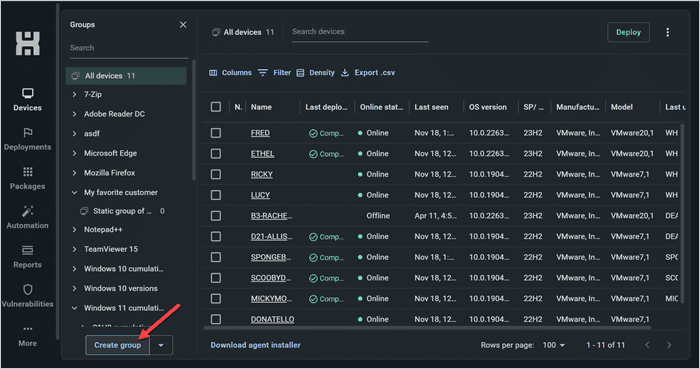
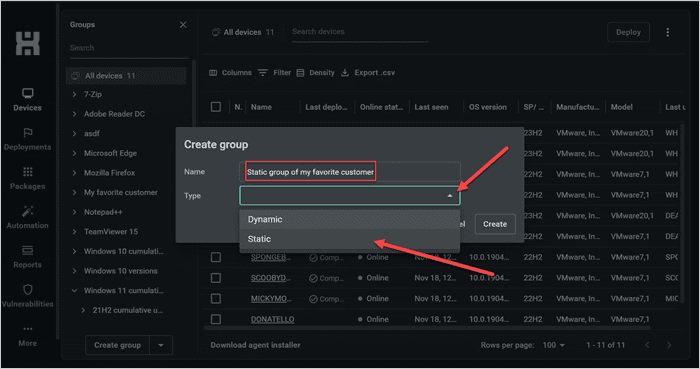
2. Name the group, expand the Type drop-down menu, and select Static. Then, click Create.
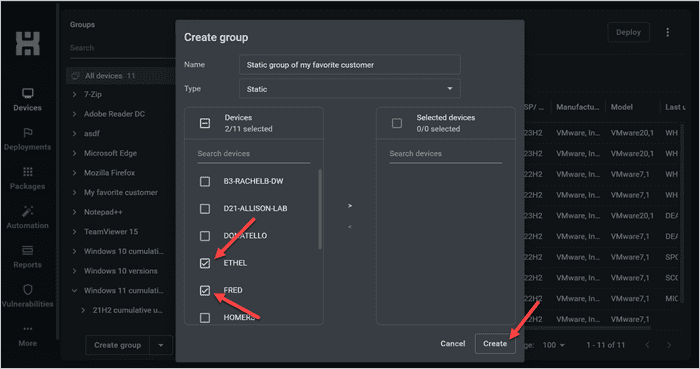
3. Check the box next to any devices you want in the group, click the arrow pointing right to move those to devices to the right column, then click Create.
4. Drag and drop the static group into the client folder to keep everything neat and tidy.
Reference the static group in subsequent dynamic groups
Once you have a static group set up for each client, you can make whatever dynamic groups you want. For this example, we’ll make a dynamic group based on the above static group to keep track of devices in the client’s environment on which weaponized vulnerabilities are present.
1. Click Create group.

2. Name your group, then select Dynamic from the drop-down menu.
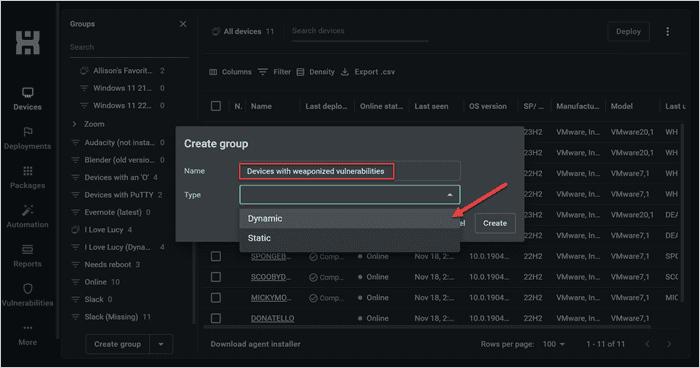
3. Set the first filter to target your static client group. Then, use subsequent filters to fine-tune your results. In this instance, I’ve set it to look for devices with weaponized vulnerabilities in my client’s static group.
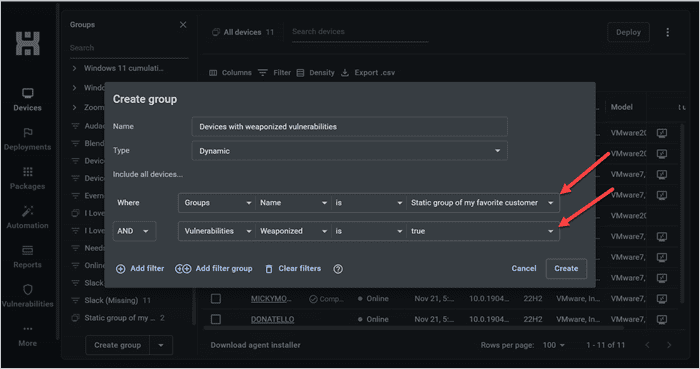
4. Click Create.
5. Repeat as needed, using your static group as a filter to create additional dynamic groups for individual clients.
6. Drag and drop any dynamic groups you create into the relevant client folder to stay organized.
Speed up the process
Looking to save time? Aren’t we all! To make this process more efficient, follow the above instructions for just one client. Then, do a GET operation to see it in the API and recreate your work programmatically for the rest of your clients.
Create separate accounts to manage tenants
If you have clients in highly sensitive industries (like healthcare), comanage an account with your client, or can’t risk client data mingling, it’s possible to create separate orgs.
To do this, simply set up separate PDQ accounts for each client. You can use Plus Addressing to create subaddresses so that everything is associated with one primary email account. Once you’re set up, switch between clients by clicking the Connect logo in the upper left-hand corner, then selecting the relevant organization.
Multitenancy is on Connect’s roadmap, and it’s poised to provide new ways to segment the environments and roles you manage. But why wait to elevate your IT services and impress your clients? Schedule a demo to see how Connect can help you efficiently deliver value to your clients.

