Have you tried keeping applications up to date with Intune? Me too. That's why you're here. That's why I'm here. (That's why PDQ Connect is here. We have so much in common.)
So I’m going to break down this process — how to package, upload, and deploy an application via Intune — with an example near and dear to my heart: PDQ Connect.
Just like we built PDQ Deploy & Inventory to aid Group Policy in application management and distribution, PDQ Connect does the same for Intune and Group Policy. But first, you need to get Connect to all of your endpoints.
Regardless of how you image your devices, it's a good idea to keep Connect as a required application in Intune to make sure no devices slip through the cracks and to prevent any admin users from uninstalling the agent.
The best way to upload applications to Intune
If you've spent any time at all uploading applications to Intune, you know there are multiple ways to get it done. But which way is the right way?
Despite no official word from Microsoft (at least as far as I can tell), it does seem that the recommended approach is to ensure that all your applications are packaged as Win32/Intunewin applications.
Although you can simply upload an .MSI to Intune, you can't do the same for any .EXE. Those need to be packaged into Win32 apps. And from personal experience relying on Autopilot at previous jobs (as well as the experiences of many I've read on /r/sysadmin and /r/intune), you're far more likely to encounter install errors during Autopilot if you mix and match file types and require many apps to be installed at once.
All this to say that it's simply best to wrap the Connect .MSI into a .INTUNEWIN file and then let Connect handle all of your application management needs from there. So, let's break down how to get that done.
Automate your patching
Keep Windows devices patched and secure from the cloud.
Package the application
There are many guides out there for packaging applications that get into the weeds and explain every nuance of this tool, but I'm going to keep this guide simple with one goal in mind: Package Connect and get it deployed via Intune as quickly as possible.
First thing first: You’ll need to download the Win32 Content Prep Tool (specifically the IntuneWinAppUtil.exe) from Microsoft's GitHub repo. You can read more about this tool and all of its CLI parameters and functions on Microsoft’s website.
Getting organized
Create the directory C:\Intune and C:\Intune\Connect
Place the IntuneWinAppUtil.exe file in C:\Intune\
Place your org’s latest version of the Connect .MSI in C:\Intune\Connect\
Wrapping the Connect .MSI into a .intunewin file
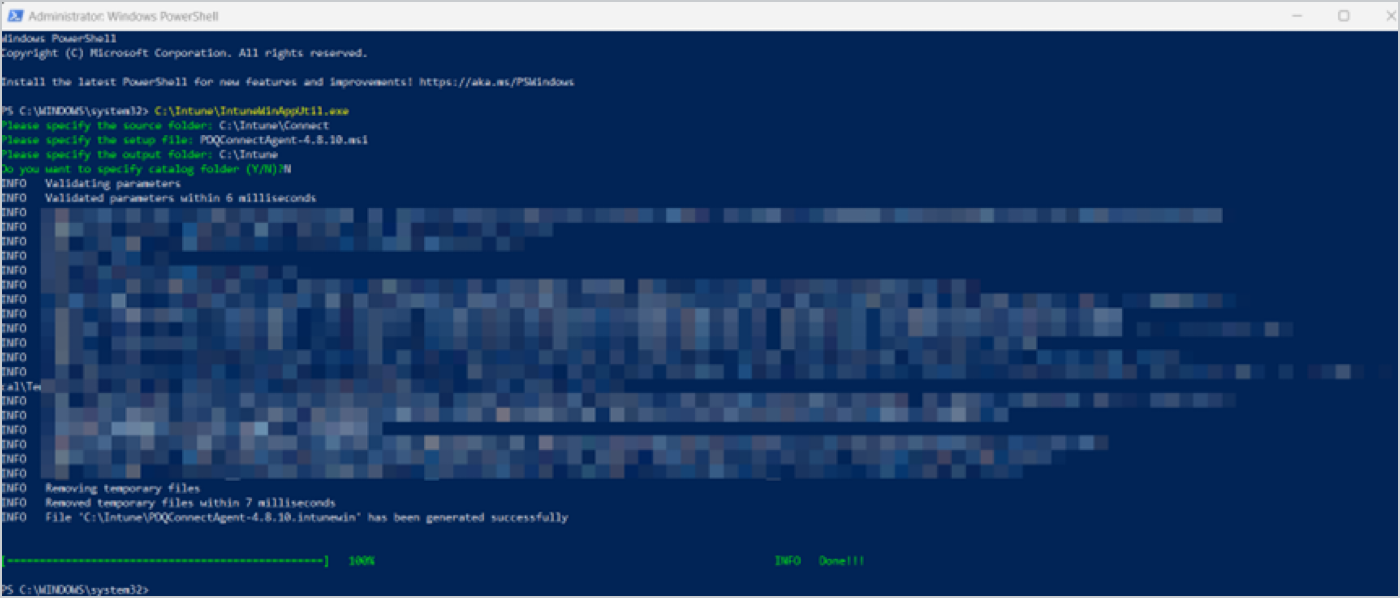
1. In an admin PowerShell window, run the following command: C:\Intune\IntuneWinAppUtil.exe
When prompted for the source folder, enter C:\Intune\Connect
When prompted for the setup file, enter PDQConnectAgent-X.X.X.msi (using the correct version number of your installer agent)
When prompted for the output folder, enter C:\Intune
When prompted for whether or not to specify a catalog folder, enter N
2. When complete, you should see similar results to this and be left with a shiny new Connect .intunewin file in your C:\Intune directory.

Upload and deploy application
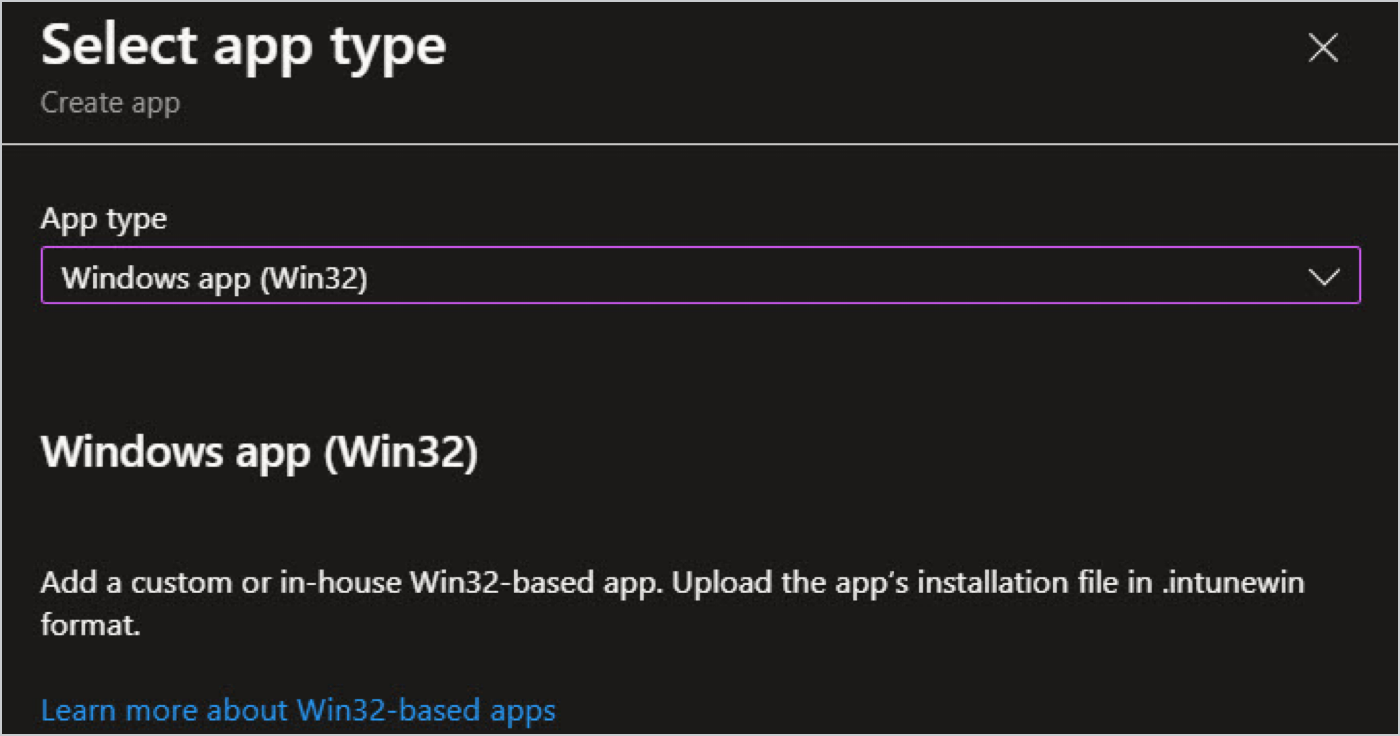
Now that you've got the new .intunewin file ready to go, it's time to head on over to Intune (or whatever Microsoft may be calling it by the time you're reading this) and navigate to Apps > Windows > Add > App type > Windows app (Win32).

Step 1: App information
Select your PDQConnect .intunewin file and fill out any of the necessary fields. Most of them are prefilled (except for Publisher), but you may want to modify fields such as Category or include relevant notes/internal owners/our logo for that little splash of color — though these fields are not required.

Step 2: Program
Intune automatically prefills all the fields on this page. (Woo-hoo!) However, you'll likely want to change the Allow available uninstall to No to prevent users from being able to uninstall Connect.
Disable the device restart behavior as we’ll silently deploy PDQ Connect — no rebooting required.

Step 3: Requirements
Choose your operating system architecture (our environment is 64-bit only) and minimum operating system requirements. Since the goal here is to manage any endpoint, you'll likely want to select the lowest available option (currently Win 10 1607); however, you can of course modify this to fit your environment or specific goals.
All other fields are not required.

Step 4: Detection rules
You can do this a few different ways, but I prefer the following settings using the Manually configure detection rules option and choosing the File detection method. This is what Intune uses to determine if the agent is properly installed and periodically check to ensure that the file and folder still exist and reinstall them if they don’t.
Path: C:\Program Files\PDQ\PDQConnectAgent\
File or folder: pdq-connect-agent.exe

Step 5: Dependencies
These settings aren’t required.
Step 6: Supersedence
These settings aren’t required.
Step 7: Assignments
In most cases, it makes sense to choose Add all devices for the Required section of the assignments to catch all endpoints, but you can, of course, choose any specific Azure device group you have if you're looking to install only on a subset of endpoints.
I would also recommend changing the end user notifications to hide all toast notifications unless you're interested in getting Slack messages from every single concerned user in the office about the strange installation notification they're receiving ...
Finally, since the application is required to install, you don’t need to add any users to the Available section for users to download from the Company Portal.

Step 8: Review + create
And just like that, you should be all set to unleash the Connect agent upon the masses. Give it a quick once-over to make sure everything looks good.

Once you're done, all that's left is to hit Create and sit back and ... wait ... 10 minutes? 45 minutes? A few hours? In other words, it’s time for lunch!
After some duration of "Microsoft Time" (as we like to call it), you should begin to see Connect installed on your devices. (Please note that while the agent does automatically update on the endpoints, you should try and keep the install file of Connect relatively up to date within Intune. It does not need to be updated for every version, but if the agent version within Intune is too old, the token may expire and new devices that receive the install may not properly report back to Connect.)
Now, you don't have to manage your software with Intune. It's time to let Connect take the wheel. Cue your happiest dance.
Ready to get full visibility into your environment? Want to ensure your machines are secure and up to date, whether they’re on prem or remote? Give PDQ Connect a whirl with a free trial.


