Autodesk has rolled out a new deployment process that uses ODIS (On-Demand Installation Service). This new method makes deploying Autodesk applications like AutoCAD and Revit easier than ever and doesn’t require large deployment packages.
Huge shoutout to the PDQ community and specifically community members Z and FiFoFree for their work on this Autodesk deployment method. You can find the original community KB post that covers this process on the PDQ Discord server.
A word about large installers
When it comes to large installation files, Autodesk is the undisputed champion. Even full operating systems often pale in comparison to the size of some of Autodesk’s chonky installers (yes, I believe chonky is the technical term). Now I try not to judge an installer by its size, but large installation files can be challenging to deploy to your managed devices, especially if those devices are remote.
Thankfully the new process doesn’t require us to attach large installers to our deployment package. However, if you like doing things old school and don’t mind dealing with large installation files, PDQ Connect supports files up to 20 GB in size. And PDQ Deploy essentially has no file size limit, so you can still build out a deployment package using traditional means.
Building a custom Autodesk deployment
The first thing we need to do is build a custom Autodesk deployment using the package creator on the Autodesk website. I’ll show you the bare minimum steps to create the deployment, but if there are additional options you want to configure with your package, you’ll do that during this process.
Log in to the Autodesk Manage website.
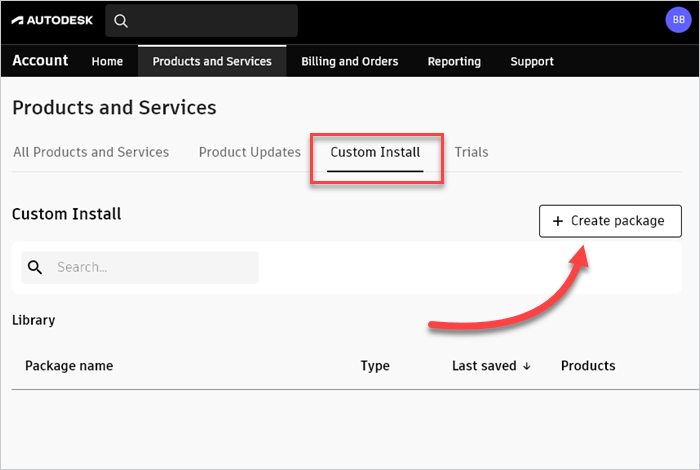
Click Custom Install, then click Create package.
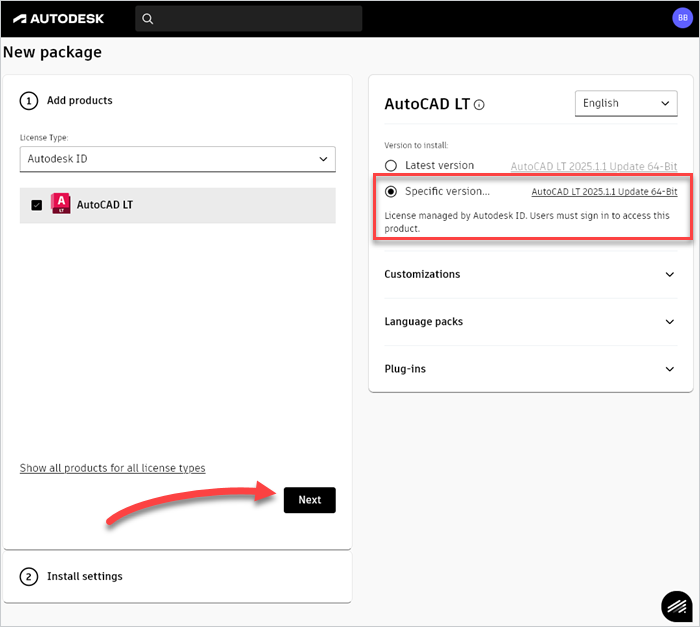
Select the products you want to add to the deployment package. For this example, I’ll use AutoCAD LT.
In the application panel, select Specific version, then select the specific version you want to deploy.
Add any customizations, language packs, or plug-ins that you want to include, then click Next.
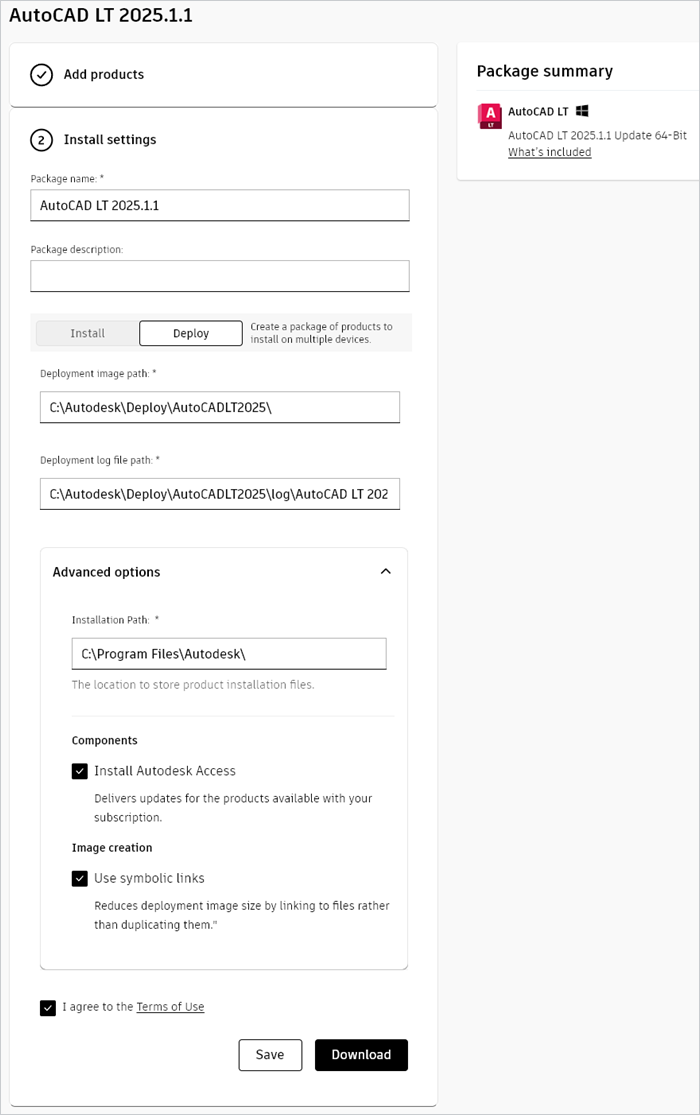
Enter a package name, then select the Deploy option.
Enter a deployment image path. This is where your deployment files will go, not your installation. For this example, I’m using C:\Autodesk\Deploy\AutoCADLT2025\.
Expand the Advanced options menu and make sure Use symbolic links is selected. Configure the other settings to fit your needs.
When you’re ready, select I agree to the Terms of Use, then click Save. Here’s my completed package.
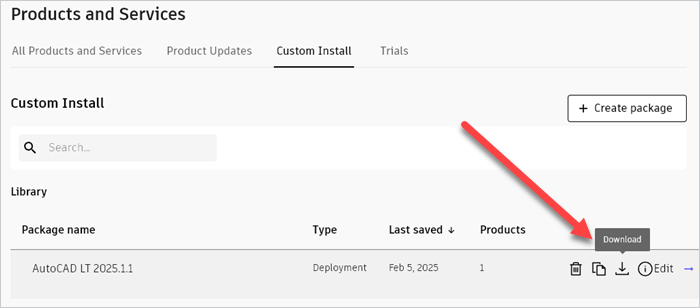
Once the package finishes saving and you’re back on the Custom Install page, hover over the package, then click the download button to download the deployment file.


Generating an Autodesk installation command
Now that we have our customized deployment file downloaded, we need to run it to get the installation command. Running the deployment file won’t install any Autodesk products. It just configures all the installation files necessary for the deployment. Feel free to run this on a test device.
Once you run the deployment file, navigate to the targeted directory. This is the directory we configured as our deployment image path during the deployment file configuration.

Inside this directory, right-click on the file labeled “Install <package_name>.bat,” then click Edit. Next, copy everything from the silent install command except the “rem” at the beginning of the command.
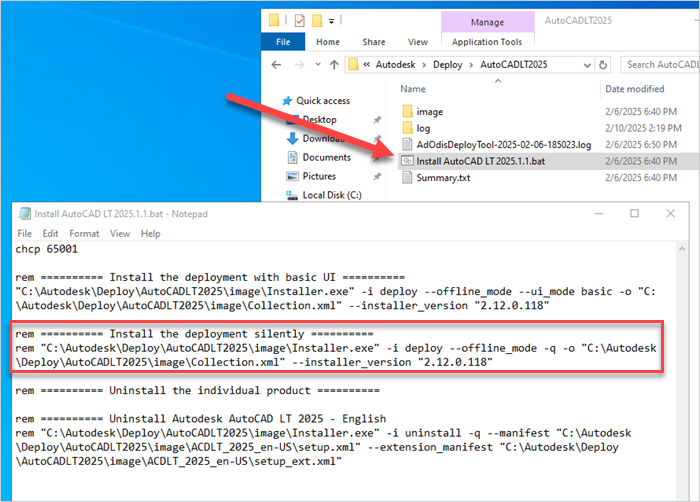
This is the command we’ll use for our deployment package.
Building our Autodesk package in PDQ Connect
Now that we have our custom deployment file and our installation command, we’re ready to build our Autodesk package in PDQ Connect.

Next-level software deployments
With unmatched speed and an effortless user experience, PDQ Connect revolutionizes application and script deployments. Don't get left behind with an outdated process. Discover how PDQ Connect is changing the game for sysadmins.
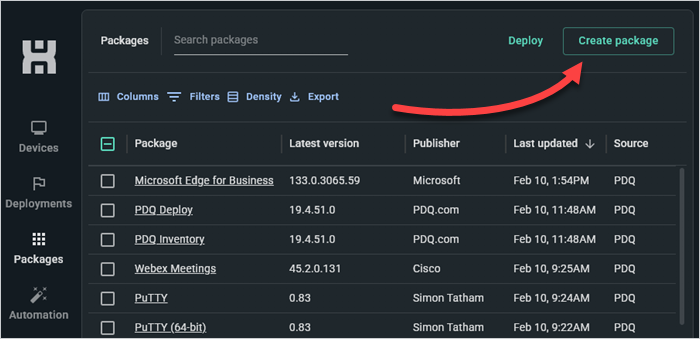
Sign into PDQ Connect, then navigate to the Packages tab.
Click Create package.
Name the package, then set the Timeout setting to something like 60 or 120 minutes. The timeout setting can be altered later once you get a better idea of how long it takes the deployment to finish. This largely depends on your target device’s network bandwidth.
Click Add install step.
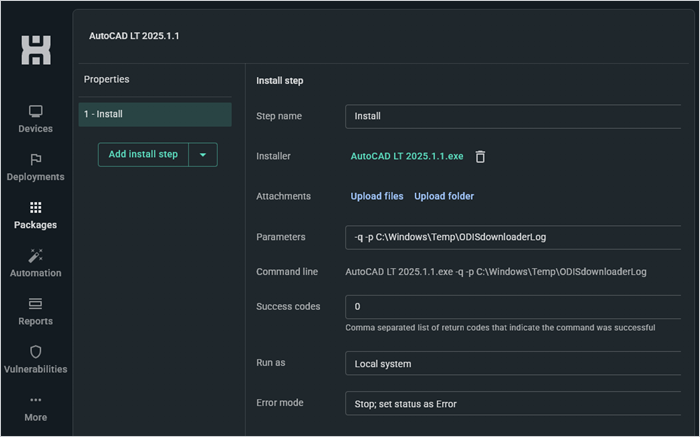
Click Attach installer, then attach the customized Autodesk deployment file we built earlier. Add this command to the parameters field to silence this step and create a log file: -q -p C:\Windows\Temp\ODISdownloaderLog.
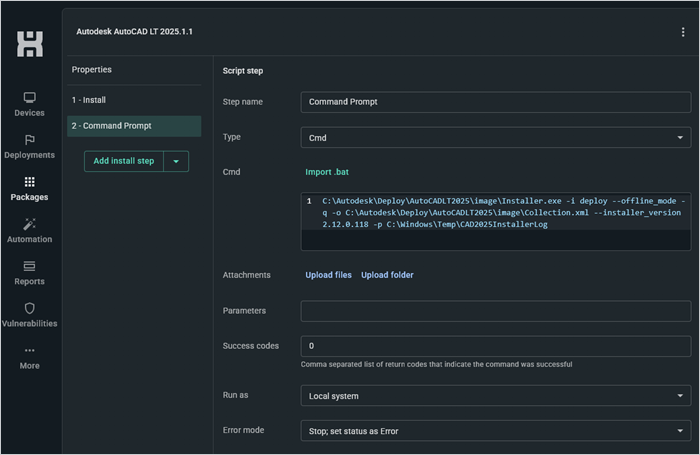
Click the drop-down arrow next to Add install step, then click Add script step.
Add the install command we copied from the BAT file to the Cmd window. You can add -p C:\Windows\Temp\<app_name>InstallerLog to the end of the command if you want a log of the deployment. (You’ll need quotes around your paths if you have spaces in directory structure.)
When you’re ready, click Save to save and close the package creator.


Deploying Autodesk applications with PDQ Connect
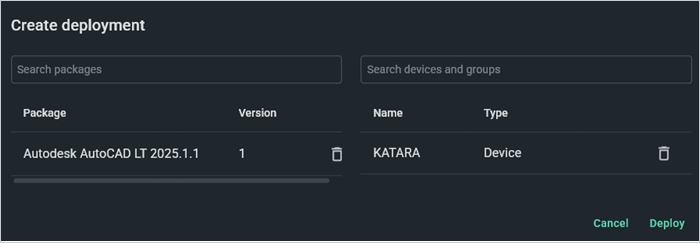
With our Autodesk application package in PDQ Connect complete, we’re ready to deploy it. In the Packages tab, select the Autodesk package, then click Deploy. In the deployment window, add your devices or groups that you want to target, then click Deploy.
If this is your first time deploying the package, I recommend sending it to a couple targets at first to ensure the package is working properly. Once you’ve tested it enough, you can deploy it to more targets, but keep in mind that it may have a pretty heavy impact on the target’s network bandwidth. Also, watch the deployment times and alter the package timeout settings accordingly. It only took me a little over 6 minutes to deploy AutoCAD LT to my virtual machine, but this can vary greatly depending on the application and the target’s bandwidth.
Deploying Autodesk applications with PDQ Deploy
Deploying Autodesk applications with PDQ Deploy follows the exact same process as PDQ Connect but with a different user experience. The package should basically be identical.
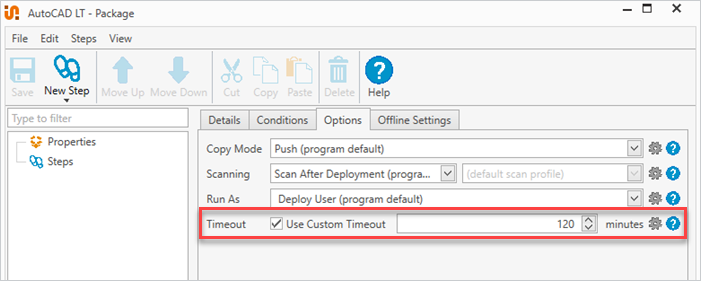
Create a new package, and give it a name. If you need to change the timeout settings, they can be found under the Options tab on the package level properties.
Click New Step > Install and attach the Autodesk deployment file.
Add these parameters to silence the installation and create a log file: -q -p C:\Windows\Temp\ODISdownloaderLog.
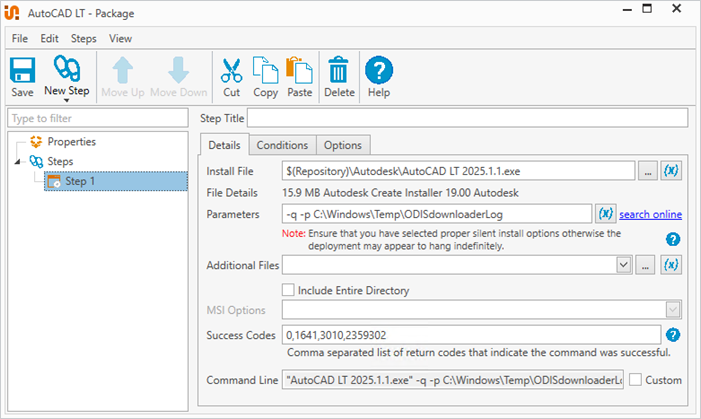
Click New Step > Command.
Add the install command we copied from the BAT file to the Command window. You can add -p C:\Windows\Temp\AutodeskInstallerLog to the end of the command if you want a log of the deployment. This is what my full command looks like:
"C:\Autodesk\Deploy\AutoCADLT2025\image\Installer.exe" -i deploy --offline_mode -q -o "C:\Autodesk\Deploy\AutoCADLT2025\image\Collection.xml" --installer_version 2.12.0.118 -p "C:\Windows\Temp\CAD2025InstallerLog"Click Save to save the package.


The package is ready to deploy to your managed devices.
How long until this process changes again?
This is the second time I’ve covered the process in the last few years. The real question is, how long until it needs to be revamped again? Who’s to say? Just remember, it was Benjamin Franklin who said, “Change is the only constant in life. One's ability to adapt to those changes will determine your success in life.” Pretty wise words, if you ask me.