Greetings, citizens of the internet! I’m going to share with you how I install and update PDQ Deploy and Inventory in Client mode. It’s pretty straightforward, but there are a few tricks I need to explain first. I’m pushing to get these added to the Package Library, but I can’t guarantee that will happen.
Here are my packages:
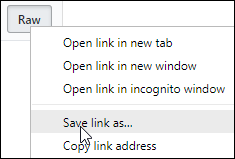
Download these as XML files and import them into PDQ Deploy. Next, I will go over the steps in detail and cover some things you may want to change to fit your environment.

Step 1 - Kill
Just a simple kill step to stop any running consoles. This is important when you’re using this package for updating rather than installing.
I set “Options\Error Mode” to Continue, but you can use “Stop Deployment with Error” if you want to.
Step 2 - Install Deploy/Inventory Client
This is where the fun begins. PDQ Deploy and Inventory store a copy of the MSI version of their installer in “C:\Windows\Downloaded Installations\Admin Arsenal\PDQ (Deploy/Inventory)\(Version Number)\PDQ(Deploy/Inventory).msi”. I used ADMIN$ so you can use Pull mode if you want to. $(PDQDeployVersion) and $(PDQInventoryVersion) are System Variables that were added in Deploy 17.1.0.0 and Inventory 16.1.0.0. $(PDQDeployServerHostName) and $(PDQInventoryServerHostName) were added in version 18.0.21.0.

Step 3 - Set registry values
This part grabs the hostname and port number of the Server from the System Variables. As of version 18.0.21.0, Client mode retrieves the license from the Server, so you no longer need to set it here.
$Product	= "PDQ Deploy"
$ServerName = "$(PDQDeployServerHostName)"
$ServerPort = "$(PDQDeployServerPort)"
Here we create the registry keys with New-Item where the Client configuration information is stored if they don’t already exist. Out-Null prevents anything from returning. I added a five second pause with Start-Sleep because I ran into issues where these didn’t exist yet when the next section ran. I don’t know if it’s necessary for every environment, but better safe than sorry.
New-Item -Force -Path "HKLM:\SOFTWARE\Admin Arsenal"          -Name
"$Product" -ErrorAction SilentlyContinue | Out-Null
New-Item -Force -Path "HKLM:\SOFTWARE\Admin Arsenal\$Product" -Name
"Protocol" -ErrorAction SilentlyContinue | Out-Null

Start-Sleep -Seconds 5
Finally, we set the registry values we gathered above with New-ItemProperty
New-ItemProperty -Force -Path "HKLM:\SOFTWARE\Admin
Arsenal\$Product\Protocol" -Name "Mode"           -PropertyType "String"
-Value "Client"      | Out-Null
New-ItemProperty -Force -Path "HKLM:\SOFTWARE\Admin
Arsenal\$Product\Protocol" -Name "ServerHostName" -PropertyType "String"
-Value "$ServerName" | Out-Null
New-ItemProperty -Force -Path "HKLM:\SOFTWARE\Admin
Arsenal\$Product\Protocol" -Name "ServerPort"     -PropertyType "Dword"
-Value "$ServerPort" | Out-Null
That concludes today’s demonstration of building a PDQ Deploy package for installing PDQ Deploy and Inventory in Client mode. Thank you for joining me on this wacky journey.


