

The new Microsoft Teams, also called Teams 2.0, is now the default version and must be deployed as a per-user Microsoft Store app instead of a traditional desktop installation.
So, what does this mean for all my sysadmin comrades? While I wouldn't hit the panic button yet, Teams is going to require a bit more effort to manage than it used to. On second thought, go ahead and hit the panic button, then come back and we'll finish going over everything you need to know.
At the moment, the version Microsoft calls “Teams” is actually Teams 2.0. The original is now called Microsoft Teams classic or classic Teams. The classic Teams app is no longer supported as of July 1, 2024 and no longer available as of July 1, 2025.
So, yeah. Probably best to deploy the new Teams ASAP if you haven’t already.
What’s new in the new Microsoft Teams?
Built from the ground up, the new Microsoft Teams experience is intended to boost performance, reduce memory usage, simplify integrations, and provide a simpler user experience. Whether they're jumping into back-to-back meetings or living in one long Teams meeting, users might notice things just feel faster — and less crashy.
Why build a new Teams client?
When trying to improve a product, it's fairly common to reach a point where it becomes easier to start from scratch than to build upon an older foundation. Especially as technology evolves and new frameworks and systems are developed, incorporating newer technologies into older platforms can be extremely challenging and resource intensive. That's why Microsoft chose to rebuild the new Microsoft Teams client from the ground up rather than overhauling the classic Teams client.
Challenges with Microsoft Store apps
Microsoft Store apps are built differently. Literally. While that's not inherently a bad thing, it introduces some challenges.
For example, most organizations prefer working with machine-wide installers, but Microsoft Store apps are generally user-provisioned. Want to uninstall a store app using the Control Panel? Unfortunately, you can't. Store apps aren't populated on the list of installed software in the Control Panel because they don't use the same registry keys or even the same install locations as traditional desktop installers.
The changes introduced to Microsoft Store apps also mean they're more difficult to track than traditional installers. But keep reading, and we'll show you how to keep track of those elusive Microsoft Store apps.
How to deploy & track the new Microsoft Teams with PDQ Deploy & Inventory
Deploy the new Microsoft Teams with PDQ Deploy
With PDQ Deploy, we can distribute Teams 2.0 to your endpoints faster than I can flee a socially awkward situation.

Install (and uninstall) without disruption
Try PDQ Deploy & Inventory — free for 14 days.
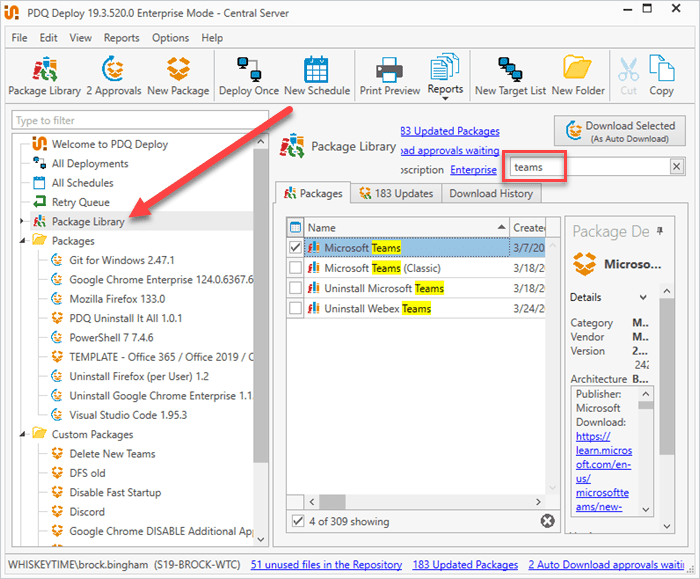
In PDQ Deploy, click Package Library on the left-hand side, search Teams, and check Microsoft Teams. Then, click the Download Selected (As Auto Download) button.
Expand the drop-down menu under Packages on the left-hand side. The Teams package should now appear there. Click it, then click the Deploy Once button.
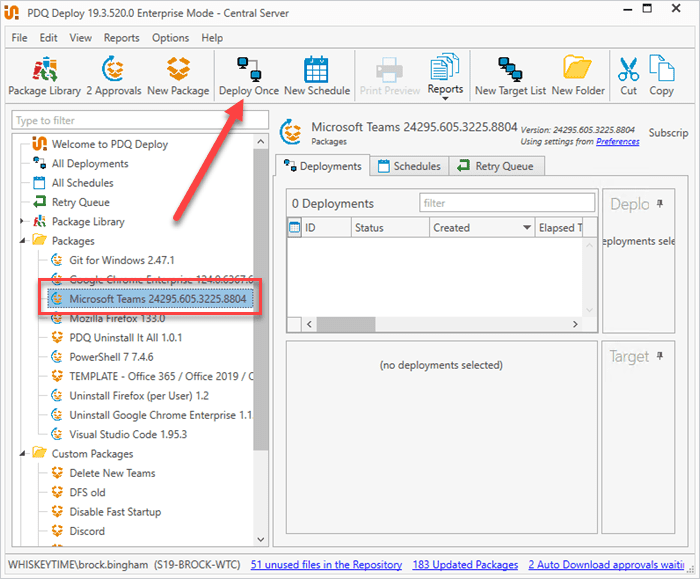
On the left-hand side, select the computers you want to deploy the new Teams to. Then, click Deploy Now.


Become a deployment expert
Here's what you need to know about the 10 deployment steps in PDQ Deploy.
Track the new Teams app with PDQ Inventory
Now that you’ve distributed Teams 2.0 to all your adoring Teams users, it's time to establish a way to track those installations. Unfortunately, tracking Microsoft Store apps isn't as straightforward as tracking traditional Win32 applications. But with PDQ Inventory and a PowerShell Scanner, we can still return all the juicy details we're looking for.
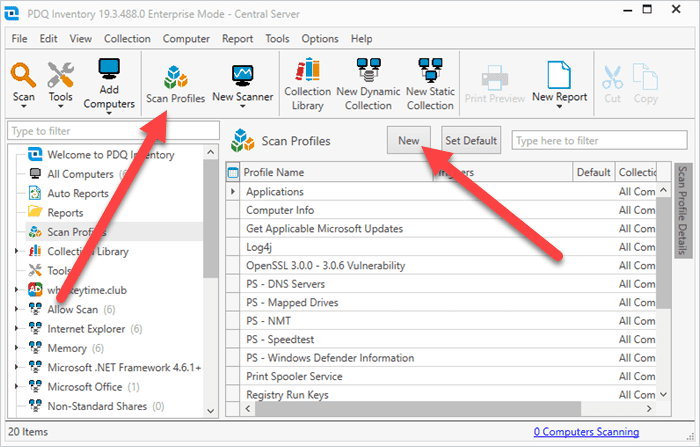
In PDQ Inventory, click Scan Profiles, then click New.
Add a name to the Scan Profile, then click Add > PowerShell.
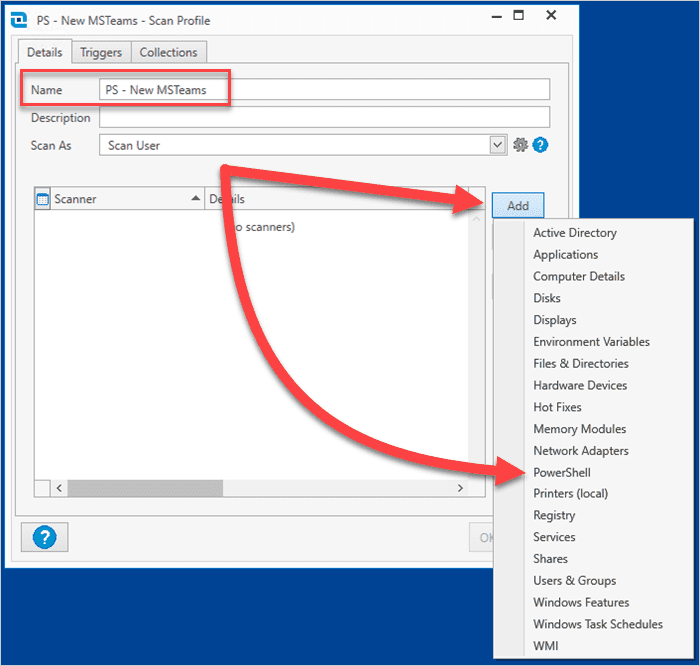
Name the Scanner, select the Script radial button, then add this PowerShell script:
$Apps = Get-AppxPackage -Name "*Teams*" -AllUsers
if($Apps){
    ForEach ($app in $Apps){
   [PSCustomObject]@{
        'Name' = $app.Name
        'Version' = $app.Version}
    }
} else {
   [PSCustomObject]@{
        'Name' = $null
        'Version' = $null
    }
}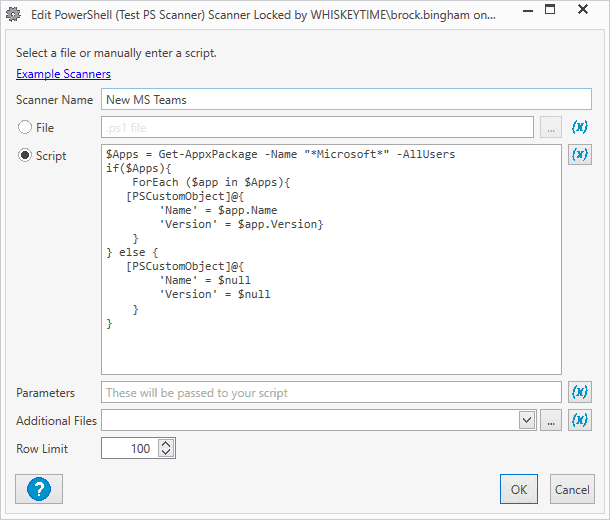
Click OK to close the Scanner window, then click OK again to close and save the Scan Profile.


With the Scan Profile created, we're ready to run it against our endpoints.
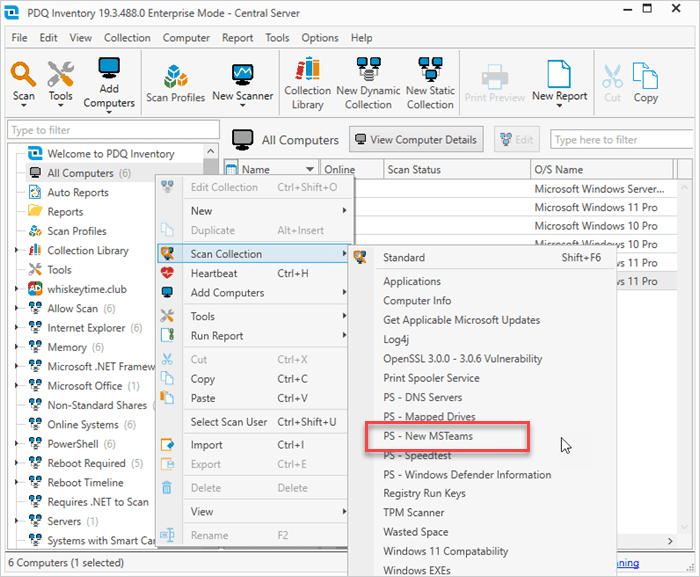
Right-click All Computers, click Scan Collection, then click the new Scan Profile you just created.
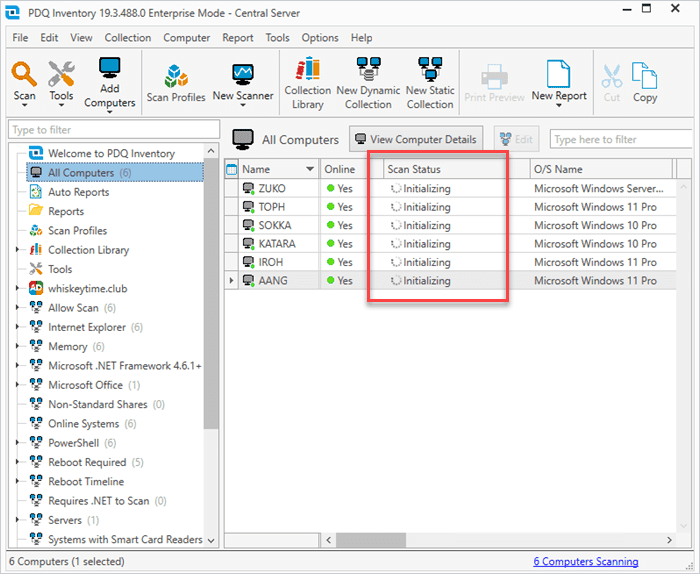
You can monitor the scan's progress using the Scan Status column.
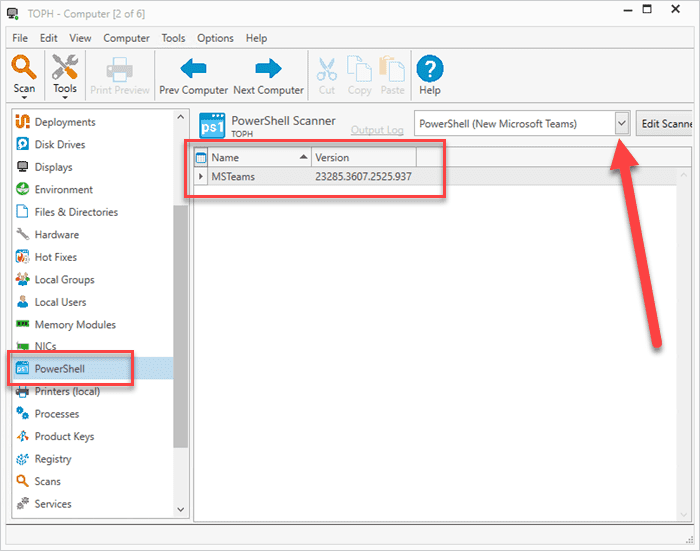
When the scan finishes, double-click on any computer you deployed the new Teams application to. Select the PowerShell menu option, then use the drop-down menu to ensure you select the right Scan Profile.


Once we've verified that the Scan Profile is working, we can create a dynamic collection with our gathered information.
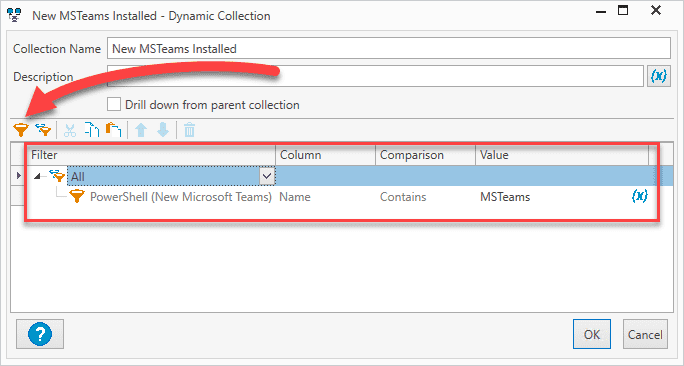
In the main PDQ Inventory window, click New Dynamic Collection.
Name the collection.
Ensure the collection starts with an All group filter.
Click the Add Value Filter button, then add the following filter details: <your PowerShell MSTeams scan profile name> | Name | Contains | MSTeams

With the dynamic collection in place, it should contain all the computers that have the new Microsoft Teams app installed.

Take your tracking to the next level with custom variables
If you really want to impress your coworkers (and who doesn't, right?), we can take things to the next level by adding a custom Microsoft Teams variable with the new version number.
In PDQ Inventory, click Options > Variables, then click New Variable. Give the variable the name @(NewMSTeamsLatest), then add the latest version number in the Value column. Just remember to update this variable information as the version number changes in the future.

With a custom variable established, we can create more detailed collections. Let's follow our Collection Library formatting convention and create three subcollections under the New MSTeams Installed collection we created above. To create subcollections, simply select the primary collection you wish to embed the subcollections in, then click the New Dynamic Collection button. Or you can drag and drop collections after they've been created.
Here are the three collections we'll create and their filters:
New MSTeams Latest
All
PowerShell (New Microsoft Teams) | Version | Version Equals | @(NewMSTeamsLatest)
New MSTeams Not Installed (sub)
Not All
PowerShell (New Microsoft Teams) | Name | Contains | MSTeams
New MSTeams Old
All
PowerShell (New Microsoft Teams) | Version | Version Lower Than | @(NewMSTeamsLatest)

If you used a different naming scheme than what I used in this example, you'll need to ensure you use the correct PowerShell Scanner and variable names.
How to deploy the new Microsoft Teams with PDQ Connect
If you have lots of remote machines in need of MS Teams 2.0, PDQ Connect might be the way to go. We’ll walk you through the deployment using PDQ Connect.
Deploying Teams 2.0 with PDQ Connect is quick, easy, and requires no human interaction (the ultimate trifecta).

Centralize your endpoint management
With PDQ Connect, gain real-time visibility, deploy software, remediate vulnerabilities, schedule reports, automate maintenance tasks, and access remote devices from one easy-to-use platform.
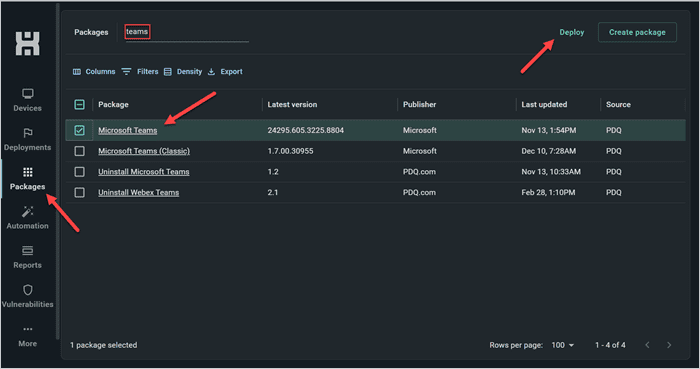
In PDQ Connect, click Packages on the left navigation bar. Input Teams into the search bar, check Microsoft Teams, and click Deploy.
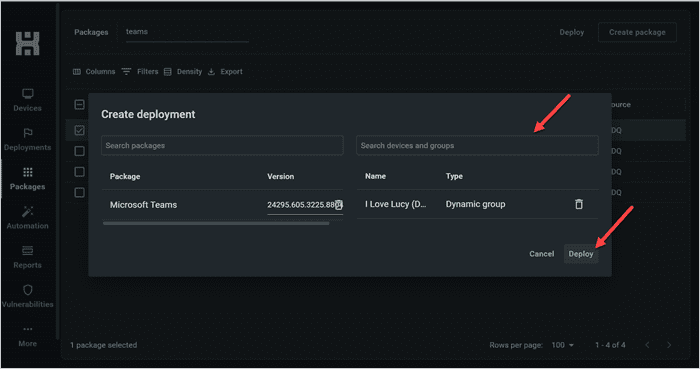
Use the search bar on the right-hand side to add your target devices, then click Deploy.


Manage Microsoft Store apps with PDQ
Microsoft left many sysadmins scrambling when they transitioned the new Teams to a Microsoft Store app. Don't be caught off guard when Microsoft throws you a curveball. PDQ ensures you have the tools necessary to manage your endpoints, no matter what tricks Microsoft has up its sleeves. Try PDQ Connect or PDQ Deploy & Inventory for 14 days and reduce your stress — and your step count.


