Whenever a new operating system launches, people can't wait to test out all the new features. In the case of Windows 11, there are plenty of new goodies to try out. You've got the new Microsoft store, snap layouts, the new widgets page, a centered taskbar, and a ton of other new features. However, once the honeymoon phase wears off, people tend to want things back the way they were. Come on, nobody likes change, right? That's why I'm going to show you a few different ways to get rid of the widgets page in Windows 11.
Widgets in Windows 11
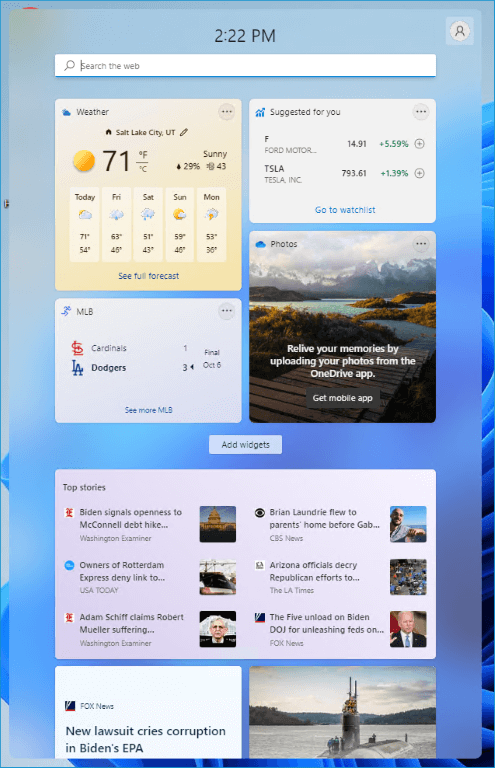
Widgets in Windows 11 is a page of interest's that users can customize to fit their needs. Interests such as the weather, sports, news, stocks, photos, traffic, calendar, and more can be added, removed, and customized by users.
To access widgets in Windows 11, click the widget's icon on the taskbar.

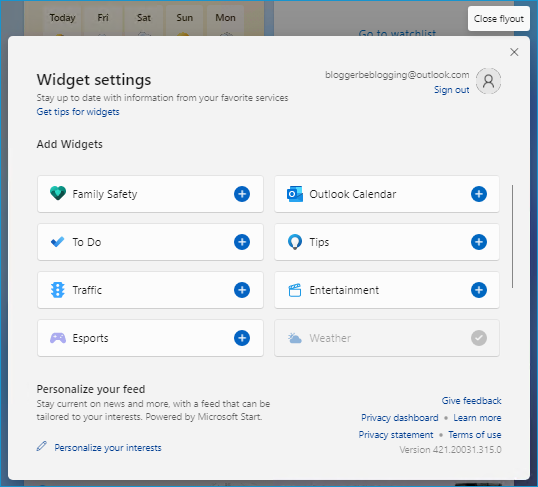
With the widgets page open, you can click the Add widgets button, which will open up the widget settings panel, where you can personalize your interests.
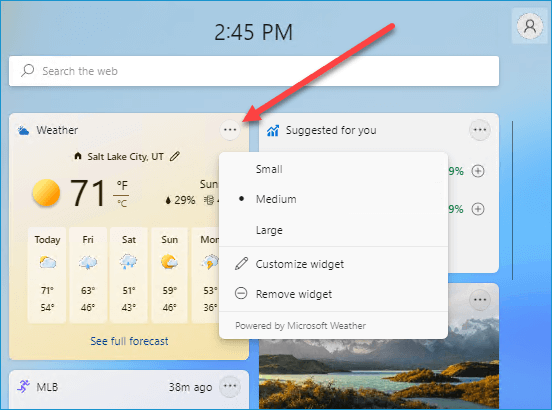
You can also tailor the size and settings of widgets by clicking on the ellipses (...) button on any widget.
Lastly, users can move widgets around the page by clicking on the top of a widget panel and dragging it to a new spot on the page.
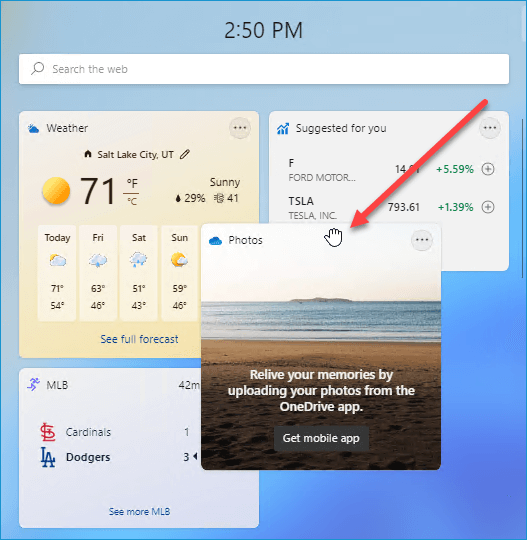
Microsoft designed the widgets page to give users a way of quickly accessing information they're interested in. However, many folks, myself included, have already decided that widgets aren't something we need or want. So how do we get rid of it? Here are a few methods to remove widgets from Windows 11.
Using taskbar settings to remove widgets
Using the taskbar settings page to remove (technically hide) widgets is the quickest and easiest way to remove the widget's icon. I say hide because, as you'll see in a moment, the widgets page and functionality are still present, even after changing this setting.
To remove the widget's icon from your taskbar:
Right-click on an empty space on your taskbar.
Click Taskbar settings.

In the settings page, turn Widgets off.
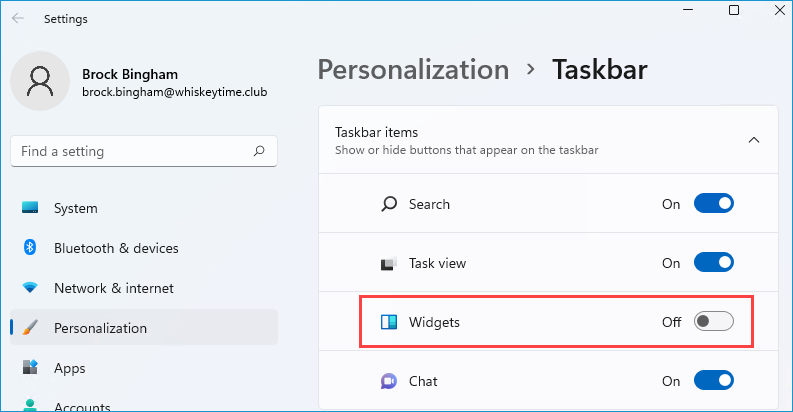
That's all there is to it. Or is it?
Like I mentioned, this setting only removes the widget icon from the taskbar; it doesn't actually remove the widget page or functionality. We can test this by using the keyboard shortcut to launch the widgets page (Windows key + w).
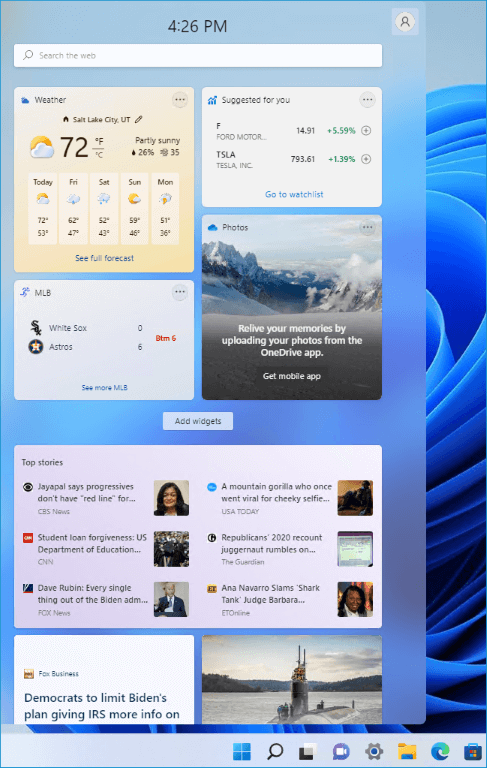
As you can see, there is no widget icon; however, we can still access the widget page.
Removing widgets using the Registry Editor
Alright, let's get a little more advanced and remove widgets using the Registry Editor. As always, if you are not familiar with modifying the registry, skip this step as you could do more damage than good. For everyone else, here is the registry key we'll be modifying.
HKEY_CURRENT_USER\Software\Microsoft\Windows\CurrentVersion\Explorer\Advanced\TaskbarDa
By default, this should be set to a value of 1. Double-click on TaskbarDa and change the value to a 0, then click OK.
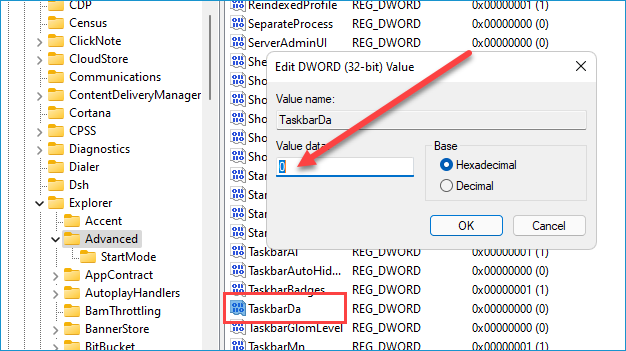
While this method will remove the widget's icon from the taskbar, unfortunately, the widget functionality still exists.
Removing Windows 11 widgets with group policy
Alright, let's look at one last method for removing widgets in Windows 11. Removing widgets with group policy not only removes the icon it also completely removes the widget functionality.
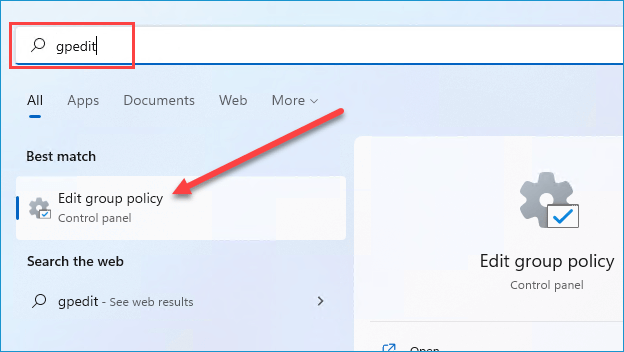
Click on the Windows 11 search icon.

In the search field, type in gpedit. Click Edit group policy in the search results.
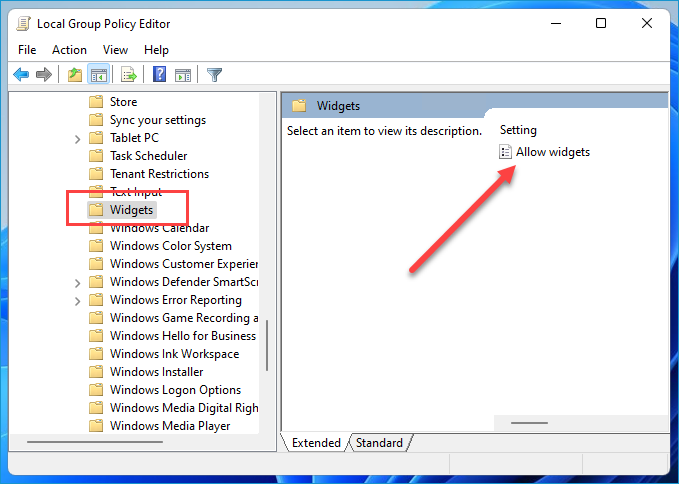
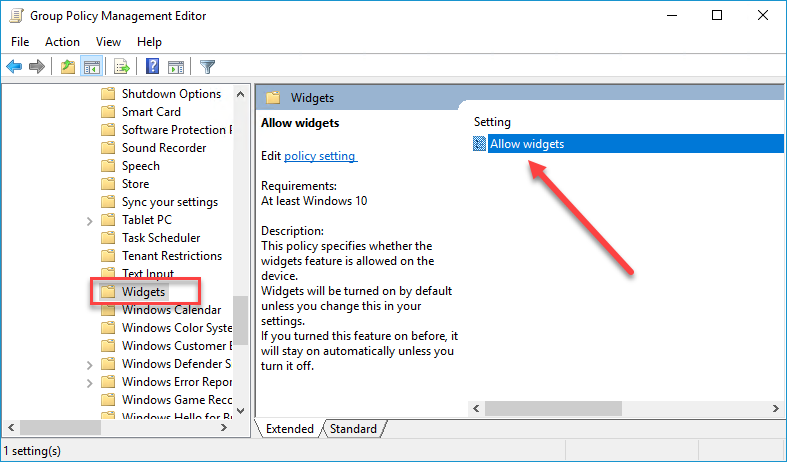
Navigate to the following group policy: Computer Configuration > Administrative Templates > Windows Components > Widgets
Double-click on Allow widgets.
Select Disabled and click OK.
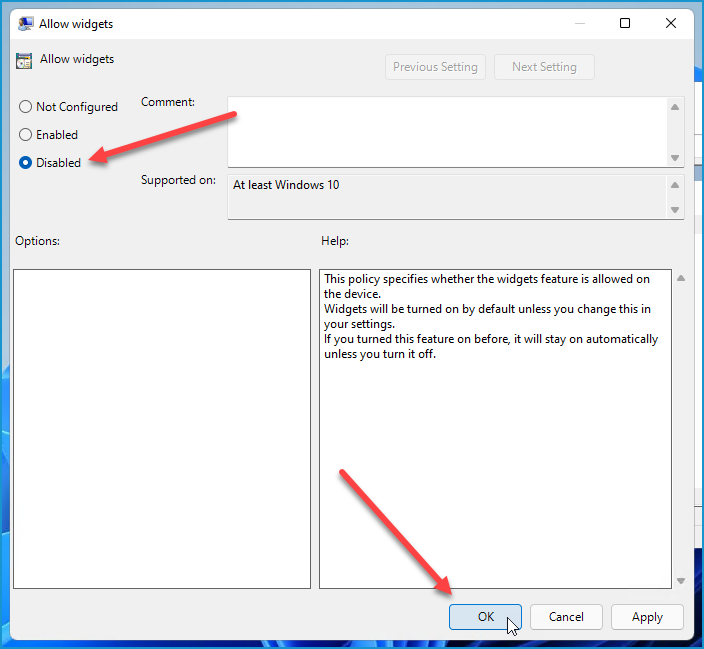
Close the Group Policy Editor and restart the computer. Once you restart the computer, both the widget icon and widget functionality should be disabled.
If you want to make this change across your network, you'll need to modify this setting on your domain in Group Policy Management. However, you most likely won't find this setting on your severs until you download the Windows 11 ADMX templates from Microsoft's website.
(This procedure is meant for system administrators.)
Once you've downloaded the MSI file, here's how to get the policies added to Group Policy Management.
Double-click the MSI you downloaded from Microsoft.
Click Next.
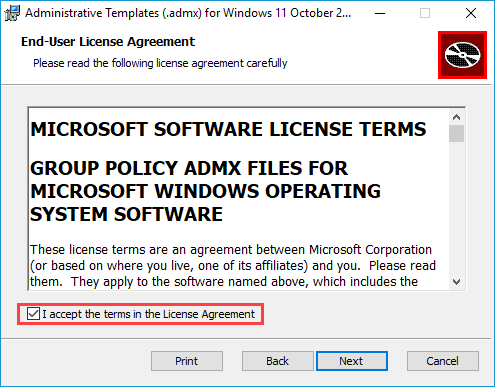
Select I accept the terms in the License Agreement and click Next.
Make a note of the location where the files will be saved, or browse to a location of your choosing.
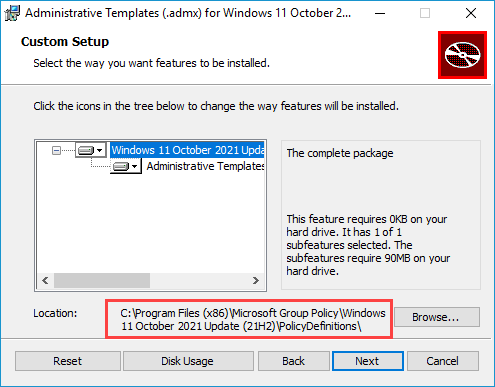
Click Next.
Click Install.
Browse to the location indicated in step 4. By default, my location was C:\Program Files (x86)\Microsoft Group Policy\Windows 11 October 2021 Update (21H2)\PolicyDefinitions\.
Copy the entire PolicyDefinitions folder.
Navigate to the following SYSVOL directory: \\domain.name\SYSVOL\domain.name\Policies\
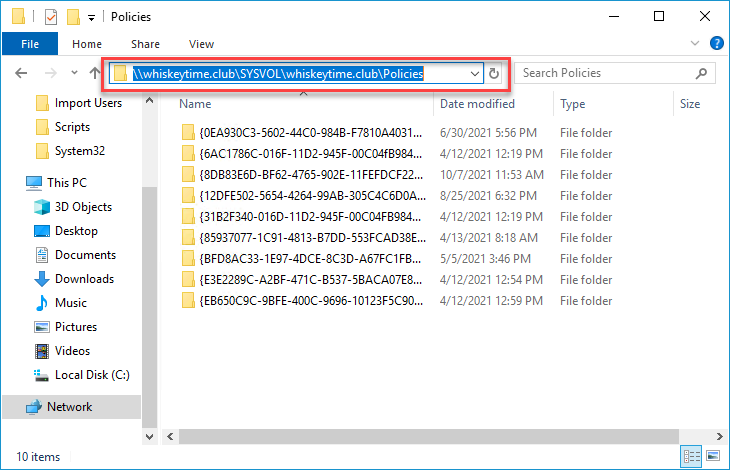
Paste the PolicyDefinitions folder in this location. If there is already an existing Policy Definitions folder, follow Microsoft's guide on managing a Central Store for Group Policy.
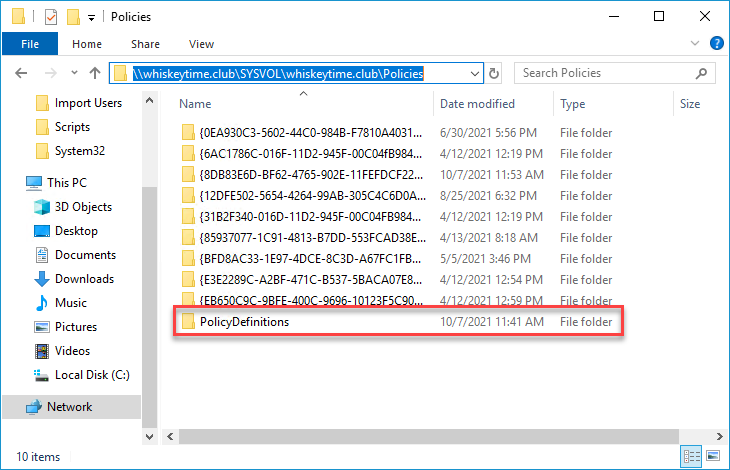
Once the policies finish copying over, you'll be able to find and set the Widgets policy in Group Policy Management.
Wrapping up
Windows 11 brings with it loads of new features. Some that you'll probably love *cough* snap layouts *cough*, and some that you'd rather not have to deal with.
If you're considering switching to Windows 11, but you're worried about the minimum requirements, check out this article where I go over finding Windows 11 compatible devices with PDQ Inventory.


