If you’re trying to set up your first deployment in PDQ Deploy and looking for help, you’ve come to the right place. This guide will cover everything you need to know to deploy packages like a seasoned veteran. So, crack open a Tab soda and throw on some Duran Duran because before you know it, you’ll have deployments flying out to all your managed devices.
Configuring PDQ Inventory
In this article, we’ll use PDQ Inventory to help with our deployment. While it’s not necessary to use PDQ Inventory, it simplifies device targeting and tracking installations.
For example, instead of deploying the newest version of Google Chrome to all your devices, you could use PDQ Inventory to target only computers that do not currently have the latest version of Google Chrome already installed, saving network resources by limiting redundant deployments.
Alternatively, you can use Active Directory, Spiceworks, target lists, text files, or manually entered computer names or IP addresses to target devices.
If you’re new to PDQ Inventory, check our getting started guide, which walks you through importing computers, understanding collections, creating scanners, and more.
Downloading packages from the Package Library
The Package Library is a collection of packages built and maintained by PDQ. It contains packages for tons of popular Windows applications, including Chrome, Firefox, Java, iTunes, Slack, Adobe Reader, Microsoft Teams, and many more. It also contains packages for Windows cumulative updates that are constantly updated and ready to deploy to your devices.
For this guide, I’ll use the Google Drive package in the Package Library. Feel free to follow along using any package of your choice. The instructions are the same, except you will target a different PDQ Inventory collection with your deployment.
Here’s how to download a package from the Package Library:
1. With PDQ Deploy open, click the Package Library button.
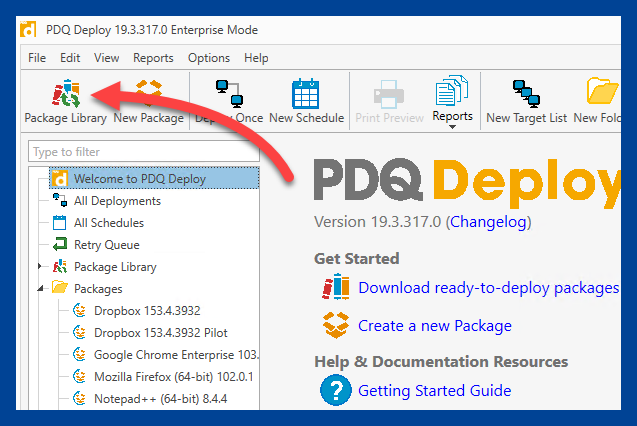
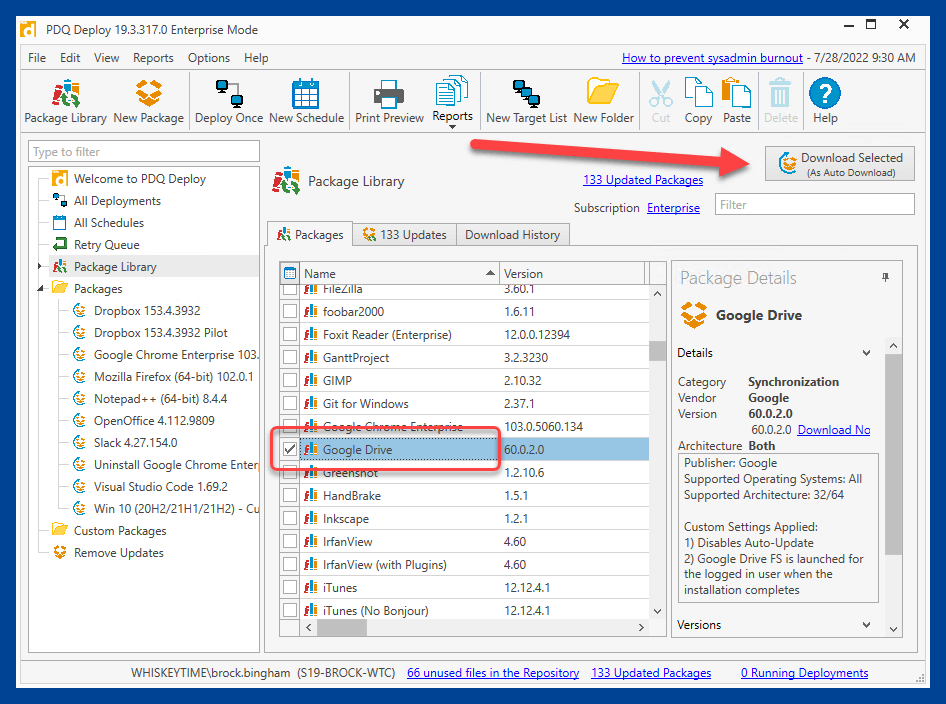
2. Scroll through the list of packages, and click on the package you wish to download. I’ve selected the Google Drive package for this example.
3. Click Download Selected (As Auto Download).
4. Once the package downloads, it will appear in your Packages folder.
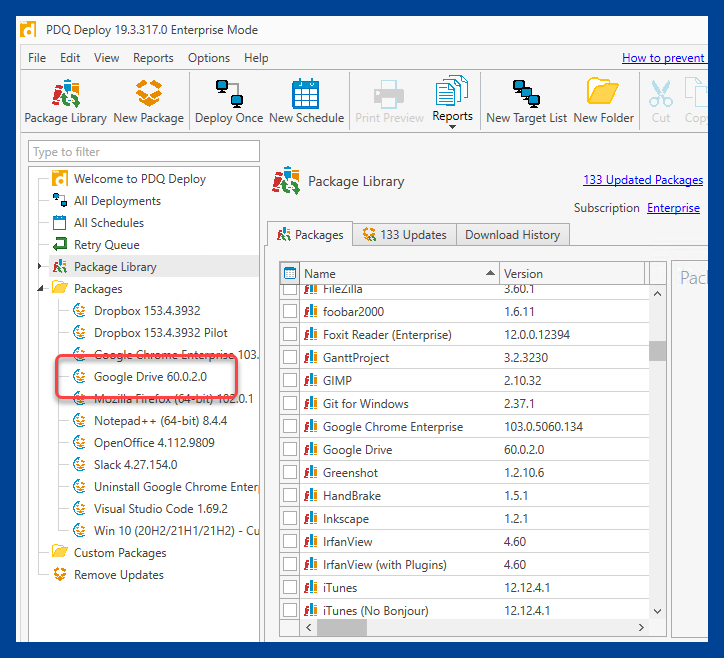
Packages downloaded using this method are called Auto Download packages. Auto Download packages automatically download the newest version of that package when it becomes available based on your auto download settings configured in PDQ Deploy’s Preferences menu. By default, Auto Download packages are configured to automatically approve and download new package versions after they’ve been available for seven days. You can modify this setting by clicking on Options > Preferences > Auto Download.
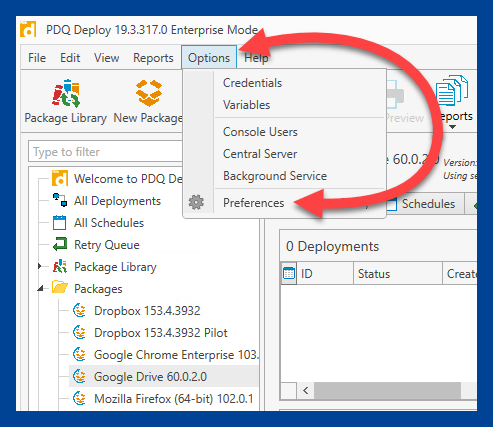
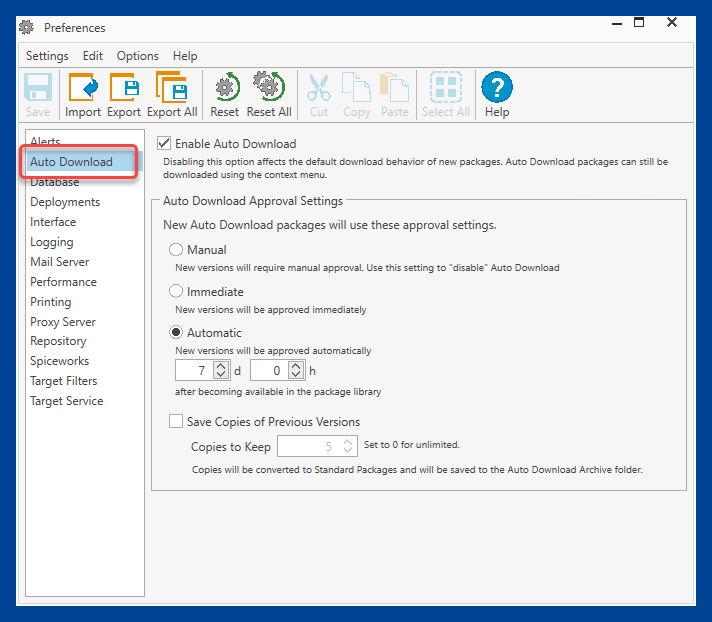
The default Auto Download configuration is a good starting point, but you may need to adjust these settings to meet your organization's needs.
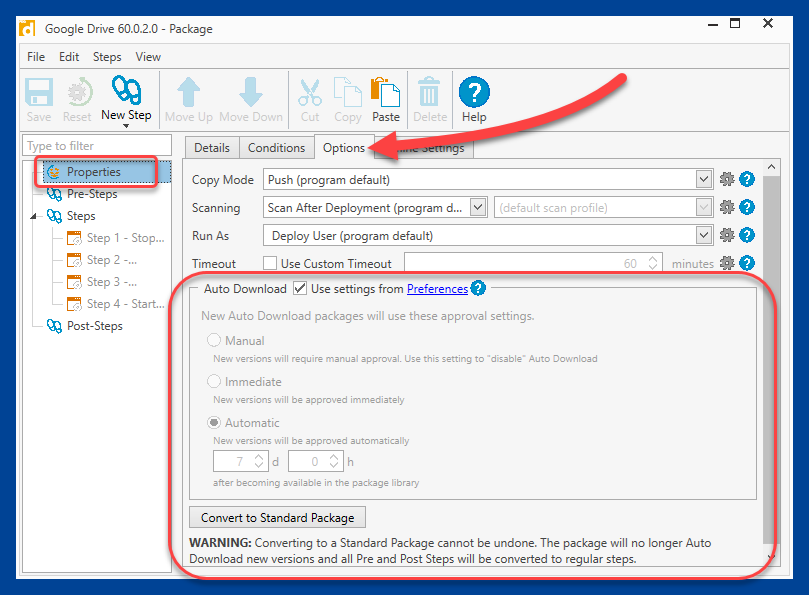
You can also adjust settings for individual packages, which can be helpful for unique scenarios and testing groups. You can modify settings at the package level by double-clicking a package to open it, clicking Properties, and then clicking the Options tab.
How to deploy packages with PDQ Deploy
Now that we’ve downloaded the package, it’s time to deploy it to the correct devices.
For this example, I want to distribute the latest version of Google Drive to computers with an old version of Google Drive already installed. This is where PDQ Inventory can really help. PDQ Inventory tracks installed applications. It can quickly identify which computers have an old version of Google Drive installed. It does the tedious task of tracking this information so that you don’t have to.
Here's how to deploy the package:
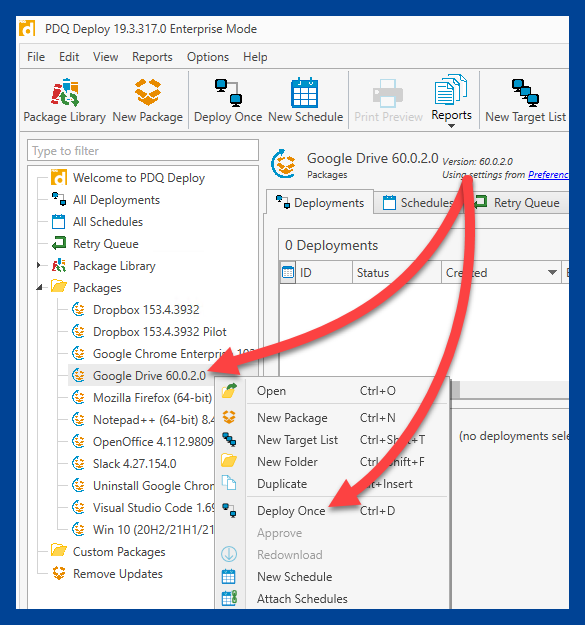
1. In PDQ Deploy, right-click on the package you want to deploy (Google Drive for this example).
2. Click Deploy Once.
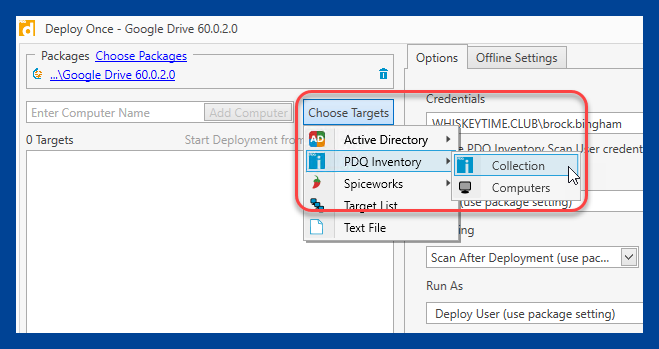
3. At the Deploy Once window, click Choose Targets> PDQ Inventory > Collection.
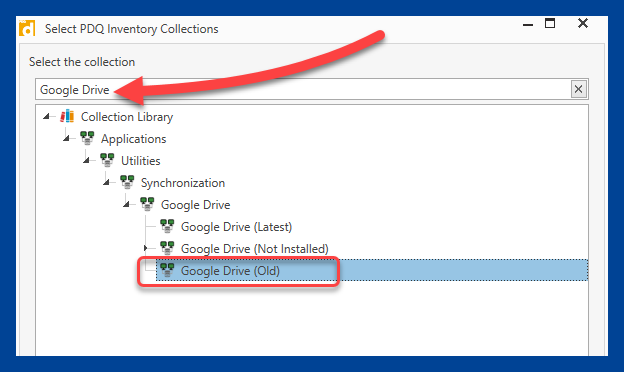
4. Enter the name of the application you’re deploying in the filter field.
5. Expand the list of collections, and select the collection you wish to deploy to. I’m deploying to the Google Drive (Old) collection, which contains computers with an old version of Google Drive currently installed.
6. Click OK to close the PDQ Inventory Collections window, and confirm your selection.
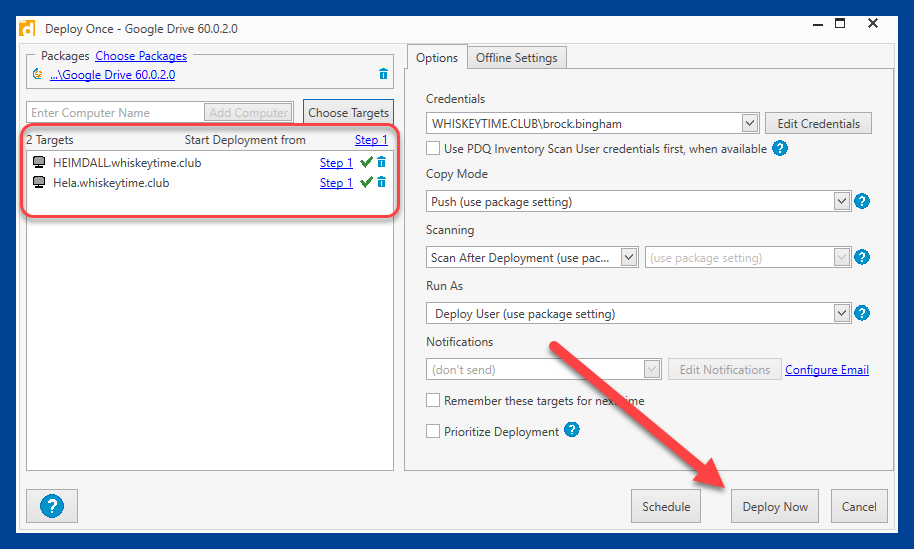
7. The computers that are members of the collection you selected will be added to the targets list. Review the targets, and when you are ready, click Deploy Now.
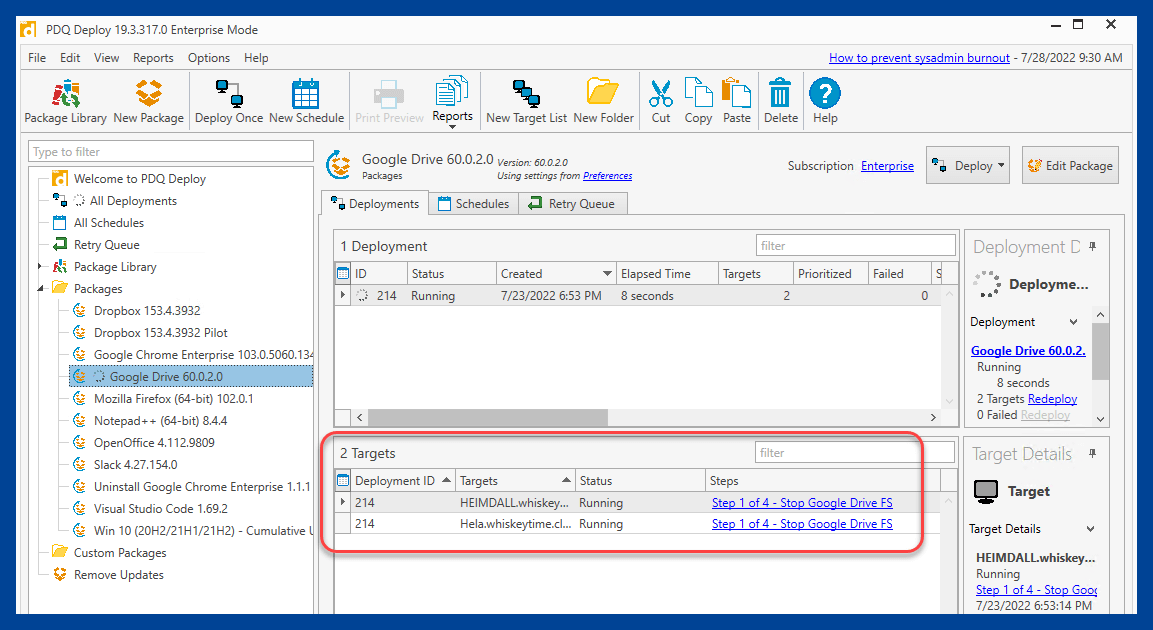
The package is then deployed to the selected targets. During the deployment, you will be shown the deployment status window where you can monitor each phase of the operation.
First deployment down, many more to go
With your first deployment out of the way, there’s still much more to learn and do in PDQ Deploy. Check out our guide on automating patch management, which will help you start automating all of your deployments. Want to learn how to build custom packages? We’ve got you covered.
If you’re not already using PDQ Deploy and Inventory, what are you waiting for? Download a free trial today! With the perfect combination of power and simplicity, Deploy and Inventory will help you reclaim the countless hours you spend manually managing devices and deployments.


