Java has been around a long time. We're talking Microsoft Windows 95 timeframe. While so many other original tech titans have come and gone (RIP Flash Player and Microsoft Internet Explorer), Java remains a staple of many network environments. However, Java's never been known for its ease of administration. Thankfully, with a little help from PDQ and PolicyPak, we can almost entirely automate the administration of Java.
Tracking Java with PDQ Inventory
The first stop on our journey to Javautomation (trademark not pending) is tracking our Java client installs. Since manually tracking this information would be beneath us, we'll rely on PDQ Inventory to tackle it for us.
PDQ Inventory comes out of the gate with hundreds of default collections. Collections are containers that group devices together if they match certain filter criteria. For example, computers with Mozilla Firefox installed automatically become members of the Mozilla Firefox collection. Since these collections are dynamic, computers automatically move between collections as they match collection filters. If a computer no longer meets a collection's requirements, it is removed from the collection.
As you might have guessed, PDQ Inventory comes prepackaged with all the Java runtime environment collections you'll need. You can find the Java JRE collections in PDQ Inventory by going to Collection Library > Runtimes > Java (JRE).
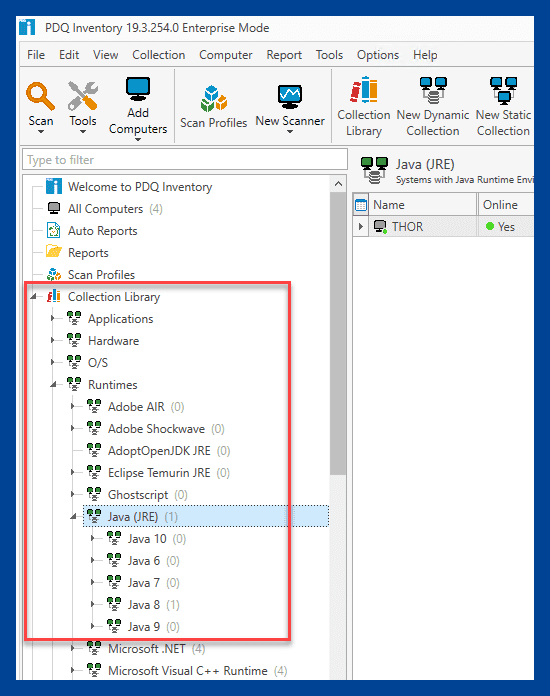
You'll notice from the image above that I only have one computer with Java installed, and it's also a member of the Java 8 collections, meaning that's what version is installed. If I dive into the Java 8 collection, I can get even more detailed information.
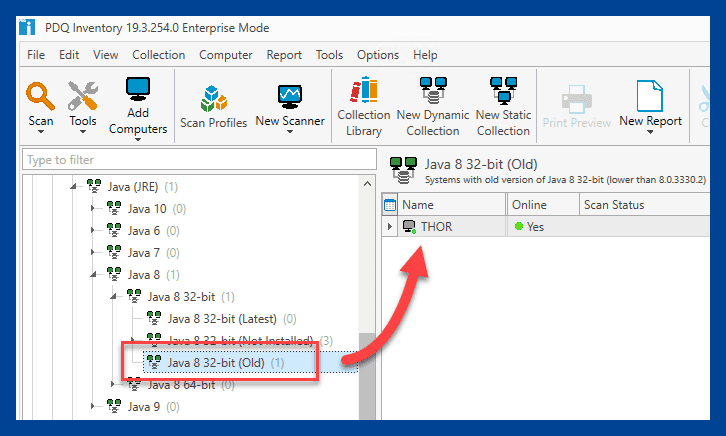
As you can see, I've got one computer that is a member of the Java 8 32-bit (Old) collection, meaning that this computer has an old version of Java 8 installed, not the latest version.
Now that we know we can easily track out Java installations, we'll switch over to PDQ Deploy to manage our Java deployments.
Deploying and updating Java with PDQ Deploy
With PDQ Inventory tracking our Java installations, we can now use PDQ Deploy to manage our Java deployments and updates.
PDQ Deploy makes it super easy to deploy and update Java across a network silently. The Package Library in Deploy includes a prebuilt Java package, so you just need to download the package and point it to the endpoints that need it installed. Here's how it works:
In PDQ Deploy, click Package Library.
In the Package Library filter box, enter Java.
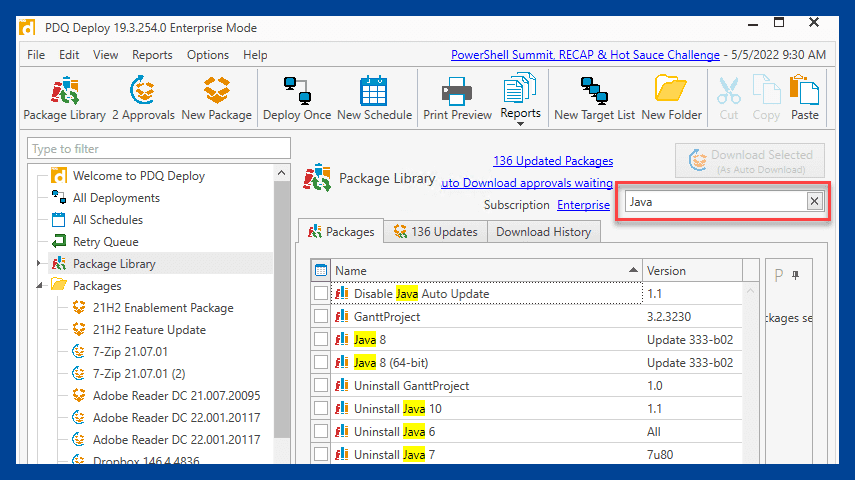
Double-click the Java package to download it. You should now have the package available to deploy.
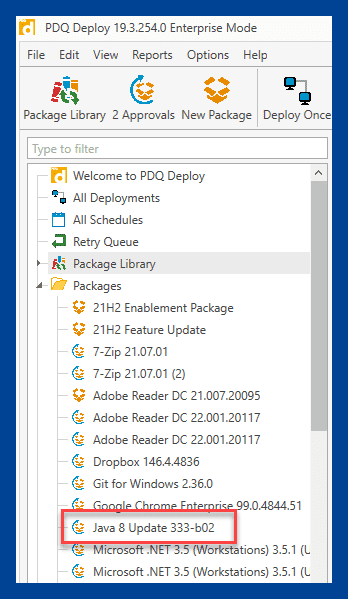
Right-click on the Java package, and click Deploy Once.
Enter a computer name to target in the Add Computer field, then click Add Computer.
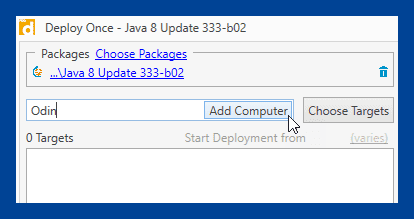
Alternatively, you can choose targets from PDQ Inventory, Active Directory, or Spiceworks.
With your targets added, click Deploy Now.
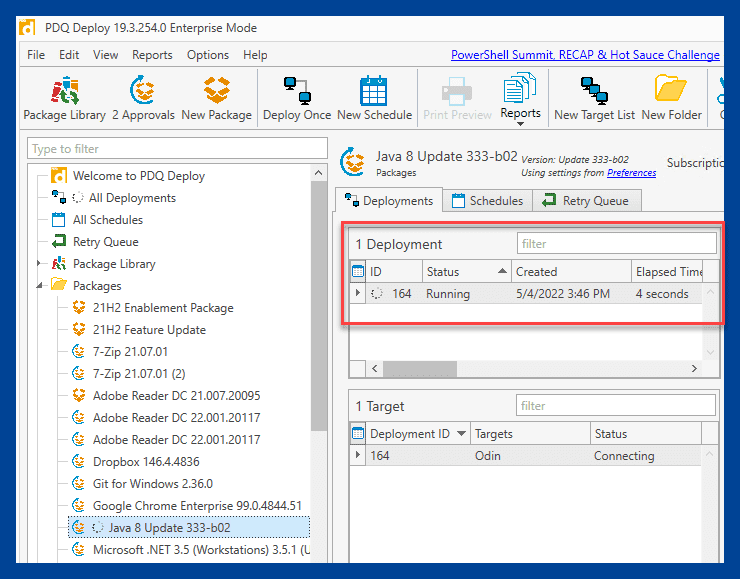
With the package selected, you'll be able to track the progress of your deployment.
Once the deployment finishes, you can go back to PDQ Inventory to see if the collections have updated.
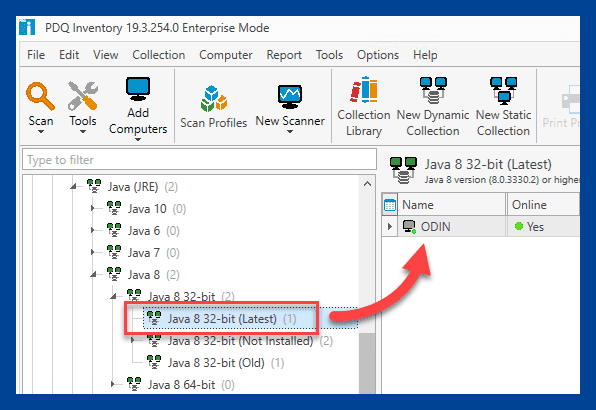
If you don't see the change in PDQ Inventory, you can manually kick off a scan to ensure you have collected the latest system information.
Deploying Java (or any application from the Package Library, for that matter) is extremely easy with PDQ Deploy. But what makes PDQ Deploy and Inventory great together is that you can automate patch deployments. Here's how it's done:
In PDQ Deploy, right-click on the Java package that we downloaded from the Package Library, then click on New Schedule.
Enter a name for the schedule, such as Java Schedule.
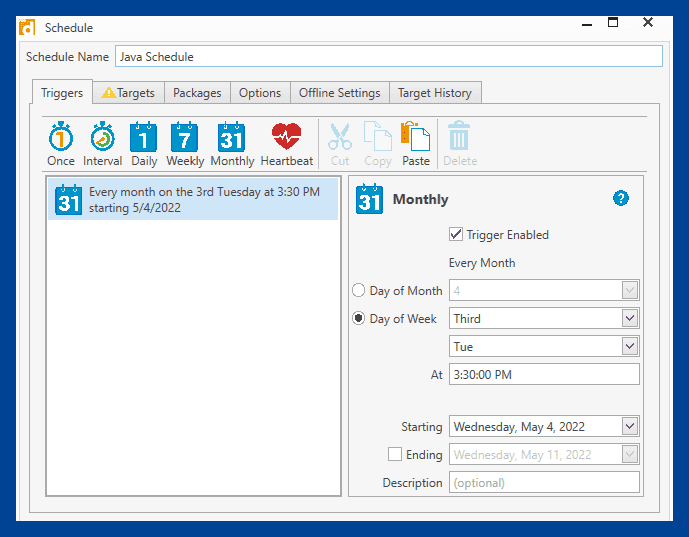
Click on the Triggers tab. The Triggers window allows you to configure how often a package is deployed. You can configure this schedule to best suit your environment. I've added a monthly trigger that deploys the package every third Tuesday of the month at 3:30 p.m.
Click on the Targets tab.
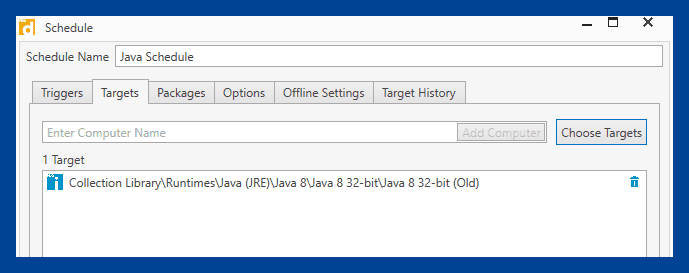
Click Choose Targets > PDQ Inventory > Collections.
Navigate to the Java 8 32-bit (Old) collection, select it, and click OK.
Click on the Options tab.
Make sure Stop deploying to targets once they succeed is checked.
Click OK to save your new Java schedule and close the Schedule window.
As new versions of Java are released, computers move from the Java (latest) collection to the Java (old) collection in PDQ Inventory. This schedule we just created then deploys the latest version of Java on the third Tuesday of the month to any computers in the Java (old) collection, automating its patch deployments.
Managing Java settings with PolicyPak
While PDQ Deploy and Inventory manage Java deployments and inventory tracking, PolicyPak is the secret sauce that makes managing Java's settings a walk in the park.
PolicyPak offers an extensive collection of application, security, and device policies that you can deploy through various platforms, such as Group Policy, MDM, or the cloud. For this example, we'll show you how to deploy Java settings using PolicyPak and Group Policy. This section assumes you’ve already installed the PolicyPak Admin Console, the correct application pak (Oracle Java Version 7 and Later for Windows 7 and Later), and the Client-Side Extension. Check out our easy-to-follow installation guide if you need help getting started with PolicyPak.
Before we create our Java policy, let's first look at one of my test computers to see how Java is currently configured.
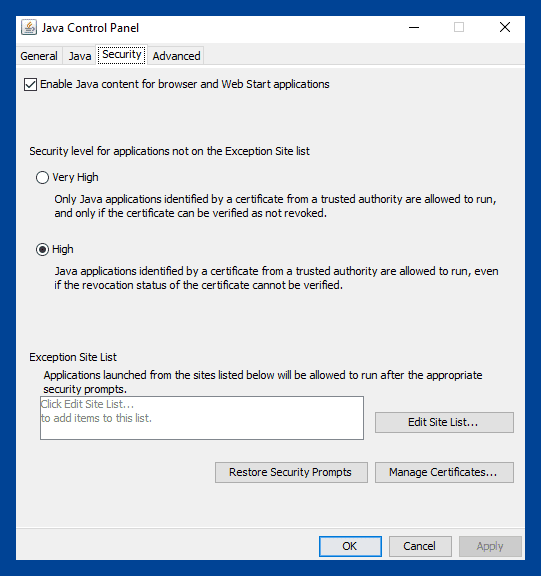
Notice that I don't have an Update tab in the Java Control Panel. Since we deployed Java using PDQ Deploy, the package includes a transform file that automatically removes the Update tab. This setting could also be managed using PolicyPak if needed. Also, notice in the Java Control Panel that our security level is set to Highand that we don't currently have any sites added to the Exception Site List. We'll use PolicyPak to modify both the Java security setting and the Exception Site List. Here's how to build the policy:
Open Group Policy Management. Remember, the computer you are launching Group Policy Management on should also have the PolicyPak Admin Console installed.
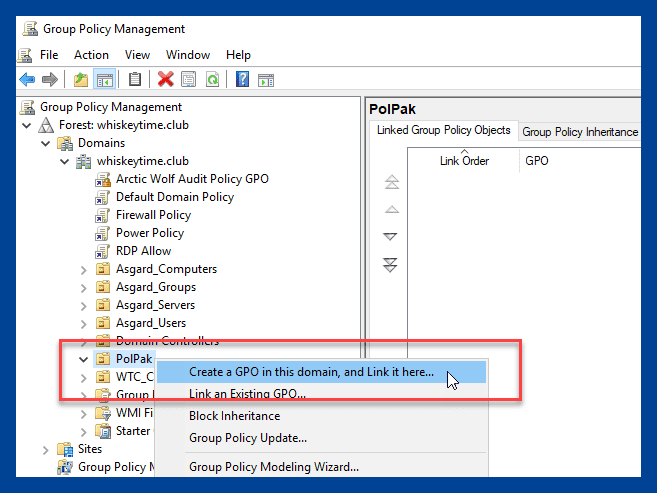
Right-click on the OU or domain you want to link this Java group policy object, then click Create a GPO in this domain, and Link it here…
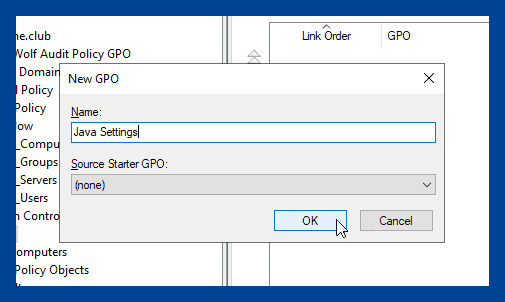
Name the GPO, then click OK.
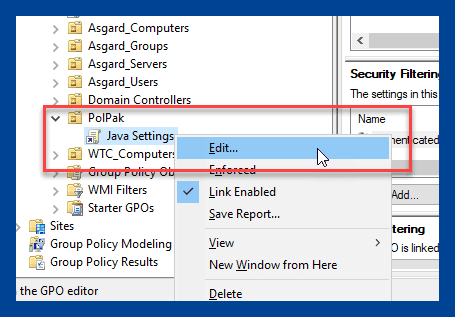
Right-click on the newly created GPO, and click Edit…
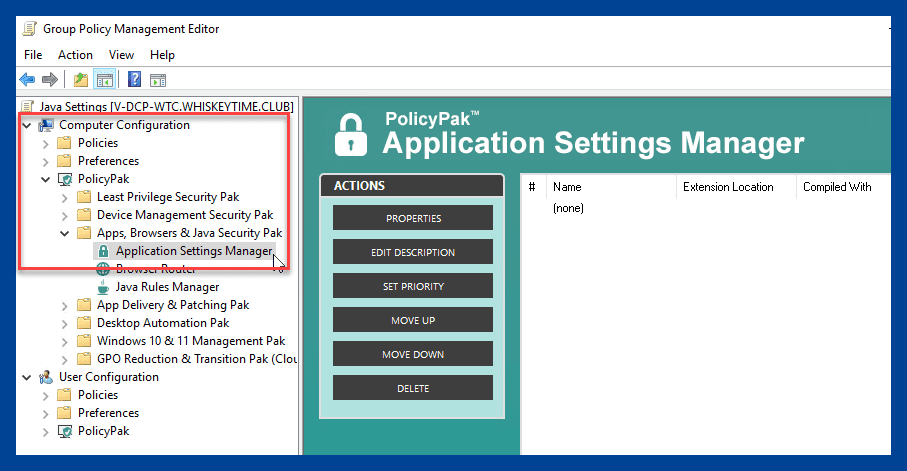
Expand Computer Configuration > PolicyPak > Apps, Browsers & Java Security Pak, then click on Application Settings Manager.
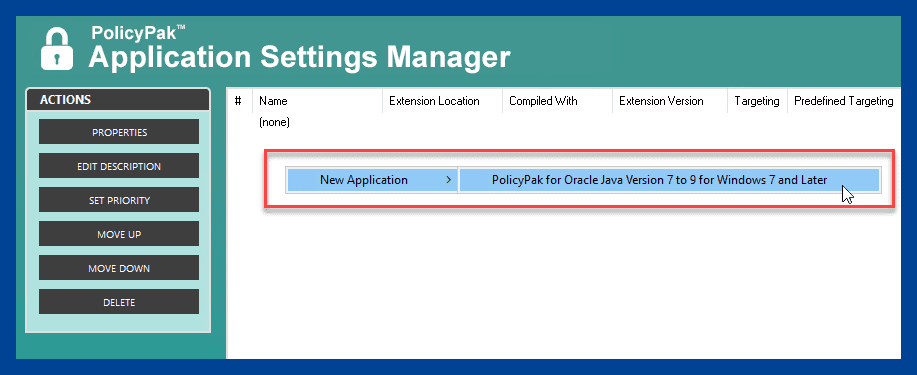
In the Application Settings Manager window, right-click in the white space, and click New Application > PolicyPak for Oracle Java Version 7 to 9 for Windows 7 and Later.
Double-click on your newly added Java application pak to open the settings window.
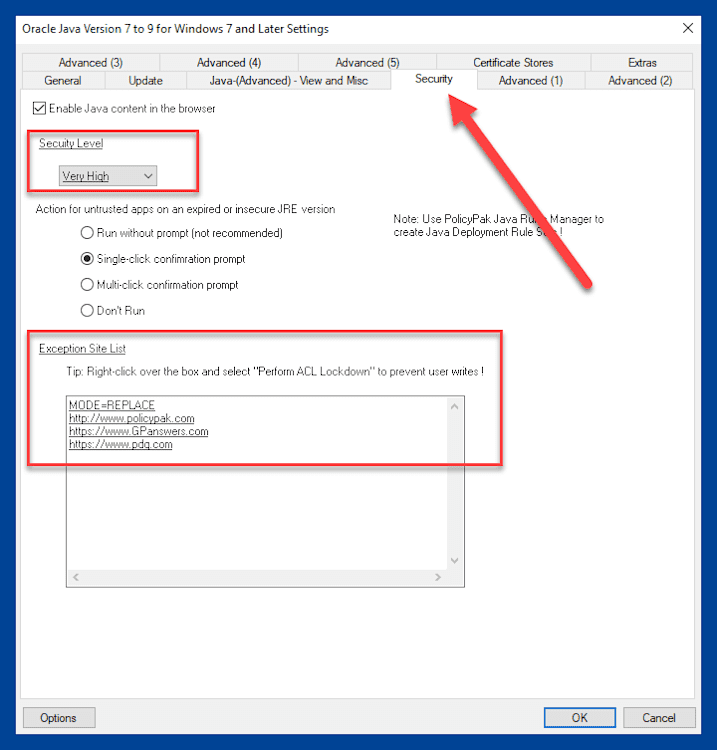
Click on the Security tab and change the Security Level to Very High.
Add whatever websites you'd like to the Exception Site List. I'll add pdq.com.
When you're finished, click OK.
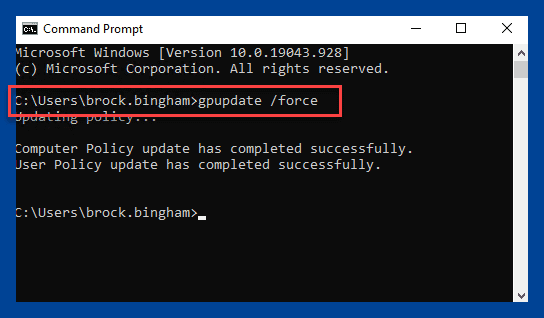
With our settings configured, we'll check our test machine to ensure the settings were applied. To speed the process up, I'll run the command gpupdate /force on the test computer to make sure it gets the newest Group Policies. You can also wait for the computer to naturally propagate the changes or restart the computer to force the policy update.
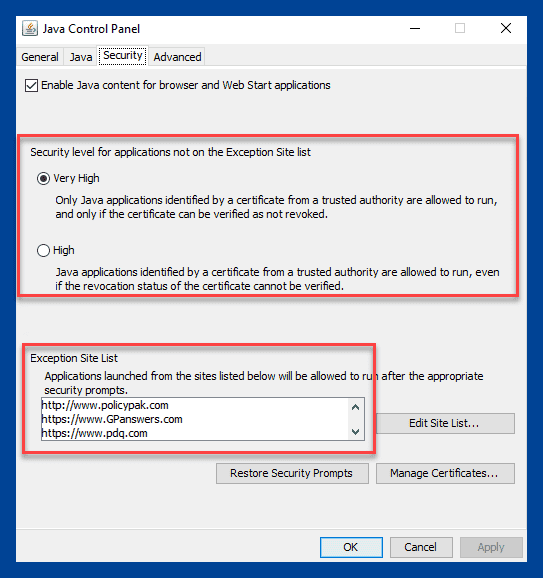
Now, if we open up the Java Control Panel on our test computer and click on the Security tab, we'll see that our security level is set to Very High and our Exception Site List has a few websites added.
Java made easy
Managing Java for hundreds or thousands of endpoints can be time consuming and frustrating, but it doesn't have to be. With PDQ and PolicyPak, you'll be able to track, deploy, and manage Java with ease.
If you're tired of manually administering your endpoints and systems, do yourself a favor and download a free 14-day trial of PDQ Deploy and Inventory and contact PolicyPak for a free trial of their incredible platform. Your only regret will be that you didn't do it sooner.

