In this post, we’ll show you how to set up DNS since it is a very important part of what makes PDQ Deploy and PDQ Inventory tick.
For this guide, we’ll assume that you’ll be using Window DNS and that the role is already installed to whatever server will be your DNS server.
Scavenging
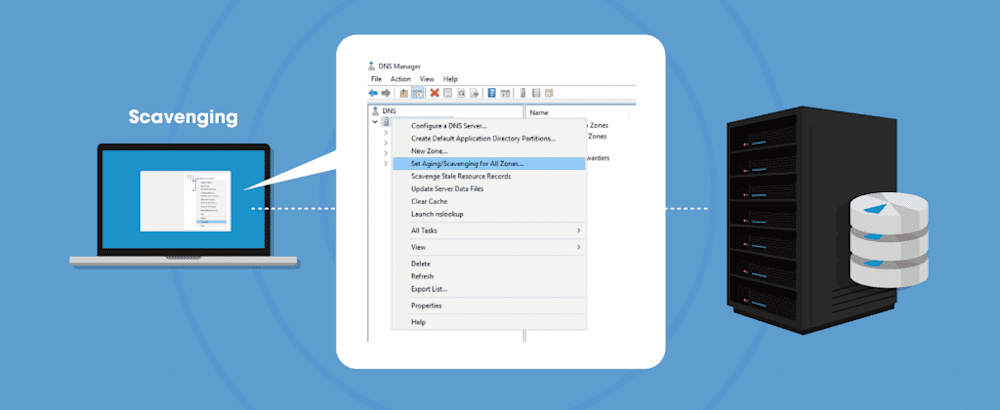
By default Windows DNS will not remove any records once created, this becomes a problem as records slowly turn stale. The records no longer reflect the correct IP address and the records may represent a device that is no longer in use. Scavenging can be configured per-zone or a default can be set for all zones by right-clicking on the server in DNS manager and selecting, Set Aging/Scavenging for All Zones.

Individually the no-refresh interval and the refresh interval must be below the DHCP lease time. The default for both of them is seven days as the default DHCP lease time for Windows DHCP is eight days. If your environment is configured differently you’ll want to change your DHCP lease time.
Once scavenging is set you can expect… not too much at first. The DNS server will wait the total time of the two settings together to remove any records since our example is seven and seven you can expect records to be removed after fourteen days of no activity.
Reverse lookup zones
DNS normally is used to resolve a hostname to an IP address, creating reverse lookup zones enables your environment to resolve IP addresses to hostnames. It’s like DNS but in reverse. It’s generally a good idea to have one zone for each network segment you have.
Right click on the reverse lookup zones folder and click new zone and then click next to start the wizard.
Unless you have a need to change these the default options of Primary Zone, Stored in Active Directory, and “To all DNS server running in the domain” are a good choice. If your setting up the zone for IPv4 (like 192.168.1.24) or IPv6 (like fe80::e8c8:6f7e:44e4:b7fd%3) make that choice here.
We’ll assume that you’ll be setting up reverse lookup for an IPv4 range.
We’ll want to allow both non-secure and secure dynamic updates, this will allow devices other than Windows computers to update DNS records. If you have specific requirement to disallow non-secure updates feel free to use secure only but be aware that only Windows computers part of the domain will be able to update their records. Once you made your selection press next and the finish to add the new reverse lookup zone you’ll want to add any other subnets that you use as well.
Forwarders
Lastly, you’ll want to set up DNS forwarders. While your DNS server can query what is called the root DNS servers directly, the root DNS servers are very busy and can take a while to respond. By adding forwards to your DNS infrastructure your DNS servers can more quickly resolve hostnames without needing to take the long trek required to speak with a root DNS server.
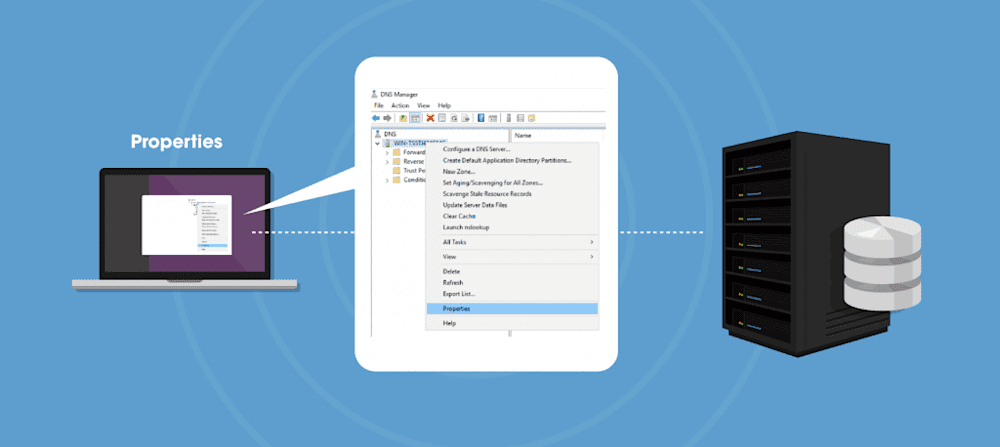
To start, right click on your DNS server and click properties.

Once the properties window opens click the forwarders tab. Unless you have a reason to uncheck it we’d recommend leaving the use root hints box checked in case there is an issue reaching any of the forwarders.
Now click the edit button to open a new window in which DNS server addresses can be entered
This field can accept both IPv4 and IPv6 addresses.
For this example, we’re using the 1.1.1.1 (Cloudflare), 8.8.8.8 (Google), and 9.9.9.9 (IBM) DNS servers.
The default timeout for queries can be left at 3 seconds. If you notice 3 seconds is not enough adjusting it upward may be required.
Now that all of that is done your DNS is in a good state!
Loading...


