Want to impress the boss? In under five minutes (and just five steps), we’ll show you how easy it is to identify, sniff out, and remove unwanted applications using PDQ Inventory. We all have those end users who unwittingly (or not so unwittingly) unleash pesky applications on our environments. You are the sysadmin, the guardian of your domain, let’s show those applications who’s boss. In PDQ Inventory, once you’ve successfully scanned your machines, you have access to a multitude of information. Now let’s look at narrowing that down. The easiest way to accomplish this is with our built-in Reports.
5 easy steps to locate and remove unwanted applications with PDQ Inventory
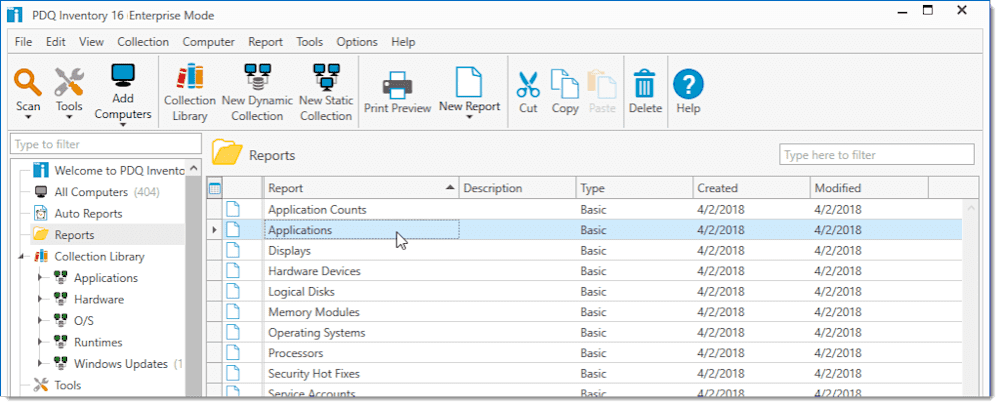
1. On the Main Console, click the Reports folder to view its content.

2. Select Applications and double-click to open it.
This opens the Applications – Report window, with All Computers as your collection source. Opening the report from the tree instead of a menu ensures that you are viewing all computers and not limiting your results.
3. On the Name column, right-click and select Group by this Column.
This will give you a list of all applications grouped by name and version number. A quick scroll can show you some obvious results of applications that shouldn’t be there.
4. Click the arrow in front of the application name to see all computers with that application installed.
5. (Optional) Use the filter field to narrow down the results by application name. Here are a few to try out: coupon, toolbar, CCleaner, torrent, Overwatch.
Wrapping up
Now we can take action and send a snarky warning to that user, put together a list to turn in to administration, or better yet, uninstall through Inventory. Watch this video for even more information. The options are endless!
Loading...


