Prior to remotely installing Office 2010 to your company, you'll want to run the admin tool, also known as the Office Customization Tool.
We have a video which demonstrates using the Office Customization Wizard. We'll also show a step-by-step below.
How to run the Office Customization Tool
Copy your Office 2010 setup disc to a folder on your workstation and open a command window. Change directories (cd) to your setup.exe location and run the following:
setup.exe /admin
The customization tool will open up.
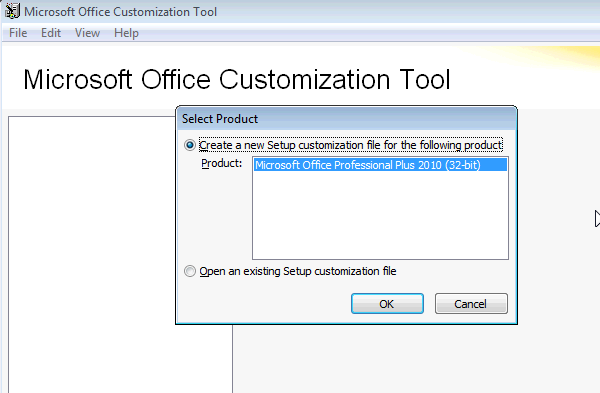
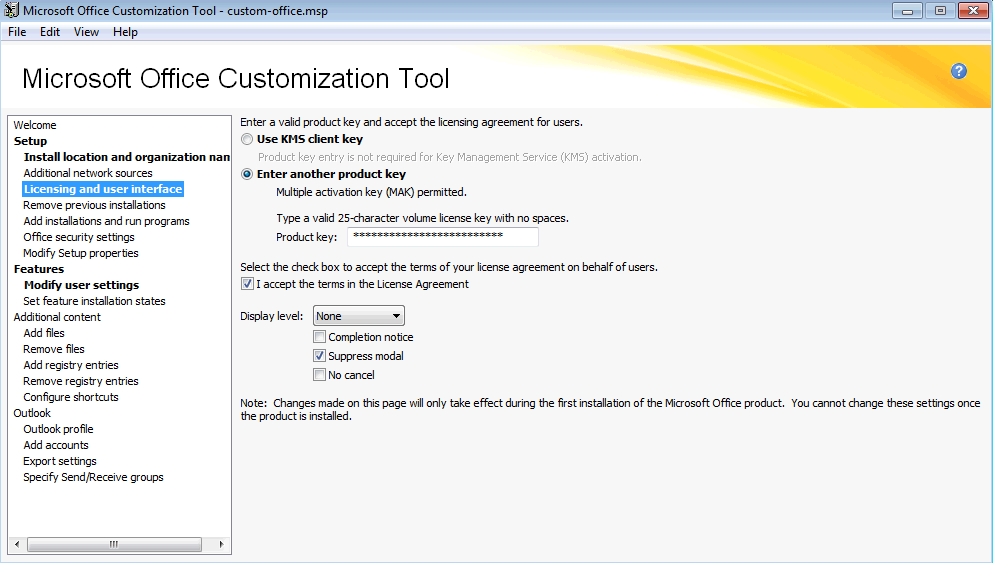
Like most customization tools, there is too much to go through here, but we'd like to focus on the customizations that will make it easier for deployment without bothering your users as well as to disable some common "phone-home" features. (While these might be helpful features, some companies have policies against such feedback).
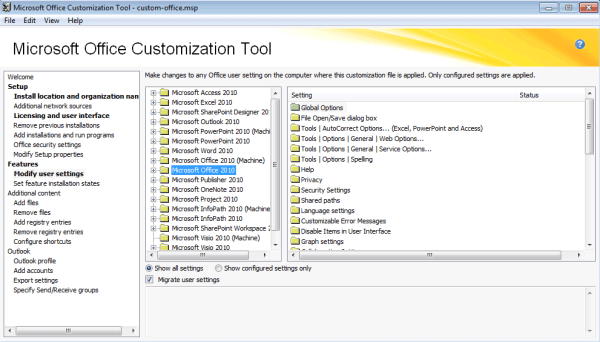
Hit the important areas to you, but be sure to select the "Microsoft Office 2010" selection, which contains some settings that are important.
After you've entered your volume license key, disabled the auto-start wizard, and disabled the phone-home settings, you're ready to make other changes as well.
Looking for more ways to work with remote Windows devices? We can walk you through how to remotely activate Microsoft Office and how to enable Windows Remote Management (WinRM).
Take the time to walk around the tool and see if there are other settings that would be helpful to you. If you have a SharePoint server this is a good way to customize the URL for your document library, etc. If you have an Exchange server this is also a fast way to ensure that all installations of Outlook point to the correct server.
A huge thanks out to the developers at Microsoft who continue to make this tool available. It helps those of us who rely on Microsoft Office everyday.

