Need to know how to remotely install printer drivers? You’re in the right place! In this blog, I’ll cover how to remotely install printer drivers in two ways: using print server and creating a TCP/IP port.
Method 1: Use print server
Using print server is one of the easier methods when paired with PDQ Deploy & Inventory or PDQ Connect. Print server adds the printer for all users on the target machine, so you won’t have to go in and add the printer for each individual user who logs into the PC.
We can add a printer using print server if we run a few commands. To do that, let’s create a package in PDQ Deploy & Inventory and add three command steps to it.
1. From the PDQ Deploy console, click New Package.
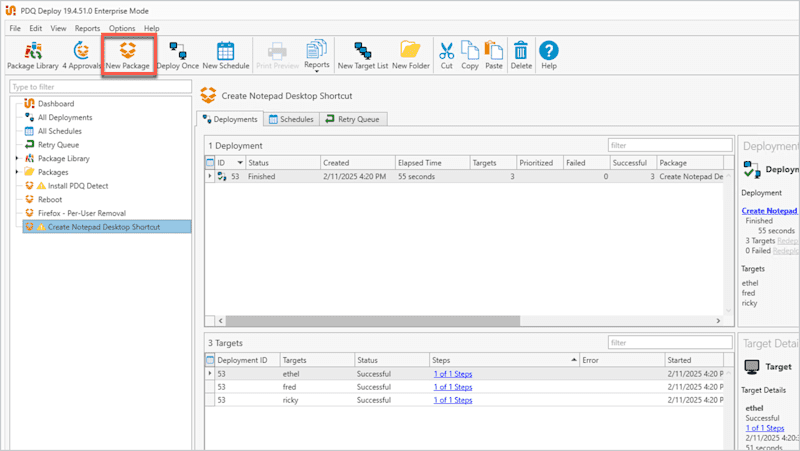
2. Give the package a name in the Name field.
3. Click Steps, and then, click Command.
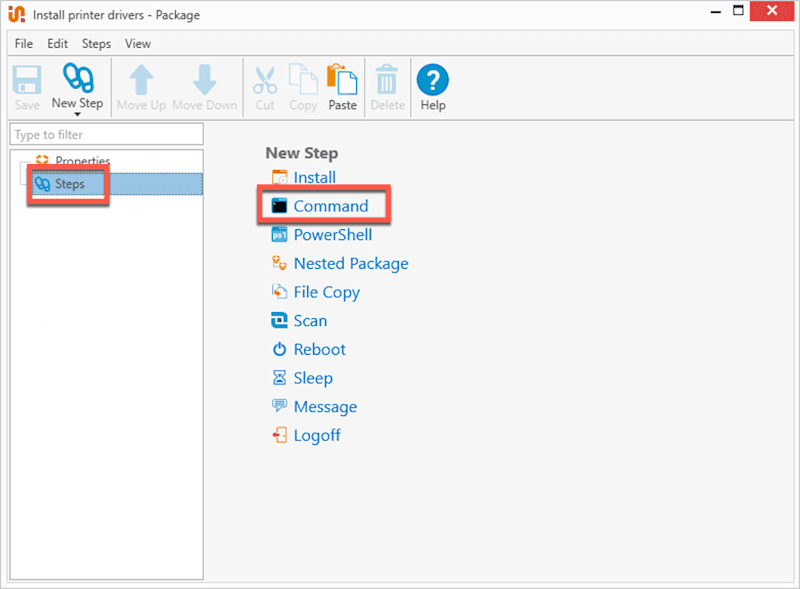
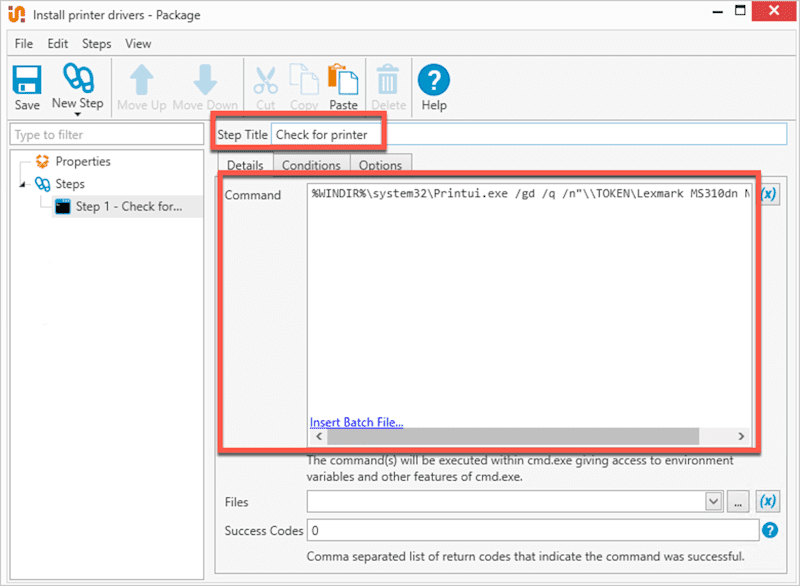
4. Enter a name for the step in the Step Title field. Then, copy and paste the below command in the Command field. This command checks to make sure the printer doesn’t already exist. Be sure to swap out the printer name (“Lexmark MS310dn North”) and server name (“TOKEN”) in the code with your own.
%WINDIR%\system32\Printui.exe /gd /q /n"\\TOKEN\Lexmark MS310dn North"
5. Click New Step at the top of the dialog box. Then, click Command, and — just like before — give this step a name. Now, let’s run a command that adds the printer.
%WINDIR%\system32\Printui.exe /ga /q /n"\\TOKEN\Lexmark MS310dn North"
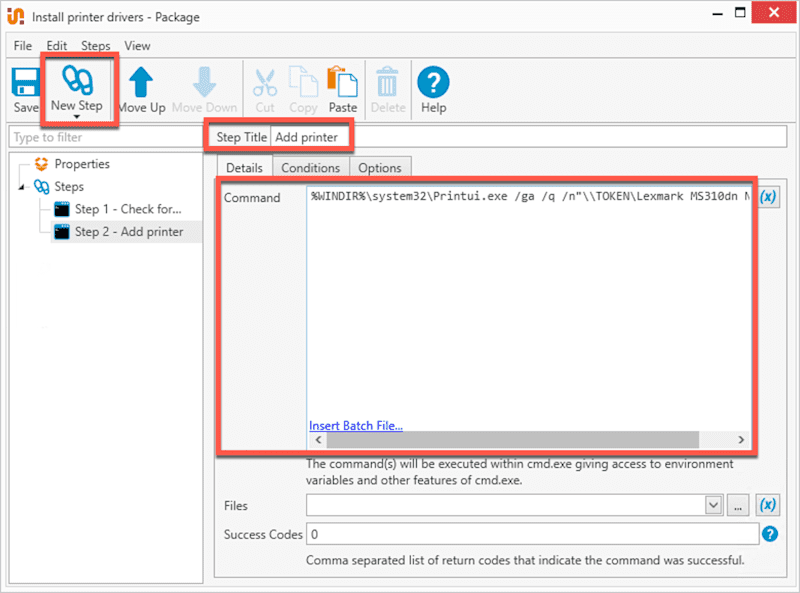
While these commands look similar to each other, you’ll notice the /gd (global delete) from the first command becomes /ga (global add) in the second. In both commands, /q is critical for a silent deployment. Without that parameter, your deployment will hang. You can see other parameters by entering the following into a command prompt:
printui /?
6. Add a third “Command” step with the below script. This stops and starts the print spooler.
NET STOP SPOOLER NET START SPOOLER
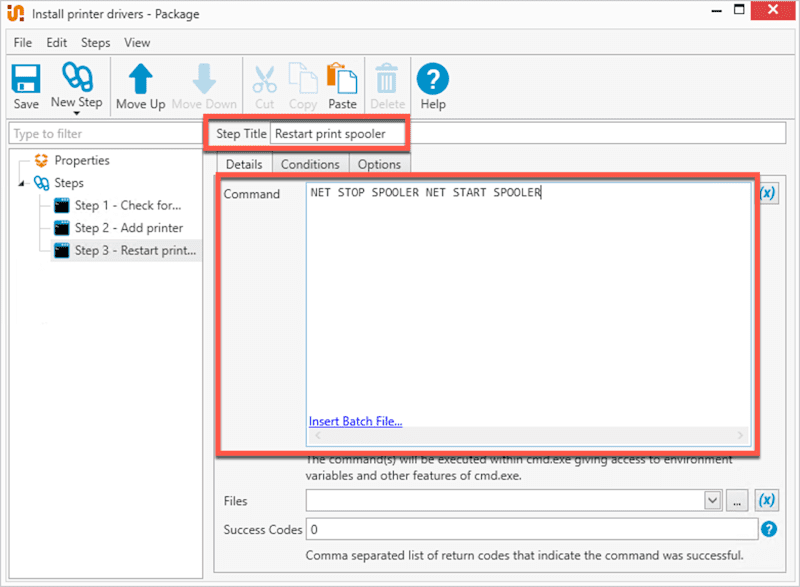
7. Click Save to save your package. From here, you can deploy this package to the desired devices in your environment.
PDQ Connect user?
The steps to create a custom package in PDQ Connect are virtually the same. For step-by-step instructions, check out our blog on how to create custom packages in PDQ Connect.
Method 2: Use a TCP/IP port
In this method, you will create a TCP/IP port and then install your printer.
Before getting started, spare yourself possible errors and clear out the printer and port.
Let’s create a new package in PDQ Deploy for this. Now that you’re an expert at turning commands into package steps, I’ll spare you the screenshots and keep it simple with the scripts for each step. Just remember to swap out your own printer name and IP address.
Step 1 (command step to clear the printer and port)
cscript %WINDIR%\system32\Printing_Admin_Scripts\en-US\prnmngr.vbs -d -p "Lexmark MS310" cscript %WINDIR%\system32\Printing_Admin_Scripts\en-US\prnport.vbs -d -r "IP_10.0.0.246"
Step 2 (command step to add the port)
cscript %WINDIR%\system32\Printing_Admin_Scripts\en-US\prnport.vbs -a -r "IP_10.0.0.246" -h 10.0.0246
Steps 3 and 4 (install steps to install printer)
The next two steps (one for each architecture type, 32-bit vs. 64-bit) install your printer using an install step. You can get your install files from the printer vendor and research what parameters you may need to silently install your printer driver.
In our example (which you can watch in the video below starting at 21:53), we got a batch file from the vendor, which is listed in the install step as the install file. Make sure you also check the “Include Entire Directory” box. This is important if your installation requires multiple files.
Loading...


