Deploying AutoCAD may seem like a daunting task, however PDQ Deploy makes it’s easy to silently deploy AutoCAD. We’ve also included a step-by-step instruction video at the bottom of this page. Let’s dive in.
How to silently deploy AutoCAD
Grab your installation files. We recommend placing the installation files on an accessible file share location. Now navigate to the installation files on your file share location, and run “setup.exe”.
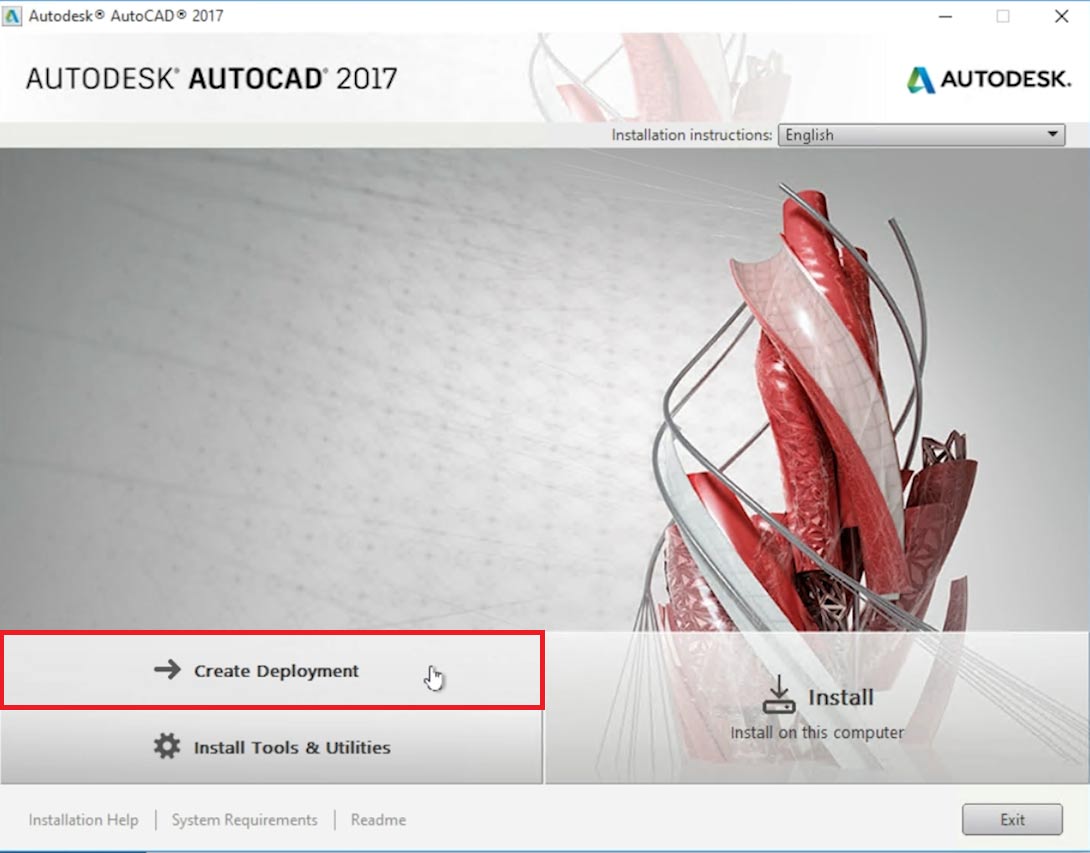
By running the setup.exe file, you will be given the option to install or create a deployment. We will choose to create a deployment using the AutoCAD deployment tool.
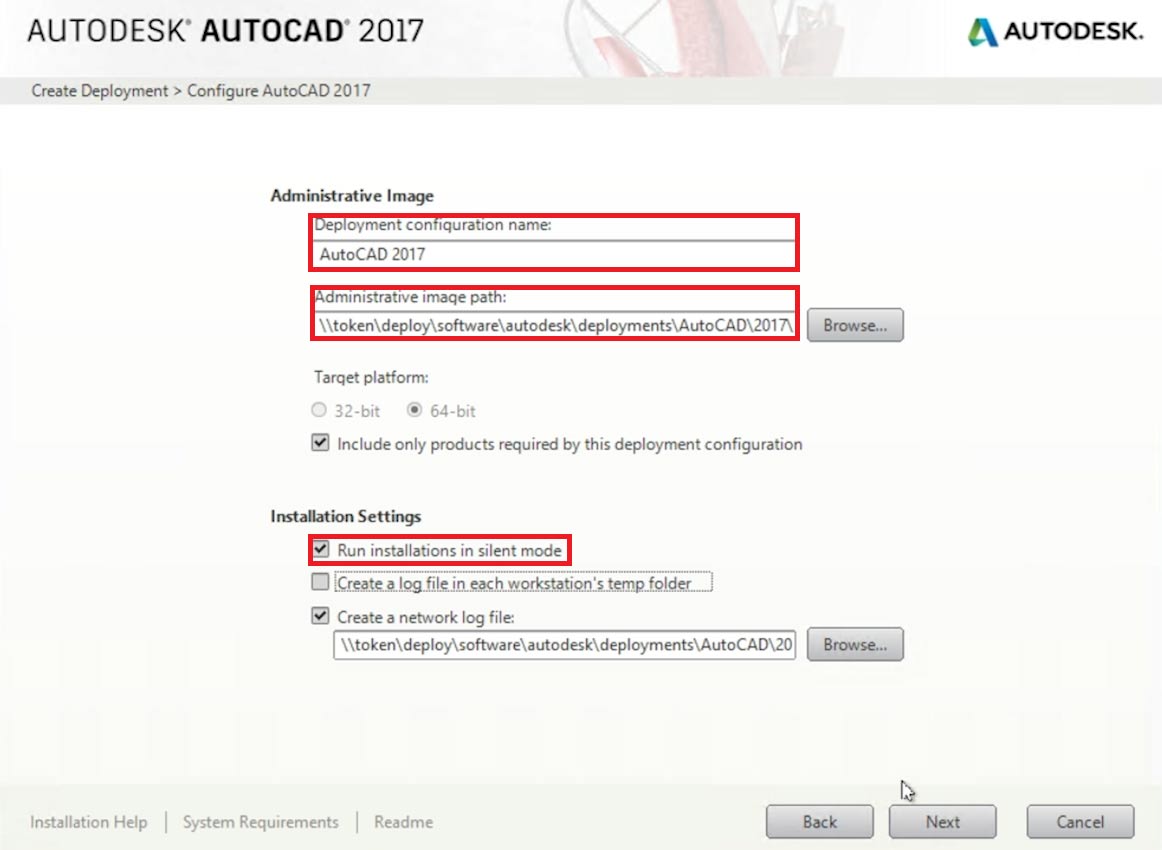
Now let’s configure our deployment. Give your deployment a name in the “Deployment configuration name” field. The “Administrative image path” field is where you will designate a location on a file share where you want the AutoCAD deployment files to be copied. The other fields on this screen provide additional options. Remember to check “Run installation in silent mode” under the “Installation Settings” section in order to silently deploy AutoCAD.
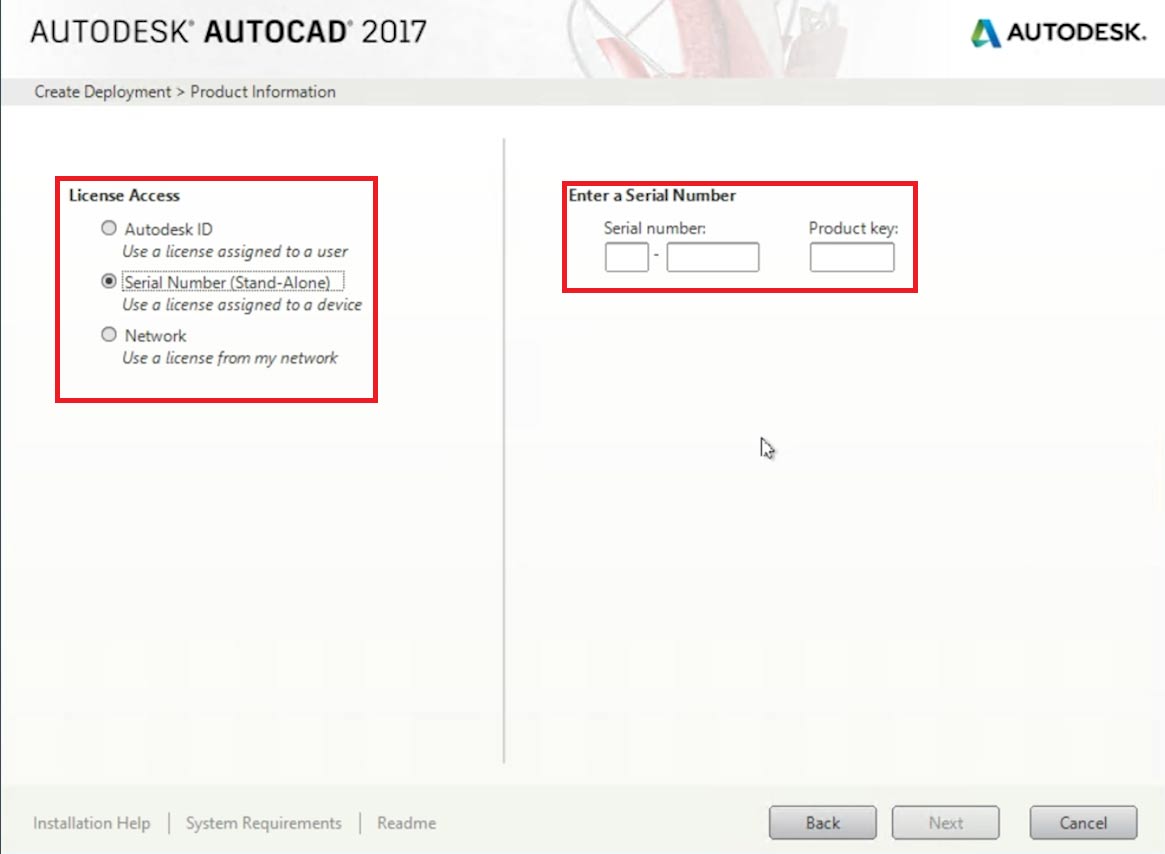
Next, you’ll need to accept the EULA and input your serial number or whatever method you use to license your AutoDesk products.
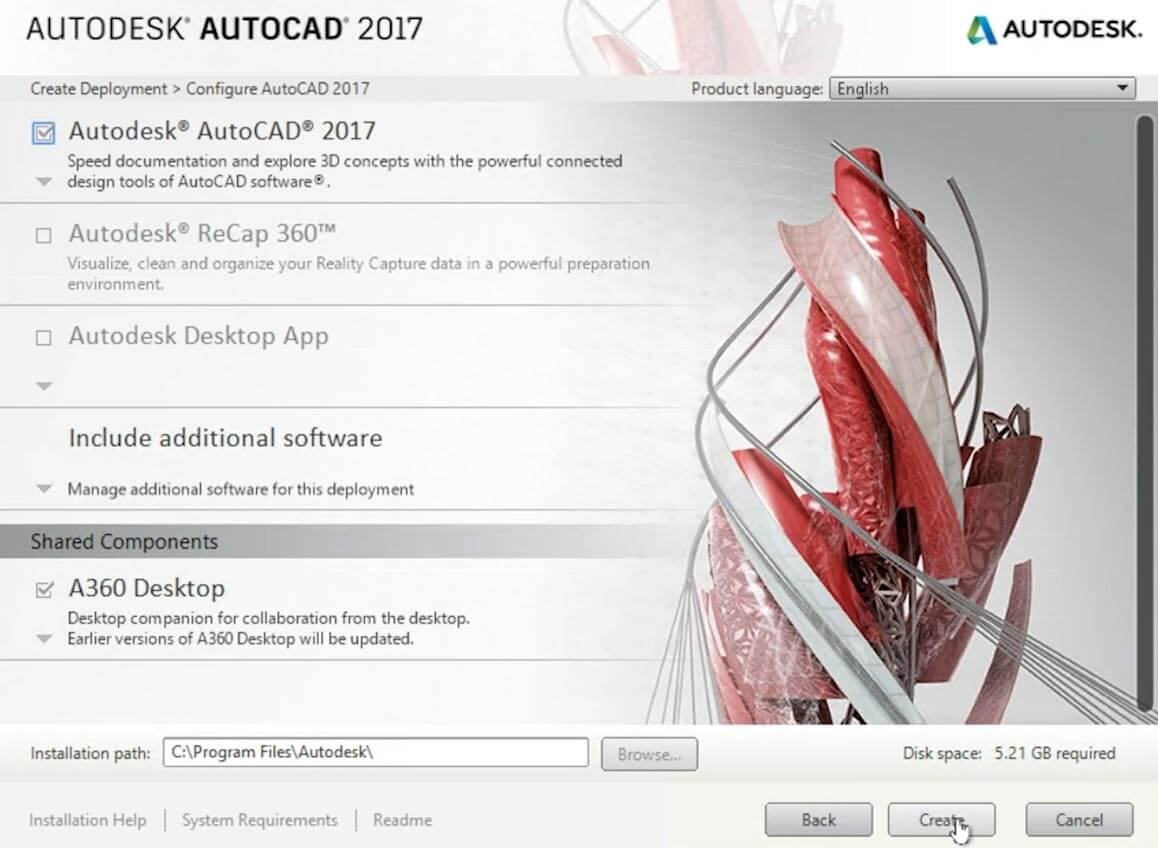
The next window will allow you to further customize the AutoCAD deployment. Once you’ve determined your deployment settings, click “Create”. Now AutoCAD will compile the prerequisites for installation and prepare everything that you selected for this deployment. This process may take several minutes, so be patient.
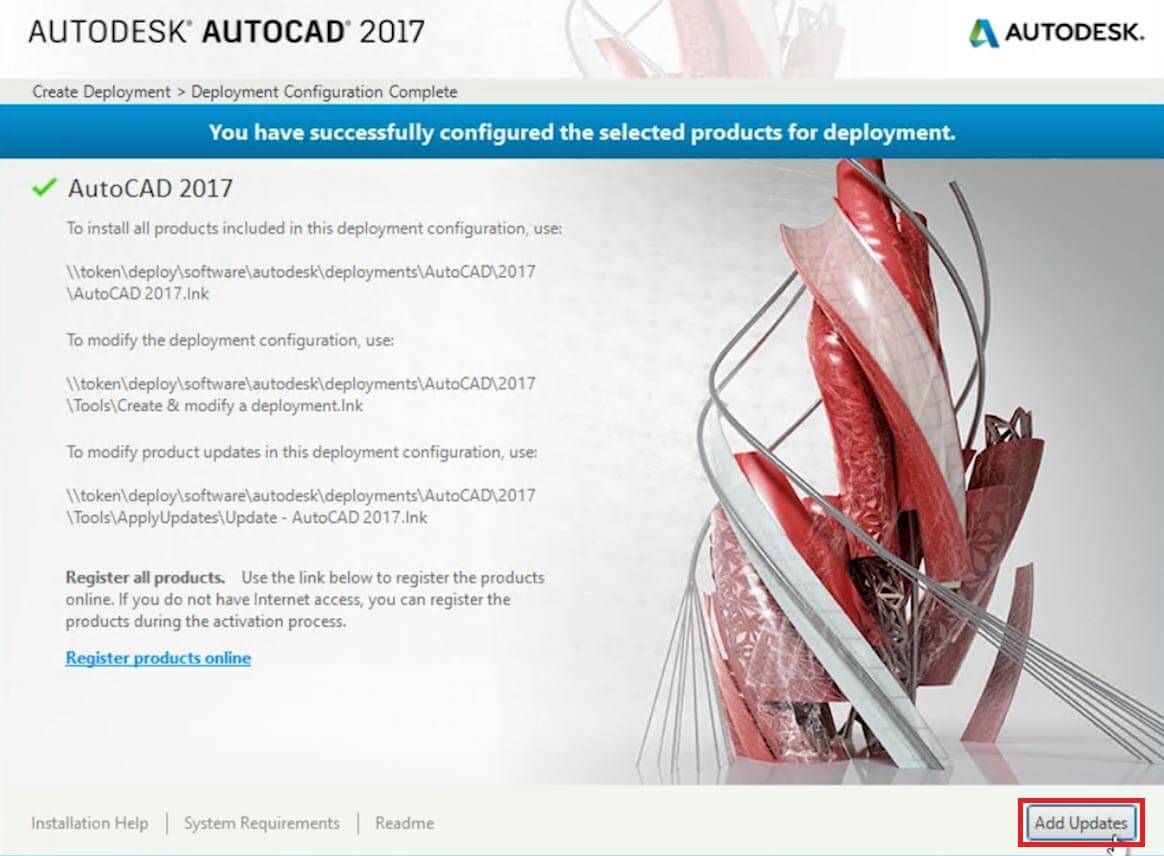
Once AutoCAD has finished creating the deployment, you may want to click “Add Updates” to check for any product updates that may be available. If there are updates available, the auto deployment tool will append them to the installation.
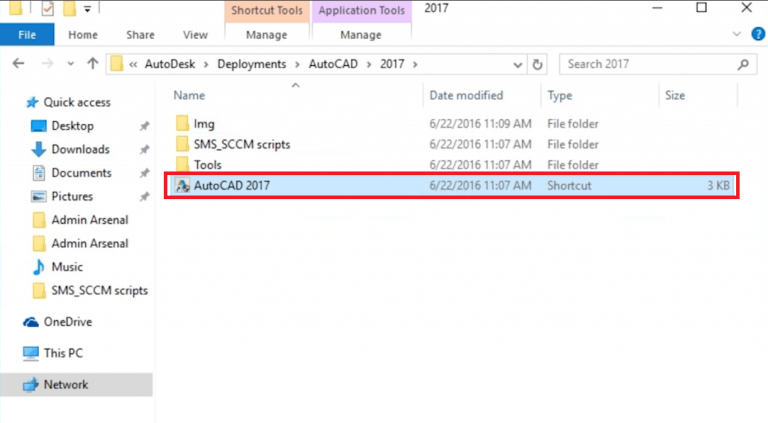
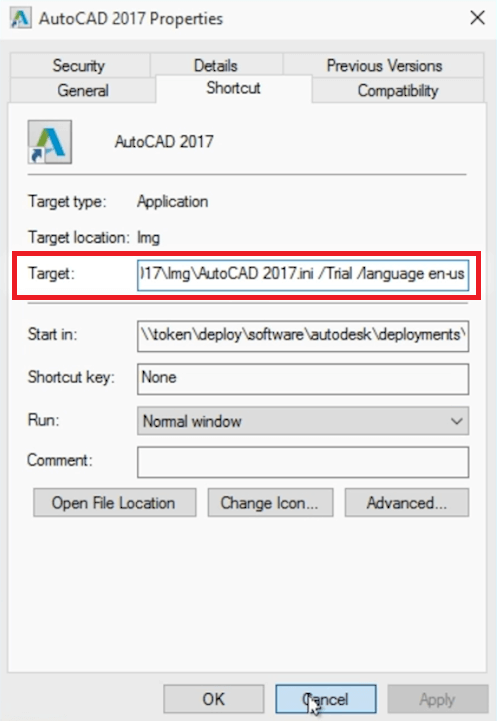
Navigate to the designated location on your file share where you copied your deployment files. You’ll notice there is a shortcut file with the name you created for your deployment. Right click and go to the properties of that shortcut file and copy the information in the target field.
Sending out your AutoCAD deployment
It’s time to open up PDQ Deploy. Go to “New Package” and create a deployment name.
Next, click “New Step” and create a “Command” step. In the package properties window delete the default install step. Now paste the information that you previously copied from the shortcut properties into the command step field. If you see a “/Trial” within the string you can remove it.
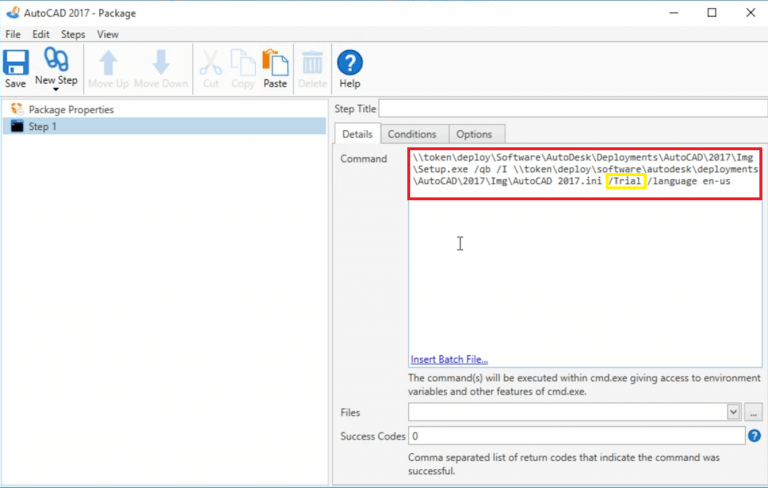
This next step is very important. Right after “\Setup.exe \” you will insert a “/W /” (with a space after the W). It should look like this; “\Setup.exe /W /qb”. The “W” tells the deployment to run the command and then wait for the other sub-processes to finish before it returns. Without, you will likely get a 259 error code.
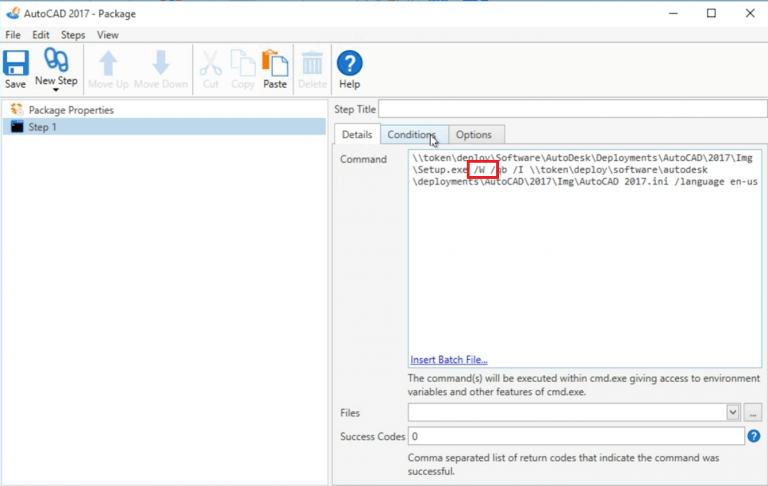
A couple of other items to take note of:
If you have spaces in your path you will need to put them in double quotes up to the “/I” Anything after that you do not need to use double quotes.
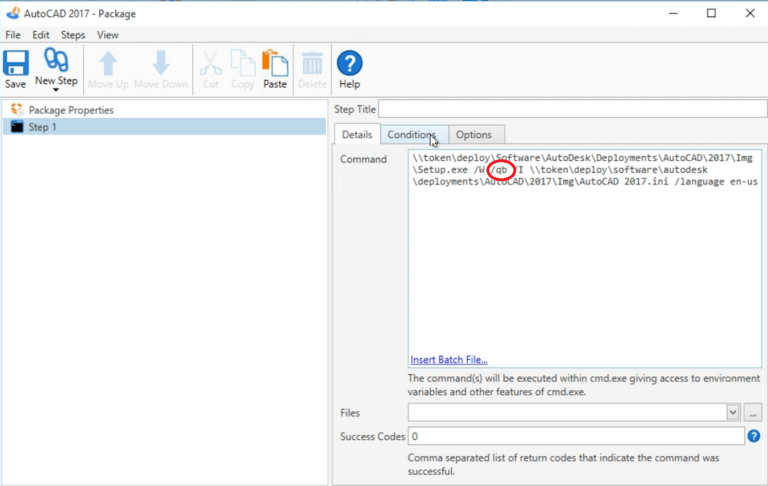
Notice the “/qb” . This means “Quiet Basic”. Under this setting if a user is logged on they may see status updates appearing on their screen. To enable a totally silent deployment, you may use a “/q”. DO NOT use a “/qn” as this will cause your deployment to hang. We recommend using “/qb” for a higher success rate.
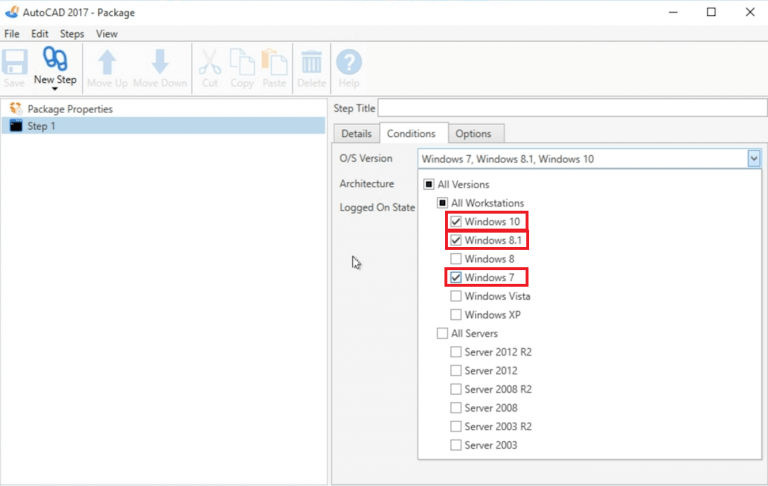
Now go to the Conditions tab and change your OS to Windows 10, 8.1, and 7. You’ll also want to change the Architecture to 64-bit.
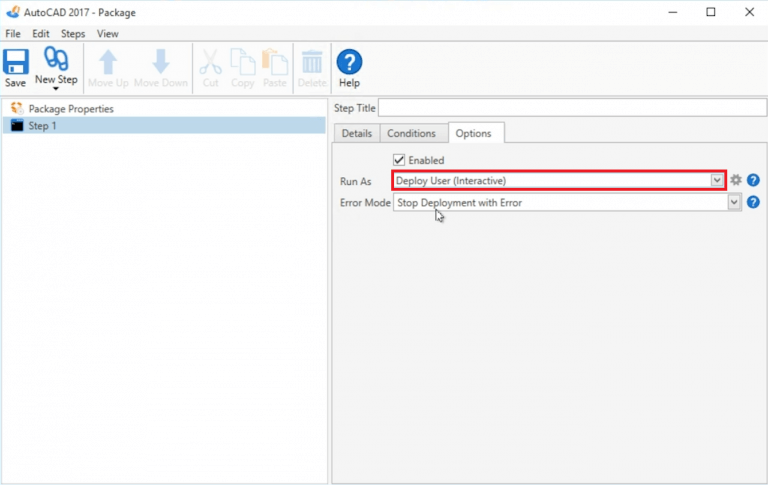
Under the “Options” tab, if you are deploying with the “/qb” previously mentioned, you’ll want to change the “Run As” field to “Deploy User (Interactive)”.
Next, since we are doing a command step, we need to enter success codes. For this deployment enter the codes; 0,1641,3010
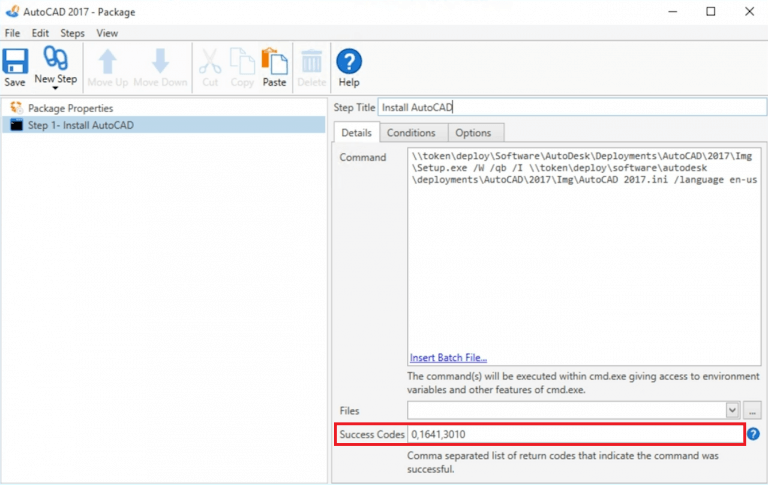
That’s all you need to do to build the deployment. Now let’s choose our targets and silently deploy AutoCAD. You can choose your targets several ways, but for our example we’ve chosen two targets using PDQ Inventory. Once your targets have been selected, click “Deploy Now”.
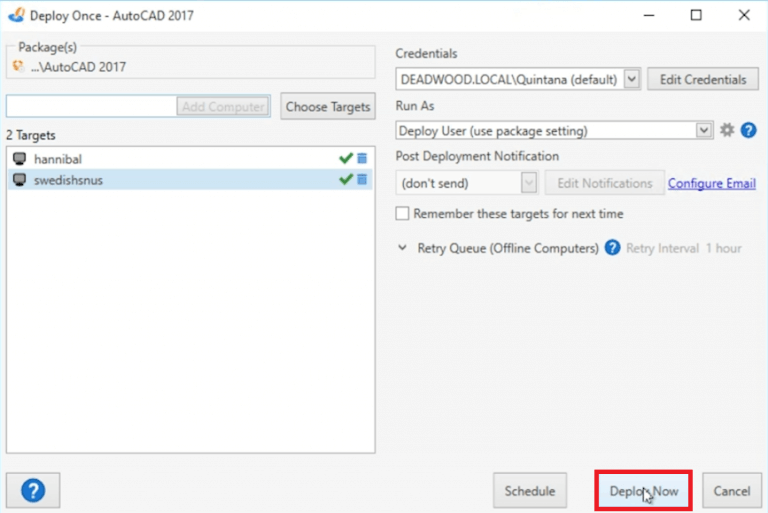
Remember, this deployment could take anywhere from 5 to 30 minutes depending on the speed of your network, so be patient. Once the deployment has finished, you’ll see the AutoCAD desktop icon on your target computers. You could also verify a successful installation by using PDQ Inventory.
Congratulations! You’ve silently deployed and installed AutoCAD. To view a step-by-step tutorial, click the video below.
Loading...


