Adobe Reader saw some significant changes with its latest release. Let’s try and break it down. Adobe Reader DC (Document Cloud) is the update and upgrade for Adobe Reader 11, but that’s not all.
There are two tracks of Adobe Reader (with two different installation files) called Continuous and Classic.
Choosing between continuous and classic
The PDQ Package Library is a great resource to silently install Adobe Reader DC (and many other things). Literally all you need to do is select your choice of package (select Adobe Reader DC for the continuous track, or for the classic track (preferable) Adobe Reader DC (Classic) to import and you’re ready to deploy to your computers.
Both of these tracks are available in the Package Library so all that’s left for you to worry over is which track. The essential difference between the two is in how frequent and what kinds of updates you’d like to receive.
Continuous: Continuous track has the most frequent updates and will include new features with updates.
Classic: This track will only have quarterly updates and critical patches. Which track should you deploy? That depends. You can read what Adobe has to say on the subject.
Should you need to customize your installation of Reader you can still use PDQ Deploy to push it out to your computers.
100+ packages — all in one place
Silently install just about anything with PDQ Deploy & Inventory. Try it free for 14 days.
Customizing Your Installation
Before we get started you’ll want to download the Adobe Customization Wizard. (Download the file that looks like CustWiz15*.exe) After downloading the wizard please run the installation. After it is installed please follow the steps below.
1. Select your installation file: You can go to Adobe’s ftp to download your Adobe Reader files. You’ll want to pick either AcrobatDC/ (the continuous track) or Acrobat 2015/ (the classic track). Click on the current version (which as of this post is 1500630033 for Classic/) and select your language or MUI (the multi-language installation).
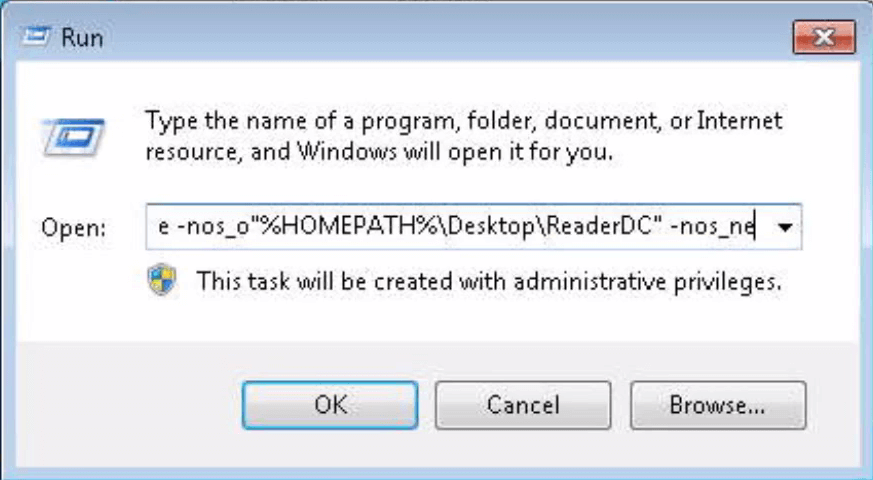
2. Extract the MSI: Your installation file you downloaded will be an EXE, and you’ll need to get the MSI from that. To do that, use Run and in the Open field, put the EXE path in that field followed by a space and (for example):

-nos_o"%HOMEPATH%\Desktop\ReaderDC" -nos_neOf course, replace the path within quotes with where you would like the MSI file to go for what is in the example.
3. Run the Acrobat Customization Wizard
Go to File > Open Package and navigate to the newly extracted MSI file
Go to Transform > Generate Transform.
Generate your transform file. Go to Transform>Generate a transform and you’re ready to create and save your MST file for deployment in the same folder all your extracted files from step two reside.
4. Customize your installation: Customize until your heart is content, but here are a few essentials to ensure a silent installation.
Suppress display of EULA
Silently (no interface) (This can be found under installation options in the run installation section. Select this so your installation does not prompt for interaction from the end user.)
Suppress Reboot
Disable product updates
Disable upsell (This can be found under Online Services and Features…you’ll definitely want to disable this to keep your users from being able to click on features and options that would require subscriptions, fees or upgrades. This is less important for a silent install… but it will save you some headaches with support calls from users that just don’t know what they’re doing.)
5. Save your new Transform file: Make sure to save your new Transform file in the same directory as the AcroRead.msi file.
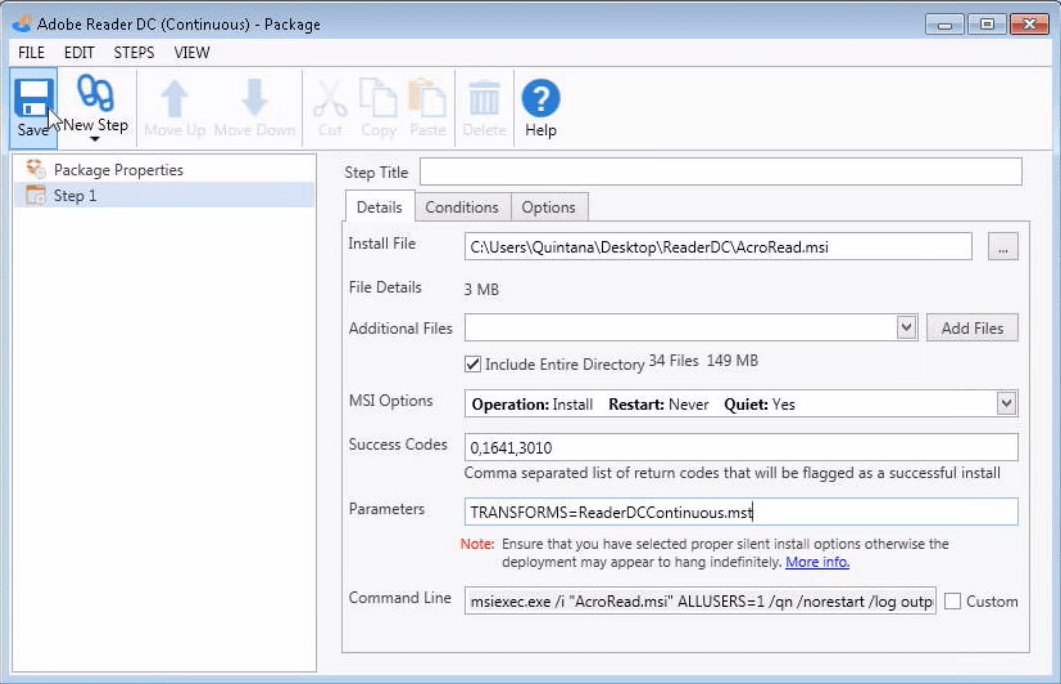
6. Deploy your customized installation: You’re ready to create your deployment package. In a new package, add the MSI in the Install File field and check Include Entire Directory. Then on the parameters line you’ll need to enter TRANSFORMS= and then enter in the path to your MST file from step five.

You’re ready to save your package and deploy it. These steps (and additional pointers) are covered in this video recording of our live webcast.


