Let’s get WinZip deployed to your computers. After you silently install WinZip, you’ll then define the settings you want on all devices in your network. Below is a video that will walk you through all the steps.
Silently install WinZip
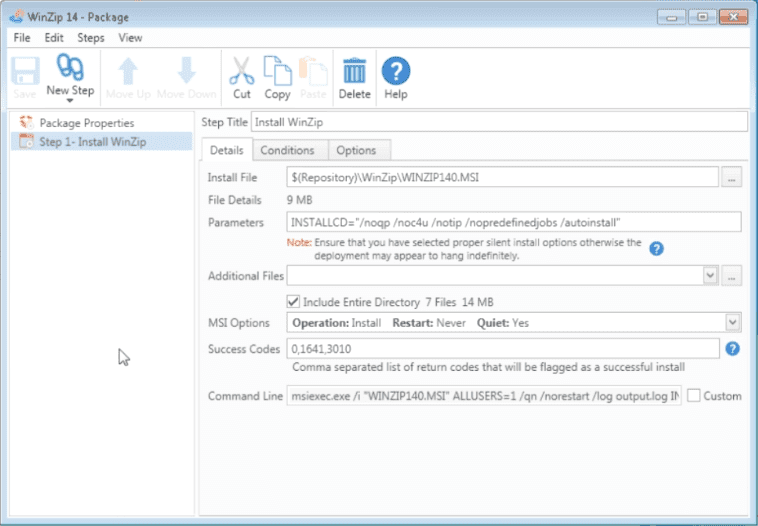
Because WinZip is a paid product (you’ll need your own license handy), it’s not available in the Package Library. However, it is a very simple application to create a deployment package for (and the free download of PDQ Deploy is all you’ll need to get the job done). In PDQ Deploy, create a new package and for the install field add your extracted MSI file for WinZip. You’ll need the following parameters to silently install WinZip. Without parameters your deployment could time out and fail.
INSTALLCD="/noqp /noc4u /noip /nopredefinedjobs /autoinstall"Before you exit out, make sure you have “Include Entire Directory” checked so that you have all the needed files for installation. You’re ready to deploy.

Managing WinZip
Watch this video to learn how to set up PolicyPak, the video will also show you where to find and how to add these “Paks” you’ll need to help quickly manage hundreds of applications.
In your GroupPolicy editor, add a new GPO. Right click and select edit.
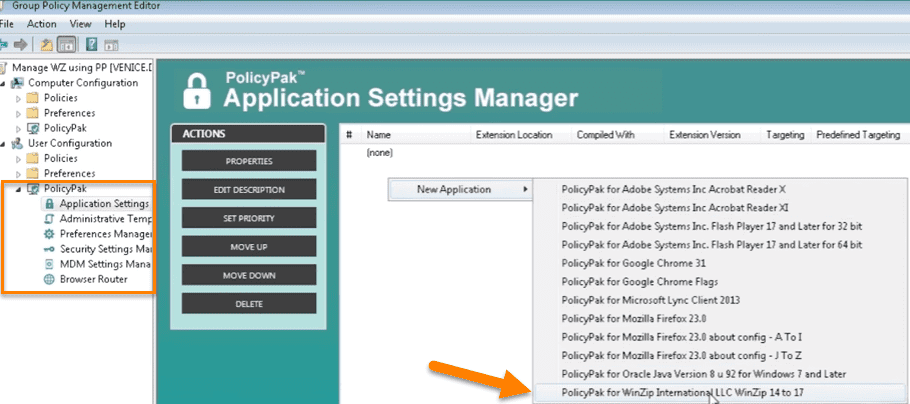
In the GroupPolicy Management Editor, right click and select WinZip. (Refer to the video on setting up PolicyPak to see how to set up these paks.)

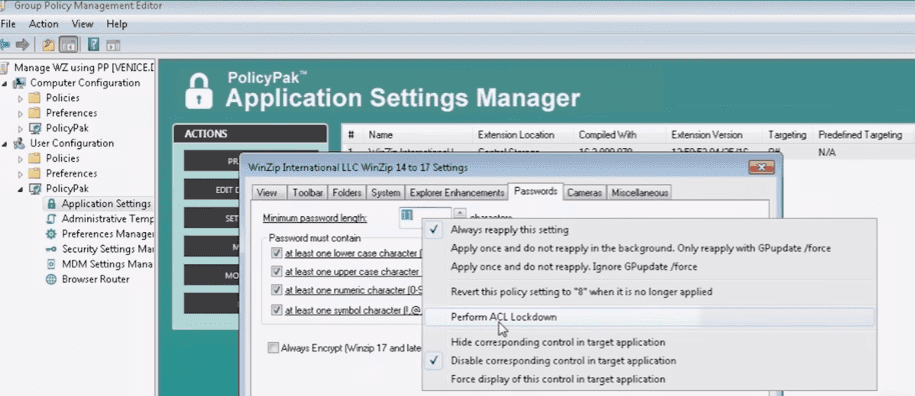
Double-click on the WinZip application listed to open the panel you’ll use to adjust settings for WinZip in Group Policy. Make your changes and adjustments, right click within the panel to Disable corresponding control in target application” or if you have particularly clever end users, you may also want to select “Perform ACL Lockdown” to make sure your settings are not tampered with. You can also make certain none of your users adjust the settings you select in any tab, by right clicking on the tab you want to lock and select “Disable whole tab in target application”.

After applying GPUpdate your settings will take effect. It’s that easy!
Loading...


