Dynamic Host Configuration Protocol (DHCP) provides a framework for passing configuration information to a network device. The configuration information allows a DHCP client to request and acquire a unique IP address and other required network information to connect to a computer network.
DHCP works on wired or wireless connections and across all types of devices. From your fridge to your smartwatch, almost every network device uses DHCP to connect. Most home internet service providers (ISPs) also use DHCP. When you connect the modem to the service line in your home network, the modem uses DHCP to connect to the ISP network.
DHCP was originally defined by RFC-1541. It has since been superseded by RFC-2131. You can read the RFCs to quench a mighty thirst for knowledge or to cure insomnia, so they are multipurpose! You don’t need to read the RFCs to understand DHCP. However, there is good information in them for the curious.
You can think of DHCP as a broker of network information. Instead of buying and selling assets like a traditional broker, DHCP is leasing and reclaiming IP addresses. DHCP knows which IP addresses are leased to which clients and listens for when clients request IP lease renewals. DHCP also ensures that IP addresses are returned to the available pool when a lease is not renewed. DHCP does the tedious work of IP address allocation and network connection request management.
How does DHCP work?
The DHCP process is a little complicated. However, it happens very quickly. The best way I can explain the DHCP process is to line out the client-server communication types and then run through a process breakdown.
Client-server communication types
DHCPDISCOVER: Client broadcasts to the local network to locate available DHCP servers
DHCPOFFER: Server-to-client response to DHCPDISCOVER with offer of configuration parameters
DHCPREQUEST: Client to server either
Requesting offered parameters
Confirming correction of previously allocated address
Extending the lease on an IP address
DHCPACK: Server to client with network configuration parameters, including committed IP address
DHCPNAK: Server to client indicating clients notion of network address is incorrect or the clients lease has expired
DHCPDECLINE: Client to server indicating the network address is already in use
DHCPRELEASE: Client to server relinquishing network address and canceling remaining lease
DHCPINFORM: Client to server asking only for local configuration parameters
A breakdown of the DHCP process
1. Client begins initialization and sends out a DHCPDISCOVER broadcast on the local network.
2. One or more DHCP Servers reply to the DHCPDISCOVER broadcast with a DHCPOFFER that includes an available IP address and network configuration details.
3. Client collects the replies and selects one of the offered configurations.
4. Client sends a DHCPREQUEST to the server that offered the chosen configuration.
5. Server replies with DHCPACK, letting the client know the initialization is complete and the client may use the leased dynamic IP address.
Why is DHCP used?
DHCP solves the problem of client network configuration at scale. When a client is in range of a known wireless network or connected to an active wired connection, a DHCP request will provide the client with a unique IP address and network information.
Without DHCP, each client would have to manually update their network configuration to the correct parameters. If you are not aware of the proper network configuration details or you mistype a character, you would not be able to connect until you had the correct information or noticed and corrected the error. The network connection process that DHCP makes almost invisible would become a difficult barrier for many users.
Enabling and configuring DHCP
Depending on your OS preference, how you enable and configure DHCP varies. We will cover Windows Server 2022 as it is the most recent version available and supports PDQ Deploy and PDQ Inventory use cases well.
It’s important to call out that the server you install DHCP services on should have a static IP address assigned. If the server does not have a static IP address, you will receive warnings while enabling DHCP in Server Manager.
How to enable the DHCP Role
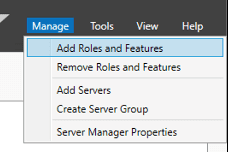
Launch Server Manager. In the top toolbar, click on Manage, then Add Roles and Features.
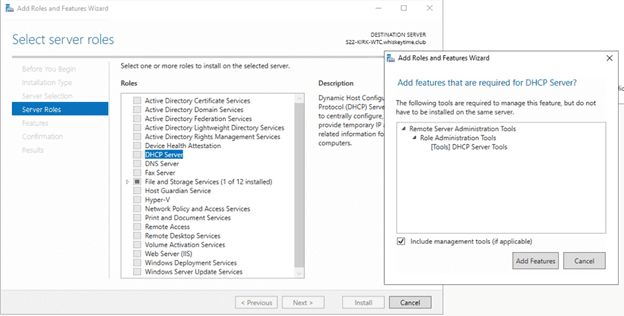
This launches the Add Roles and Features Wizard. Inside the wizard, read the information carefully and then click Next. Select Role-based or feature-based installation, and click Next. Select the server that will run the DHCP service from the list, and click Next. Tick the DHCP Server box and be sure to include management tools, then click Next, Next, and Install.
How to configure DHCP
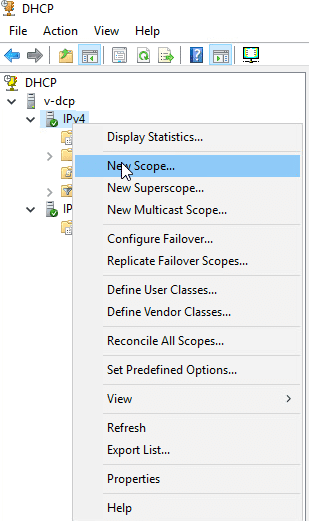
With the DHCP role now installed, you can launch the DHCP console under Tools > DHCP in the Server Manager. To create a new scope, right-click on the IPv4 section and select New Scope. This will open up the new scope wizard.
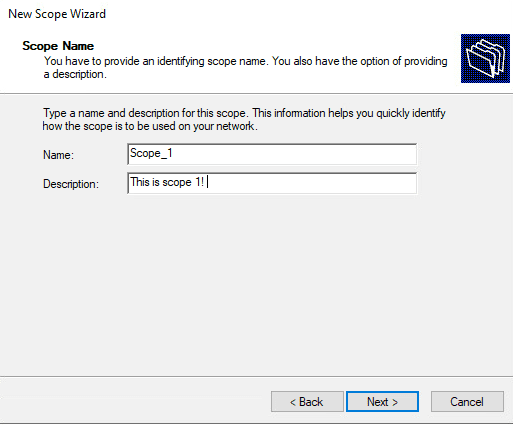
Click Next on the welcome screen, set the scope's name and description, and click Next again.
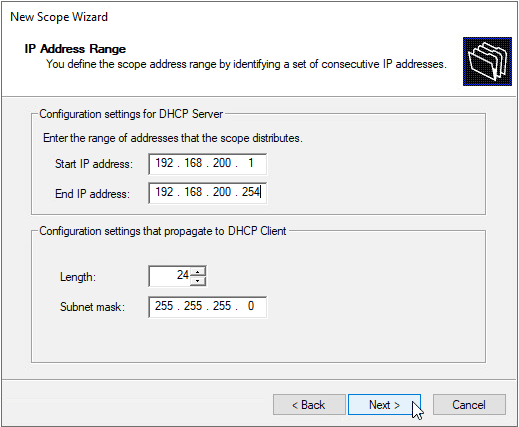
Next, we’ll configure the IP address range. I’ve chosen a Class C network with a /24 subnet mask. Once you have configured the DHCP scope, click Next.
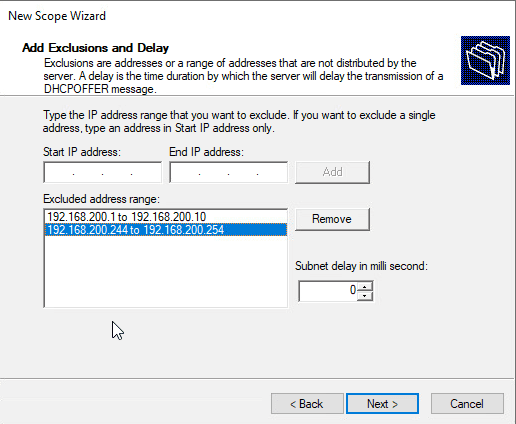
Next, we configure Exclusions and Delay. Exclusions tell the DHCP server which IP addresses should not be leased to clients. I’ve excluded 10 IPs from the bottom and top of the DHCP scope IP address range to ensure IP addresses are available for infrastructure.
Delay tells the DHCP server how many milliseconds to delay the transmission of a DHCPOFFER message. Delay is often used in more advanced failover scenarios, which we won’t cover here. Leave delay on the default value, and click Next.
Next up is DHCP lease duration. This tells the DHCP server how long a lease should be valid. You can change the DHCP lease time to suit your environment.
Wired devices do not change networks often and can have longer lease times, while wireless devices frequently change networks, so shorter lease times make sense. A client tries to renew an IP lease when it is 50% expired; an 8-day lease starts attempting renewal on day 5. If a lease is not renewed before it expires, it returns to the pool of available IP addresses in the scope.
Set your lease duration to a value that makes sense for your environment, then click Next.
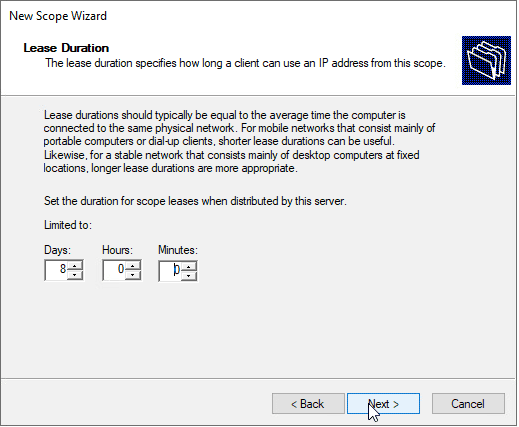
Next, you are asked if you want to configure the DHCP scope options. Click Yes and then Next.
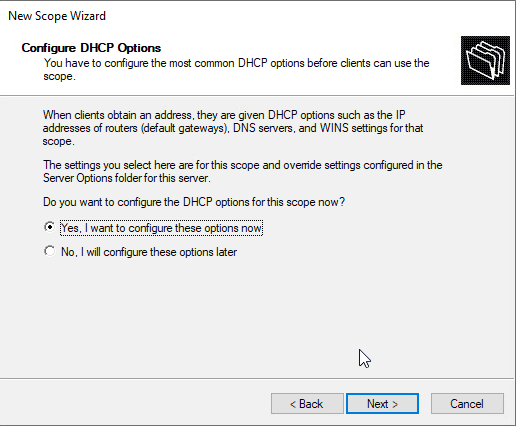
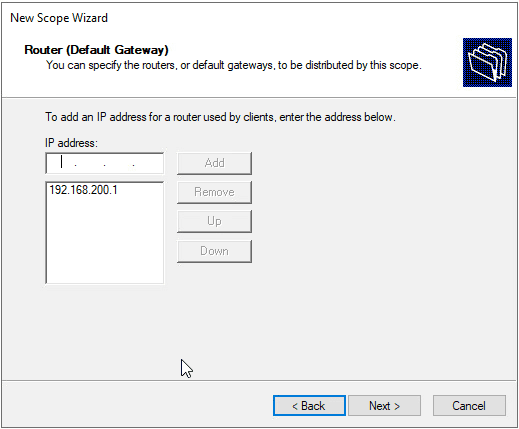
In order for clients to properly connect to the network, they need to know the default gateway. The gateway is the IP address assigned to a switch or router that routes traffic from the local network to other private networks or out to the internet. Add the proper IP for your network gateway, and click Next.
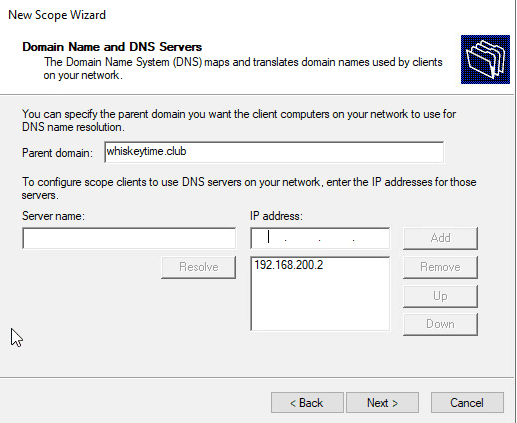
A Domain Name System (DNS) handles name resolution, and your DHCP server must provide connecting clients with the IP address(es) of your DNS server(s). Add your DNS server(s) IP address(es), and click Next.
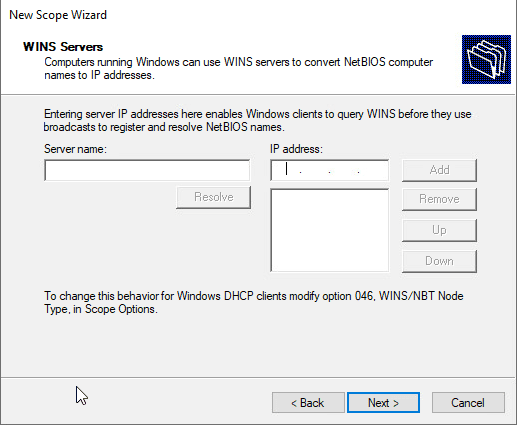
If you use WINS, configure your WINS server IP addresses here, and click Next.
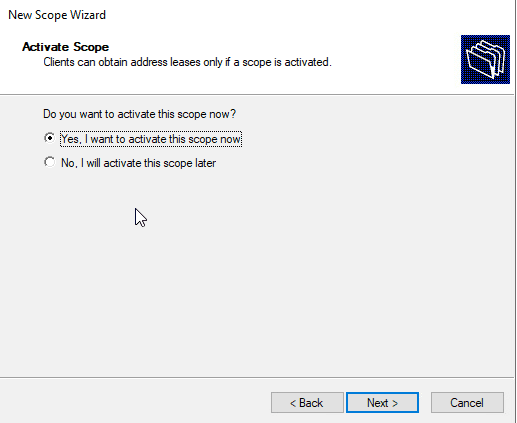
Confirm that you would like to activate your DHCP scope now, and click Next.
Finally, click Finish.
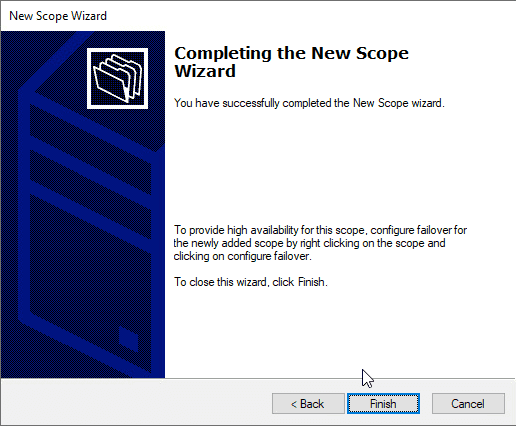
You have just configured and activated your DHCP server. If you did it properly, clients who connect to your network receive a DHCPOFFER from your server after sending out a DHCPDISCOVER broadcast.
Enabling dynamic DNS record updates
The DNS is critical for many apps and services. PDQ Deploy and PDQ Inventory are no exceptions. To ensure that DNS records are up to date, we’re going to enable dynamic DNS record updates for DHCP clients. This helps automatically update records entered via DHCP. Static records are not affected. To access this, right-click the IPv4 leaf in the DHCP console, select Properties, and then open the DNS tab in the new window. Now, be sure “Enable DNS dynamic updates according to the settings below:” is ticked, and select the radio button for “Always Dynamically update DNS records.” Also, check the box “Discard A and PTR records when the lease is deleted.” By enabling these options, you’ll ensure DHCP clients are entered into the DNS records when they are active and removed when they are no longer active.
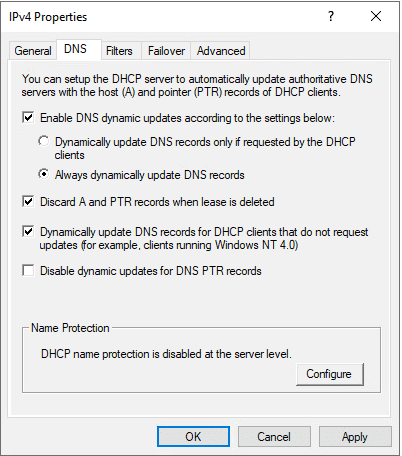
If you do not allow dynamic DNS updates, then accessing connected clients by hostname will not work and some services may be impacted.
Other DHCP FAQs
How is DHCP related to IP addresses?
DHCP is a manager of IP address leases in a given network scope. DHCP helps ensure clients have a unique unicast IP address and the correct network information required for network access.
How does DHCP differ from DNS?
DHCP allows the automated network connection of client devices to a network, while DNS maps IP addresses to human usable domain names. Both services are critical to the operation of your local network and the world wide web. Without DHCP and DNS, the internet would feel like a far less modern and friendly place.
We’ve covered the basics of DHCP and showed you how to set up your own DHCP server in Windows Server 2022. If you enjoyed reading this article, you can find other great articles on our blog and instruction videos on our YouTube channel.

