The Enterprise version of PDQ Deploy is regarded as one of the most user-friendly and powerful patch management deployments solutions available. It's easy to see why with things like automated patch deployment just a few clicks away, plus a package library containing hundreds of pre-built mainstream application packages.
But, what if PDQ Deploy Enterprise is just out of reach of your budget, even with its industry-leading low price? Well, you're in luck. PDQ Deploy Free Mode provides amazing functionality at a price even Scrooge McDuck would be happy with.
And today, we're going over all of the awesomeness packed into PDQ Deploy Free Mode.
Creating custom packages
The process of creating and deploying custom application packages is the bread and butter of PDQ Deploy,. Manually installing applications on hundreds of devices is unrealistic, even for the most generously staffed IT departments. And let's be real, if you're reading this article, you probably don't have the budget for a well-staffed IT department.
Thankfully, PDQ Deploy makes short work of application deployments. Let's check out how it's done.
For this example, I'll show you how to create a custom package for Google Chrome using an MSI. Most other applications will follow this same process. However, you must ensure you have a silent install parameter before deploying packages using an EXE installer.
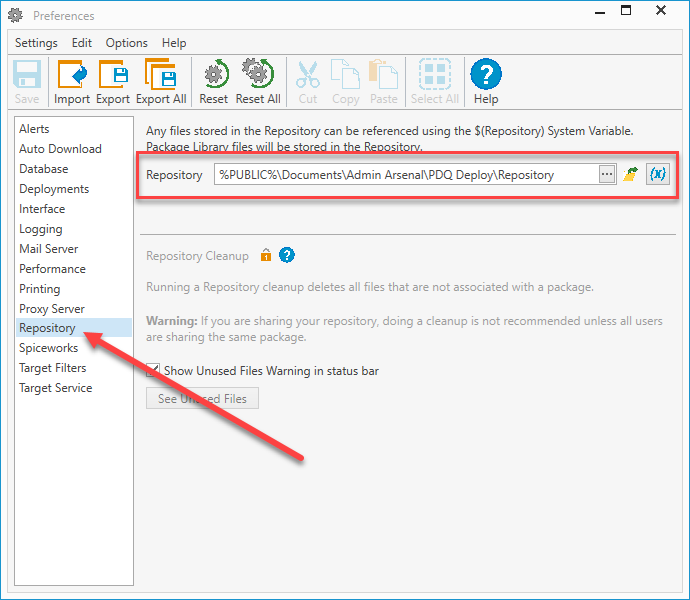
Before we begin, make sure to download your installer. Though this isn't necessary, I like to keep and organize my installers in the PDQ Deploy repository. By default, the PDQ Deploy repository is located in "C:\Users\Public\Documents\Admin Arsenal\PDQ Deploy\Repository." You can double-check the location of your repository by clicking Options > Preferences then clicking on the Repository menu option in PDQ Deploy.
With the installer downloaded, we're ready to build our package.
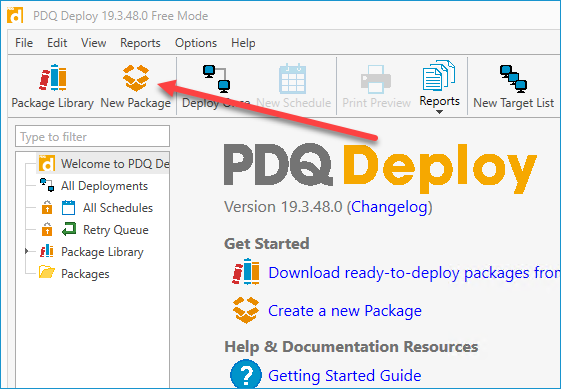
1. With PDQ Deploy open, click New Package.
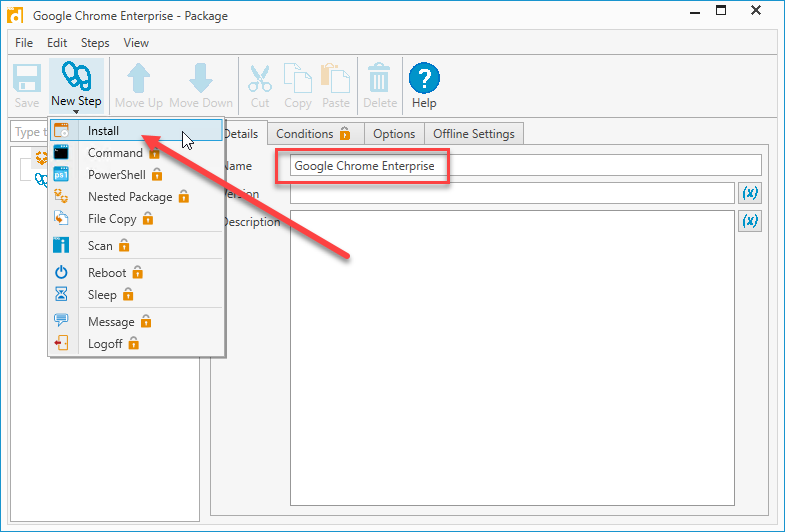
2. Give the package a name.
3. Click New Step > Install.
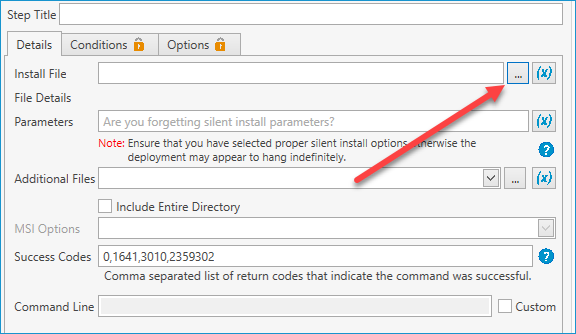
4. Click on the ellipses button next to the Install File field.
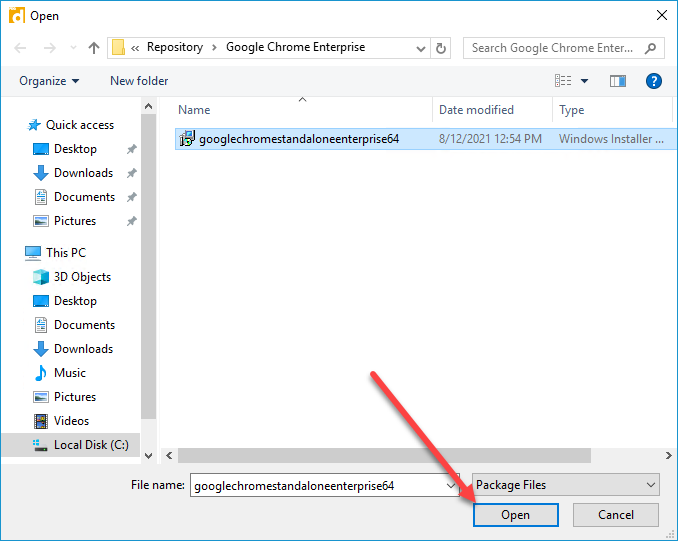
5. Browse out to your installer file, select it and click Open.
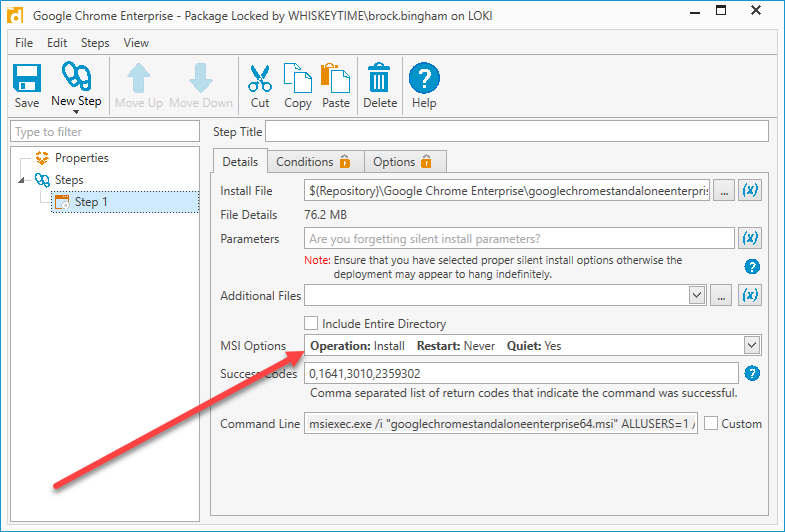
6. If you're using an MSI, you'll automatically see that the silent parameters get added to the package. If you are using an EXE, you'll need to provide the silent parameters yourself in the Parameters field.
7. Once you're done, review your settings and click Save.
8. You'll see the package now available in the menu pane.
Install (and uninstall) without disruption
Try PDQ Deploy & Inventory — free for 14 days.
Deploying packages
Now that you've successfully created a package, it's time to deploy it. Deploying packages is super easy:
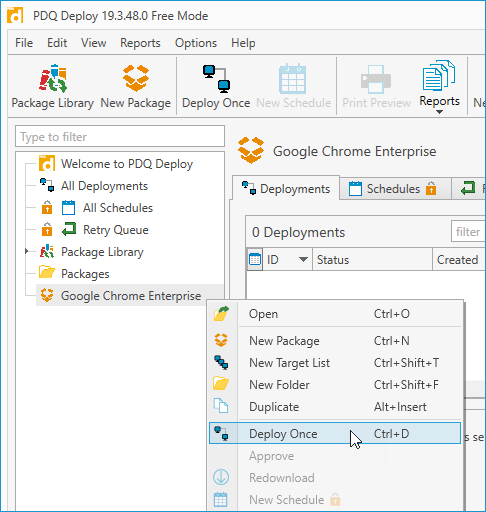
Right-click on the package and click Deploy Once.
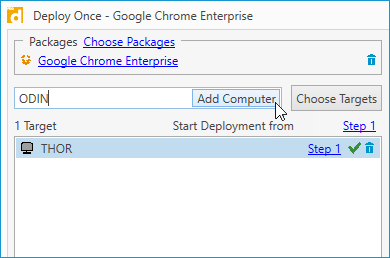
In the deployment windows, enter the names of the computers you want to target and click Add Computer or click Choose Targets from a source like PDQ Inventory or Active Directory.
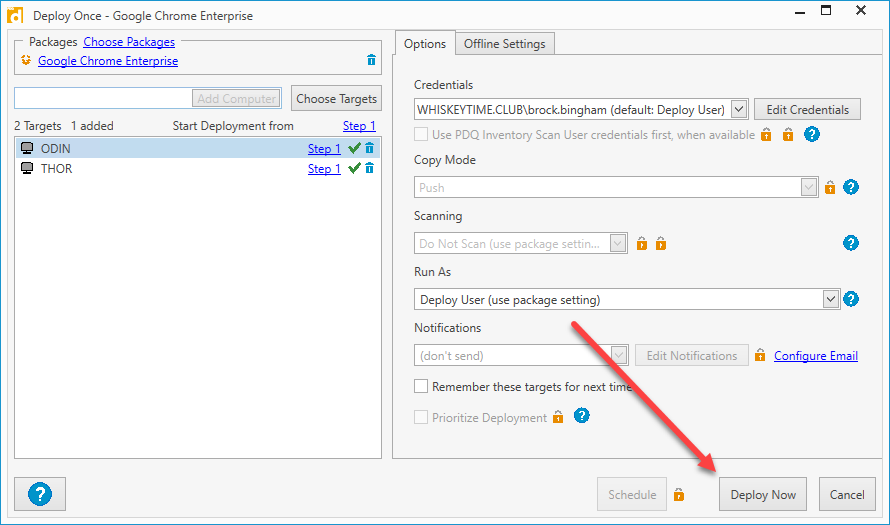
Once you've added your targets, click Deploy Now.
After starting the deployment, you'll be shown the deployment window. Here, you can monitor the status of your deployment and will be notified of any errors encountered during the deployment.
Deploy almost anything — from scripts to patches
Get time back in your day with PDQ Deploy & Inventory. Try it free for 14 days.
Generating reports
With PDQ Deploy Free Mode, you can easily generate package and deployment reports. Let's look at the deployment that just finished and generate a report containing the deployment details and results.
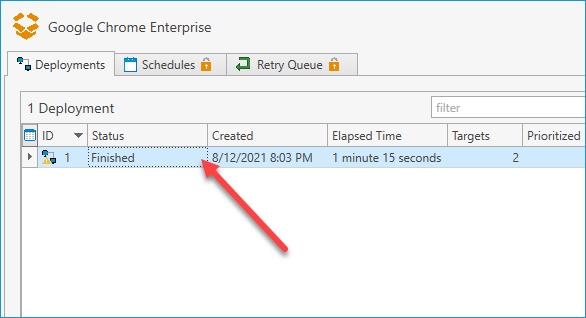
As you can see in this screenshot, one of the targets encountered an error during the Google Chrome Enterprise deployment.
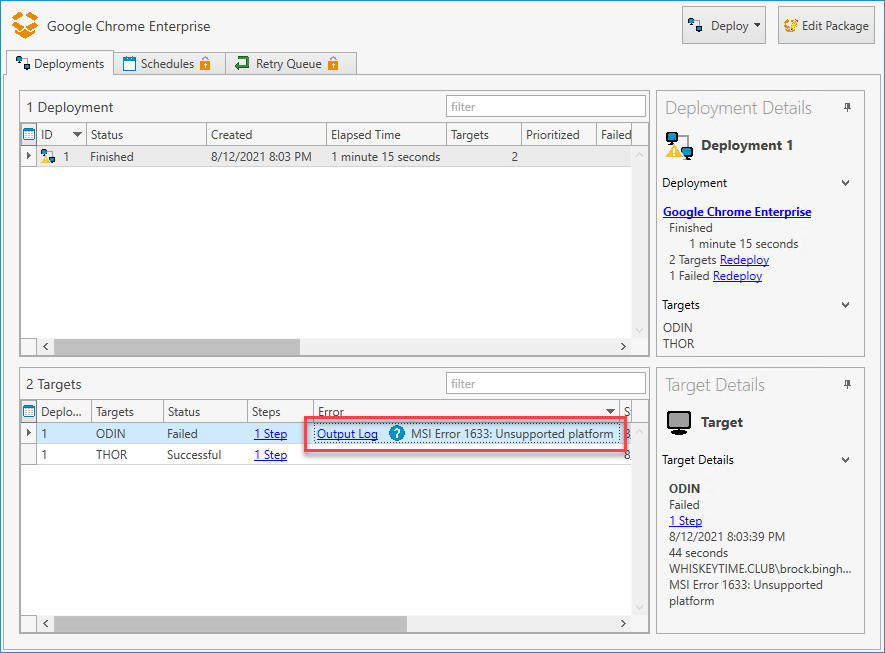
The error message says, "MSI Error 1633: Unsupported platform." One of the more common reasons you'll see this error is if you try deploying a 64-bit application to a 32-bit system. Clicking on the Output Log link will provide further information about the error.
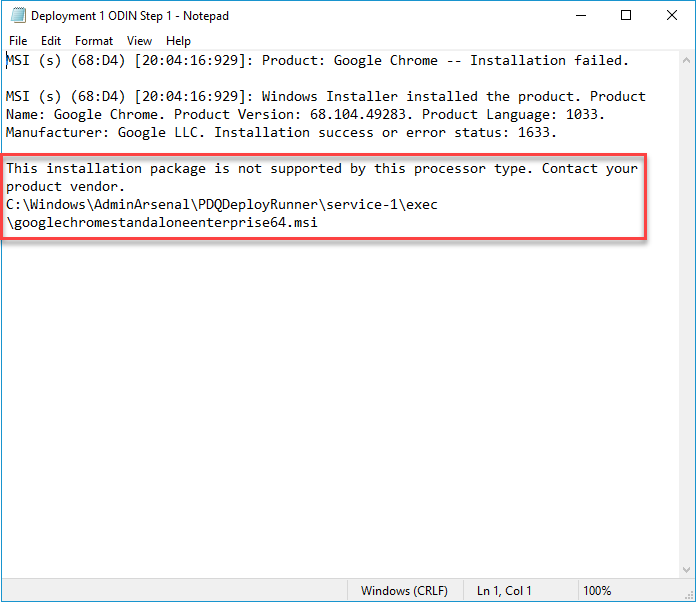
The output log also indicates that I tried to deploy a 64-bit application to a 32-bit system. After checking the device, I confirmed that it did have a 32-bit version of Windows installed.
Now that we've reviewed the deployment and understand why one of the targets failed, let's generate a report.
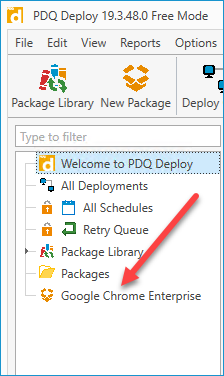
In the menu pane, click on the package you want to generate the report for.
2. Click on the deployments you want on the report. You generate reports for multiple deployments at once by left-clicking with the SHIFT or ALT key held down.
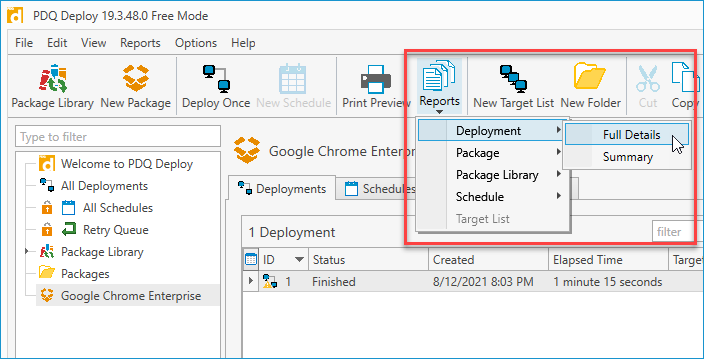
3. Next, click Reports > Deployment > Full Details.
The report window should open, containing all the details about the deployments you selected.
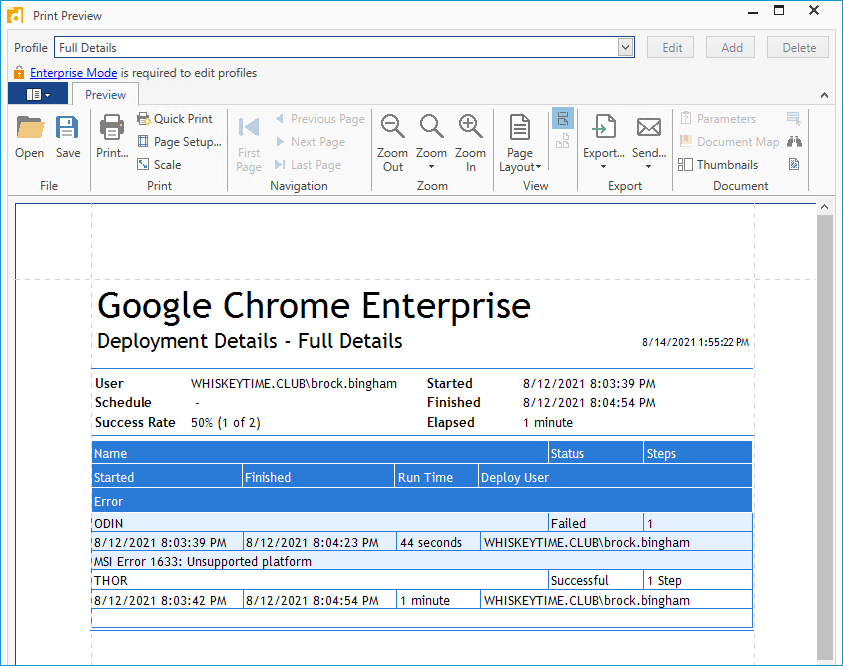
With our report generated, you can then print or export it in your preferred format.
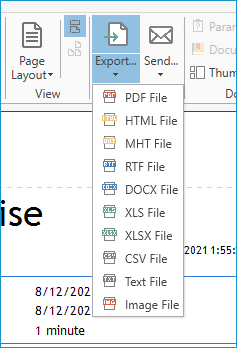
Reports are super easy to generate and are a great way to prove to your boss just how busy you've been.
Free packages in the Package Library
While full access to the package library is reserved for Enterprise users, Free Mode users still have access to several useful packages. Pre-built and maintained by PDQ's very own expert packagers, the packages in the package library are a great way to kick off your package collection.
The easiest way to view all the packages available to Free Mode users is to open up the package library and sort by the License column (you may need to scroll over to see the License column).
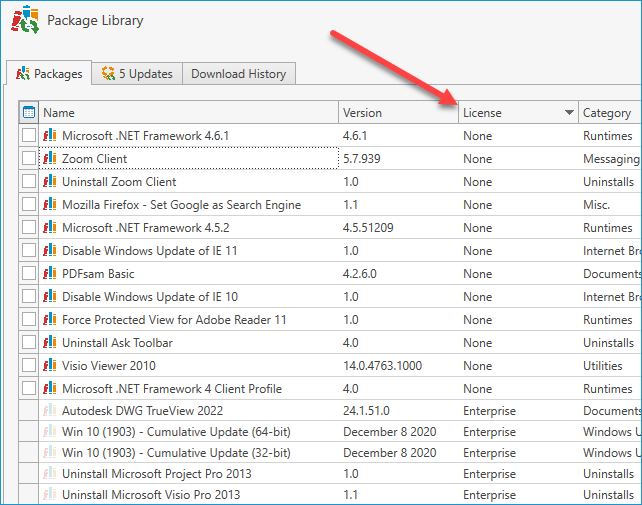
To download any of the available packages in the package library, simply double-click them or select them and click Download Selected (As Standard Download). The packages will be added to the Packages directory in the menu pane.
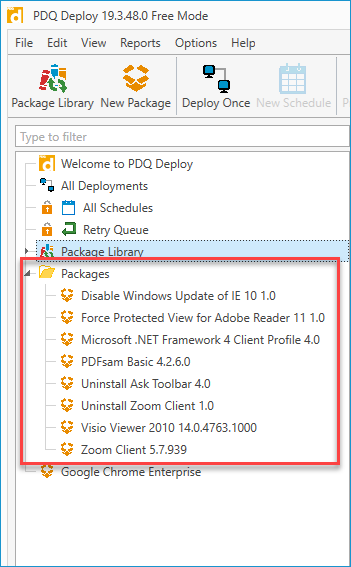
Remember to browse through the package library every so often, as packages available to free mode users may change from time to time.
Wrapping up
PDQ Deploy Free Mode is no slouch in the features department. Being able to deploy packages across your network silently will make it seem like you just doubled your team of sysadmins.
If you're ever interested in checking out the additional features included with Enterprise Mode, such as scheduling and multi-step packages, you can try it out for free with our 14-day free trial. Your only risk is falling in love with PDQ.


