Have you ever spent several months losing those last 10lbs with diet and exercise, only to gain it all back in one turkey and pumpkin pie-filled holiday weekend? Few things in life are more frustrating than trying to get rid of something, only to have it keep coming back like the world's most reliable boomerang. While we can't help you achieve your weight loss goals, we can help you uninstall Microsoft Teams once and for all.
If you still use Teams but just want an improved version, learn how to deploy the new Microsoft Teams. Alternatively, if problems emerged after an update, we'll tell you how to roll back Windows updates.
What is Microsoft Teams?
Microsoft Teams is a collaborative application designed to help groups and companies stay organized by having one place to share files, chat, and schedule and host meetings. It's similar to Slack in a lot of ways, with channels and direct messages. With the pandemic changing the way many companies do business and forcing many employees to work remotely, Microsoft Teams has become an essential part of how many organizations share information.
Why won't Microsoft Teams stay uninstalled?
Microsoft Teams has been one of Microsoft's more successful application launches in recent years. The pandemic has skyrocketed the adoption rate of Teams, which now has over 145 million daily active users. This may be one reason why Microsoft wants to ensure every computer has a copy of Microsoft Teams. While the tactic is shady at best, making it difficult to remove Teams is in Microsoft’s best interest. The longer the application stays on your computer, the more likely you are to use it.
So, what’s causing Teams to reinstall after you've already removed it? The answer is actually quite simple. Unlike most applications, which list just one application in the control panel or settings menu, Microsoft Teams actually has two.
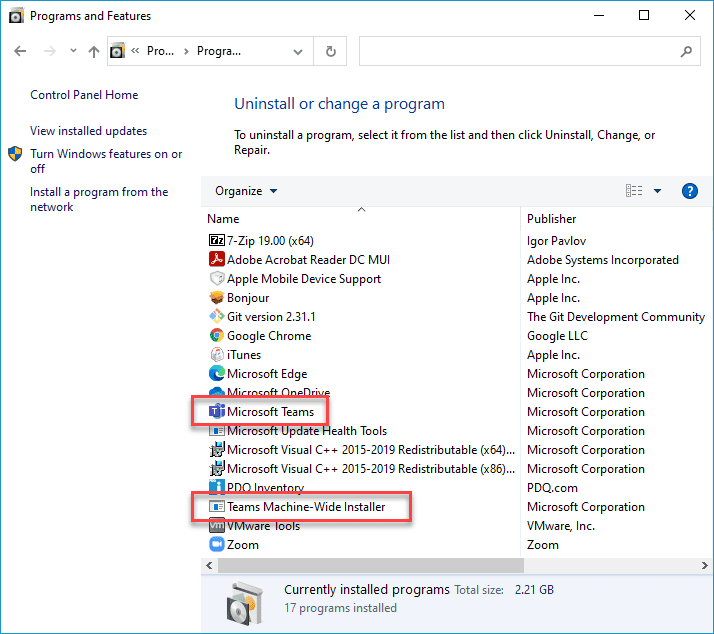
It's an easy oversight to make. You go into the control panel or settings, you see Microsoft Teams, and you remove it thinking that's all there is to it. The problem is that the Teams Machine-Wide Installer is left untouched, and it's going to reinstall Teams for you because you must have just accidentally uninstalled teams, right? What makes it worse is that they called it "Teams" Machine-Wide Installer instead of "Microsoft Teams" Machine-Wide Installer, ensuring it wouldn't be grouped next to the Microsoft Teams app. At least if it were next to the Microsoft Teams app, users would likely see it and know to uninstall it.
Three ways to remove Microsoft Teams for good
Now that we know the culprit behind these ninja reinstalls, let's go over a few ways to remove Microsoft Teams for good. Be aware that these processes may be slightly different, depending on which version of Windows you’re running.
Uninstalling Microsoft Teams from Control Panel
The first way to remove Microsoft Teams for good is to use the control panel to uninstall both the Microsoft Teams app and the Teams Machine-Wide Installer app.
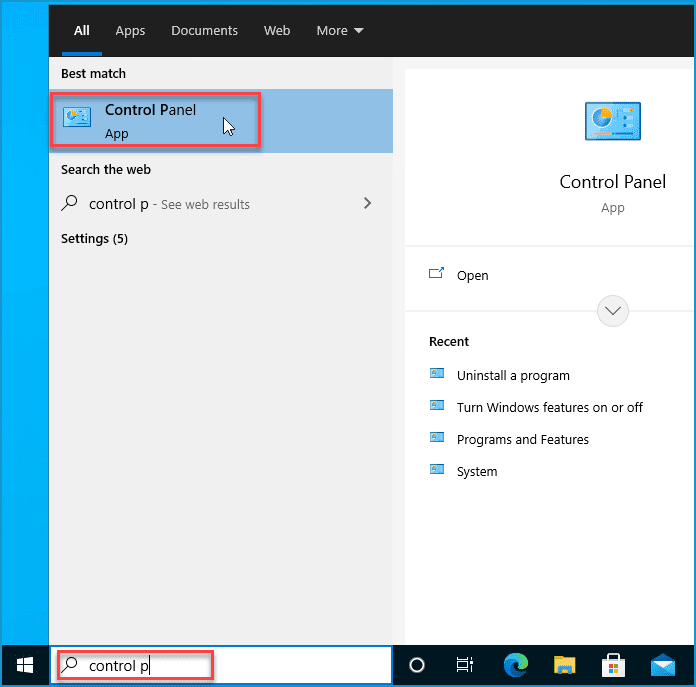
In the Windows 10 search bar, type in Control Panel
Click on the Control Panel app that pulls up in the list
Click on Uninstall a program
Click on Microsoft Teams and click Uninstall
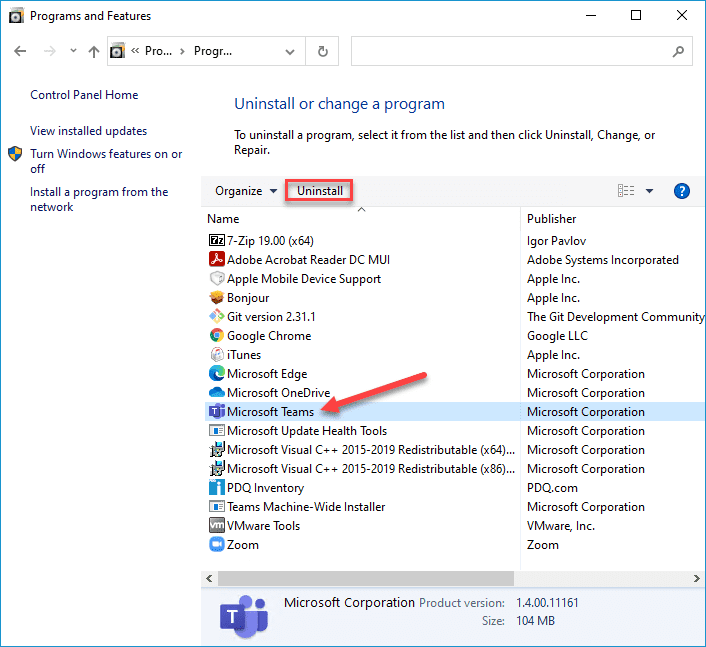
After it finishes removing the Microsoft Teams app, click on the Teams Machine-Wide Installer and select Uninstall
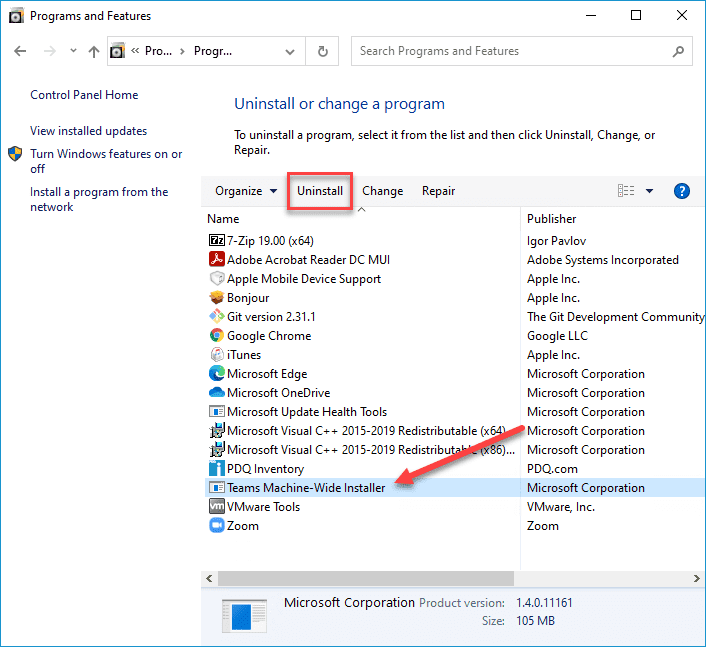
You will receive a prompt asking if you are sure you want to uninstall Teams Machine-Wide Installer. Click Yes

If you receive a UAC prompt asking if you want to allow this app to make changes to your device, click Yes
That's all there is to it—no more pesky Microsoft Teams installations. Now, let's look at another way to uninstall it if the Control Panel is too old school for you.
Uninstalling Microsoft Teams from Windows settings
If you like Microsoft's newer way of doing things, then this method is for you.
Click on the Start or Windows button to launch the Start Menu
Click on the Settings icon to launch the settings menu
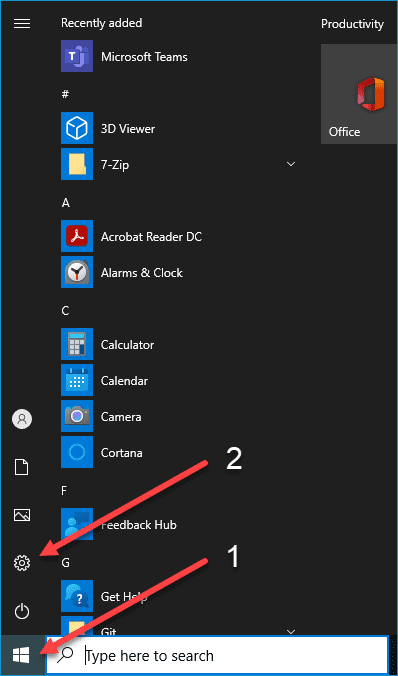
Click on Apps

Scroll down the list of apps and locate Microsoft Teams and click on it
Click Uninstall
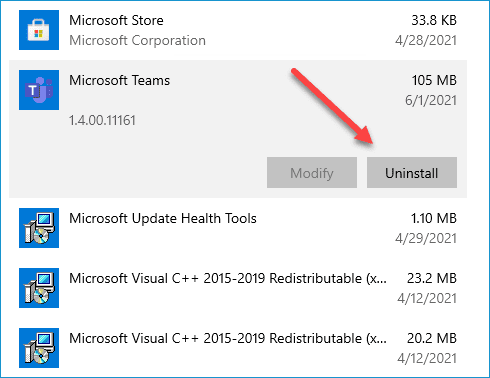
You'll then be prompted with a message that says, "This app and its related info will be uninstalled." Click Uninstall.
After the app finishes uninstalling and disappears from the app list, scroll down and locate the Teams Machine-Wide Installer app, click on it, and select Uninstall
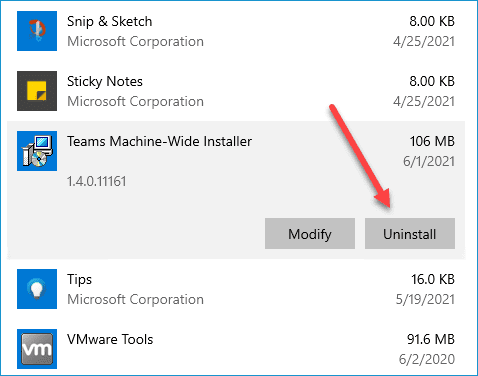
You'll receive the same prompt as in step six. Click Uninstall
If you receive a UAC prompt, click Yes
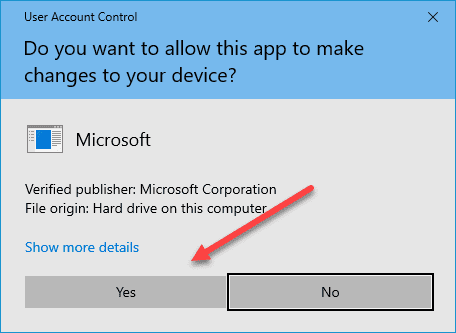
You should see Teams Machine-Wide Installer get removed from your apps list, and that's all there is to it.
Uninstalling Microsoft Teams with PDQ Deploy & Inventory
The two methods above are great and all, but if you need to remove Microsoft Teams from an extensive collection of computers, then you'll need a more efficient way to do it unless you really want to get your 10,000 step goal in for the day. This is where PDQ Deploy & Inventory shine. PDQ Inventory can quickly identify which computers have Microsoft Teams installed, and PDQ Deploy will make uninstalling them a snap by removing both Microsoft Teams and the Teams Machine-Wide Installer with a single package.
If you don't already have PDQ Deploy and PDQ Inventory and you want to follow along, head on over to our trial download page and grab yourself a free 14-day trial. If you need help with the installation, check out these handy guides, which will walk you through the process.
Done installing? Now let's go over the process of removing Microsoft Teams with the power of PDQ Deploy and Inventory.
Launch PDQ Inventory
Expand Collection Library > Applications > Messaging
Click on the Microsoft Teams collection. This collection will give you a list of all the computers in PDQ Inventory that have Microsoft Teams installed
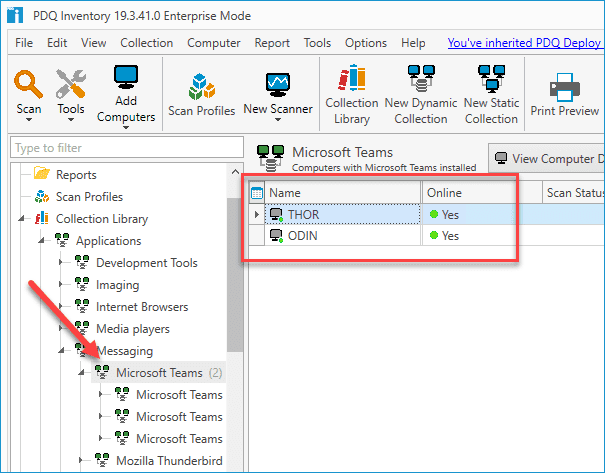
This collection is included by default with PDQ Inventory. Now that we know which computers have Microsoft Teams launch PDQ Deploy
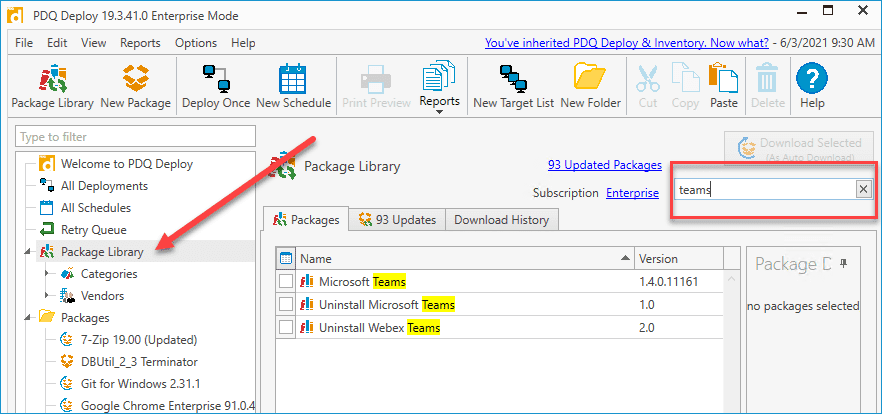
In PDQ Deploy, click on Package Library
In the Package Library screen, type teams into the search box
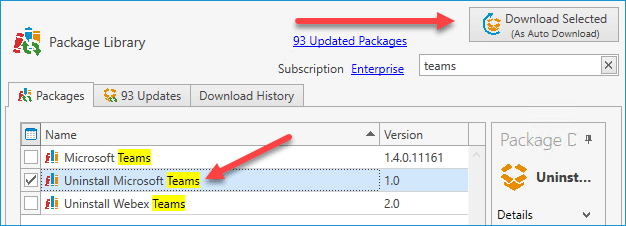
Select Uninstall Microsoft Teams and click the Download Selected (As Auto Download) button
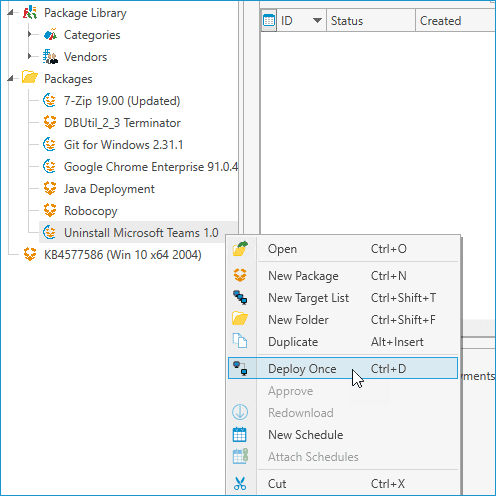
Once the package gets added to your available packages, right-click on the package and select Deploy Once
Click on Choose Targets > PDQ Inventory > Collection
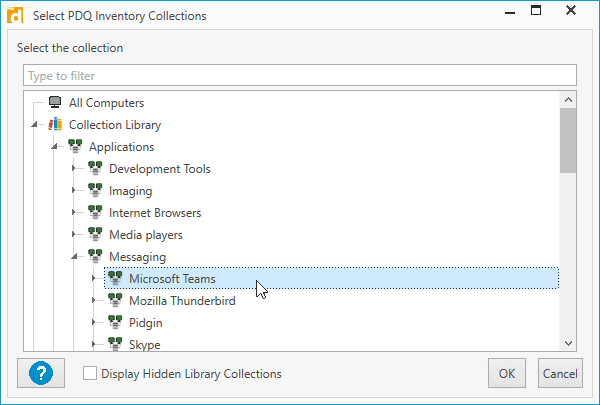
Click Collection Library > Applications > Messaging > Microsoft Teams and click OK
Review the targets in the Deploy Once screen. If everything looks okay, click Deploy Now

The deployment will push out to all of the computers in the Microsoft Teams collection, removing it for good. No more unexpected Teams installations!
Wrapping up
Regardless of whether you think Microsoft Teams is a great application or not, it's frustrating that removing it isn't as straightforward as it should be. Re-installing an application that users have tried to uninstall is a surefire way to lose your customer's trust. And considering this is a Microsoft product, that's a lot of customers.

